Friday, 12 August 2016

Historical match up – Rome vs. the Seleucid.

Rome and the Seleucid met at Magnesia in 190 BC and though defeated Antiochus III still held power over a vast empire. For many gamers, the Seleucid army is not an easy one to use as it is pip costly especially when using elephants and scythed chariots, but then wheat is a Seleucid army without them?

In their favour, the changes to 3.0 have made the phalanx easier to handle and cataphract (4Kn) no longer pursue as do their 3Kn cousins. 

This completes the test series for Rome and next week a new series will begin featuring the army of Antiochus III (Seleucid).


II/33 Polybian Rome
1 x general (Cv, 1 x cavalry (Cv), 2 x triarii (Sp), 4 x hastati/principes (4Bd), 2 x velites (Ps), 2 x allied auxiliaries (4Ax).

II/19c Seleucid
1 x general (4Kn), 1 x cataphract (4Kn), 1 x elephant (El), 1 x scythed chariot (SCh), 4 x phalanx (4Pk), 2 x thureophoroi (4Ax), 1 x Cretan archer (Ps), 1 x slinger (Ps).


Test game one.
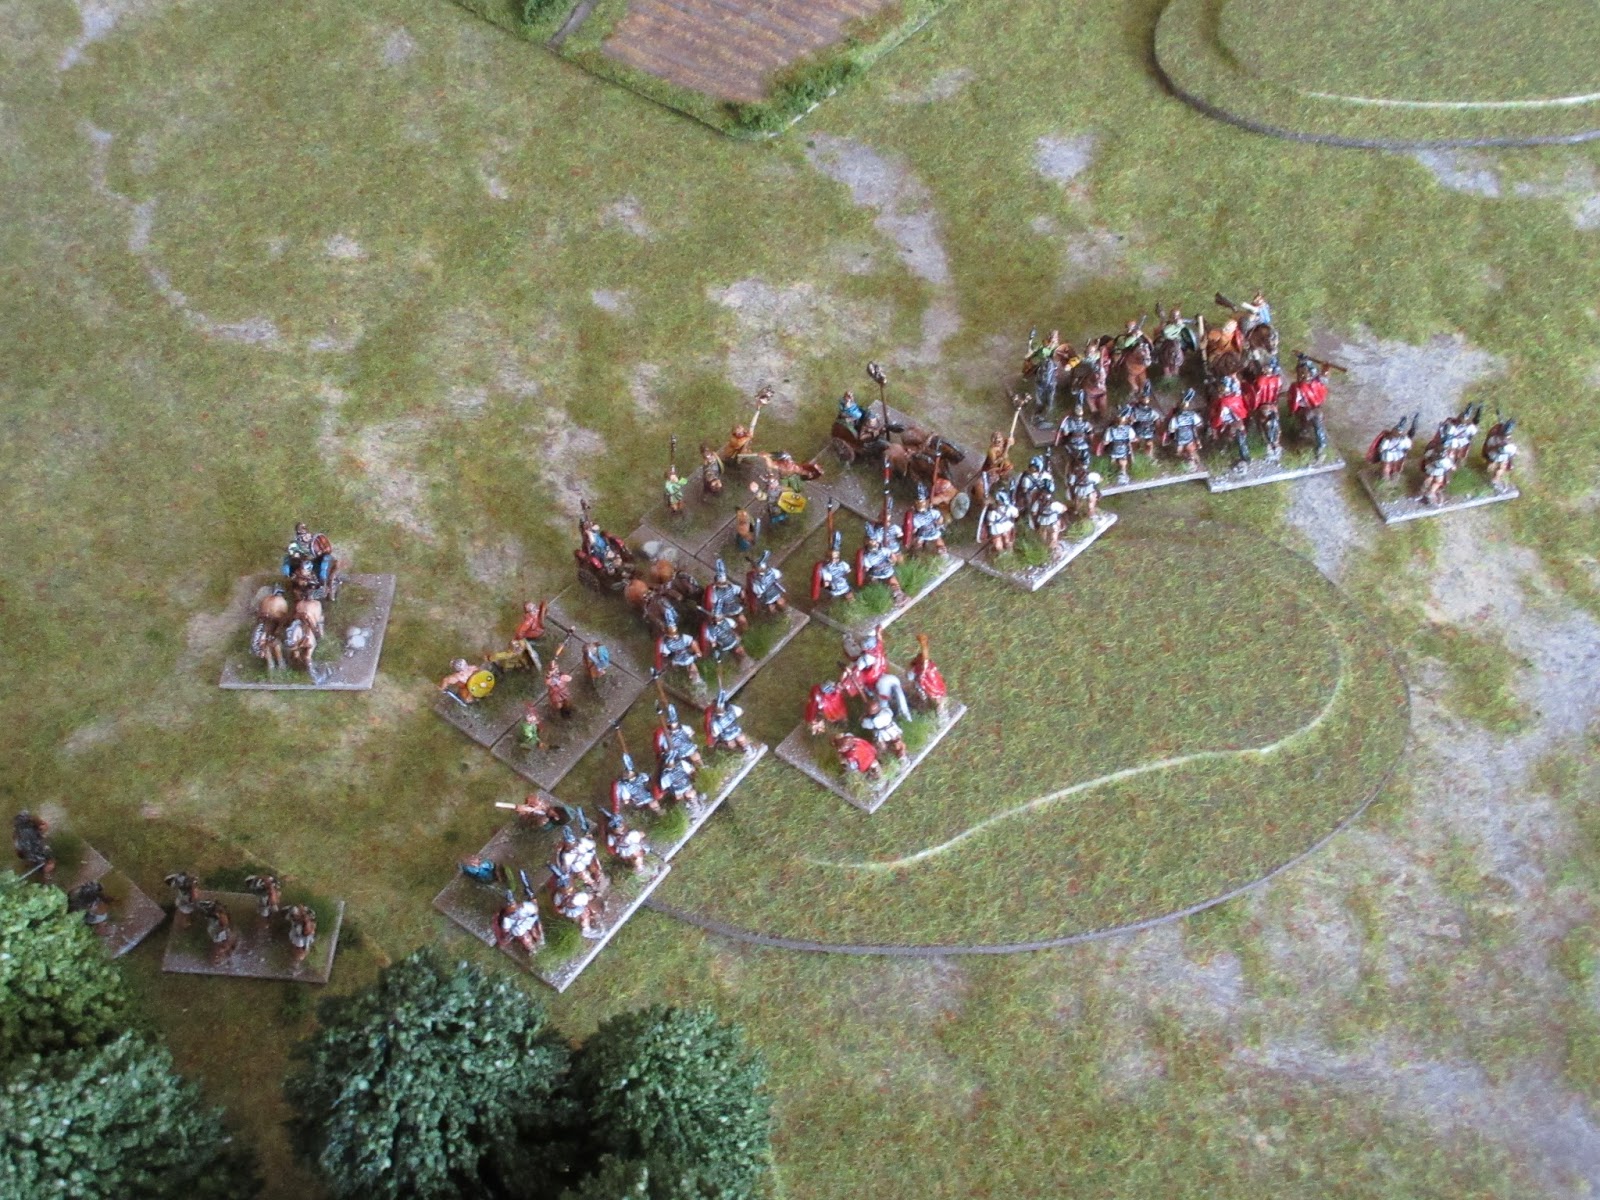
Seleucid defending placed the terrain, a BUA, two gentle hills and a wood and deployed in an extended line with the phalanx on the left and cataphract on the right. Rome squared off and matched the Seleucid line and interspersed the triarii between the hastati and principes, allied units were placed on the extreme end of the line and all cavalry formed up as a reserve.


The Seleucid moved as two separate wings in echelon, the maneuver would have the phalanx pin the Roman line while the cataphract and scythed chariot would deal the final blow.


That moment came quickly as the phalanx did their job and surged forward while Roman determination sent the cataphract recoiling back. Despite the minor embarrassment, the Seleucid were ahead 2 – 0.  


For some unexplained reason, the Seleucid could do no wrong; the phalanx ground their way forward killing Romans, the Scythed Chariot through the Roman centre and the cataphract finished the job they started out to do, 7 – 0 for Seleucid.


Test game two.
Rome, now the defender, took advantage of the hill placement and BUA to deploy its force between them which positioned their line further back.  


Positioned further back, Rome improved her deployment forcing the Seleucid line to wheel right and break her alignment.


This had the desired effect of exposing the flanks of the phalanx to be dealt with by the heavy troops while the lighter troops kept the Seleucid cataphract occupied. 1 – 4 for Rome.


Test game three.
The Seleucid as defender placed the terrain so as to provide maximum space for the army. The final game saw the first use of an “allied contingent”, the Pergamene (2 x 3Kn, 1 x Ps) and these can be seen at the far right of the Roman line.


Despite being plagued with a series of “1” for pip scores, the Seleucid managed to bring her line forward.


Pergamene have rolled up the Seleucid left flank but the cataphract have made a dangerous breakthrough to threaten the Roman command and the score is even at 3 – 3.


Repeating their decisive maneuver at Magnesia, the Pergamene fell on the exposed centre while the hastati turned the phalanx from the opposite side and now every element was engaged along the battle-line. It was close and the final score was 3 – 4 for Rome.


The closes the series of test games for the mid-Republic and the next series will feature the Seleucid against their historical opponents.


Cheers, 

Tuesday, 9 August 2016

Project Rome – historical match up – Carthage

Carthage had bedeviled Rome for seventeen years on Italian soil during the 2nd Punic War and hopefully they would duplicate that in this series of test games.

Looking at the army list below, the Carthaginian have a number of possible options, one can double the number of Cv and LH or forego the advantage and use 2 elephant. You can also add an extra punch by adding the Gallic warband which is the option I used.

II/33 Polybian
2 x Cv (including general), 2 x hastati (4Bd), 2 x principes (4Bd), 2 x triarii (Sp), 2 x velites (Ps), 2 x Latin auxiliaries (4Ax).

II/32a Carthage
1 x general (Cv), 1 x Cv or El, 1 x El or LH, 1 x Numidian (LH), 3 x Libyan (Sp), 1 x Spanish (4Ax), 2 x Gallic (4Wb) or (4Ax), 1 x Caetrati (Ps), 1 x slinger (Ps)


Test game one
Rome as defender placed two plough, two gentle hills and one wood on the board. As Carthage had more cavalry Rome would deploy further back and take advantage of the wood and hill.


Surprisingly, Carthage did not deploy directly in front but positioned her centre on the wood. After two turns Carthage would wheel to the right forcing Rome to come off the hill to conform to the new line.


The Carthaginian spear maintained a steady front while the Gallic warband and elephant were dispatching their opposition poised in front of them.


In a desperate move to hold back any possible breakthrough the Roman consul supported by the principes eliminated the elephant. By then the clockwork destruction by the Gallic warband brought the score to 4 – 1 for Carthage.


Test game two
Note: Reviewing the photos while writing the reports I noticed the two plough should have a space of 1BW between them. This was done out of habit as the fields are used primarily for the gunpowder era battles.


Rome defended and was blessed with a die roll of one; this meant a brief respite as Carthage would plod through the fields at 1BW per turn. This actually turned to an advantage for Carthage as it would give the flanks ample time to position them for the “final” crunch.


After turn four Rome decided to switch from a passive to an active role and launched an attack on the Carthaginian left flank.  Carthage enjoyed Rome’s eagerness to dance and in two bounds eliminated both wings and an element in centre to bring the score to 4 – 0 for Carthage.


Test game three
Rome, down two games, needed to make some changes to save her reputation; an allied contingent was selected from among the historical options – Gallic. These replaced three foot units giving Rome cavalry parity and good troops to use against Carthaginian spear.


Both sides deployed facing one another and Gallic forces for both sides were placed on the right flank. Moving forward, both sides overlapped the enemy right flank but this did not have the desired effect, with the exception of the odd recoil, both sides held their ground.


The following turn both sides turned each other’s flank and by now both sides scored even, 2 – 2.


Roman spear and principes neutralized the elephant’s roll in the game and with good die rolls were able to push forward cutting the spearmen and Spanish auxiliaries to bring the score to 2 – 4 for Rome.


Saturday, 6 August 2016

Project Rome – additions to the Library.

Pursuing the possible expansion of the Seleucid collection I ordered three books from Amazon UK, volumes two and three of John Grainger’s Seleukid trilogy and a classic, Hannibal by Theodore Dodge.


I have not yet finished “The Seleukid Empire of Antiochus III” but the information contained in it has stimulated enough good ideas for scenarios and revision of my set of campaign rules.

Full reviews can be read at the following links.


Hannibal is from the Great Captains series written by Theodore Dodge and based on the two I currently have in my library, I purchased this title. Gustavus Adolphus and Caesar both have a large quantity of maps and not only does the author give an excellent biographical coverage but adds subsequent developments to each book, for example, the former title brings the reader through military events leading to the wars of Marlborough.  

The book Hannibal also covers the period of the pike to include Later Macedon and the empires of Seleucus and Ptolomey.

Cheers, 

Tuesday, 2 August 2016

The Seleucid in battle array.

With the Seleucid now complete they can now be added to list of test games planned against the Polybian Roman army. For all the test games we use the standard 12 element command and for the Seleucid that is the following:

1 x General (Cv/4Kn), 1 x cataphract (4Kn), 1 x elephant (El), 1 x scythed chariot (SCh), 4 x phalangite (4Pk), 1 x thureophoroi (4Ax), 1 x Galatian (4Wb), 2 x archers and slingers (Ps).

The standard twelve element army. 


Massing three such commands will look like this.

The right flank.


The centre.


The left flank.


The army in battle array.


Saturday, 30 July 2016

The Seleucid – the mounted elements.

Any reader contemplating collecting the Seleucid I would recommend having B. Bar-Kochva – The Seleucid Army – organization and tactics in the great campaigns in your library. The author gives an in depth analysis of the regular army from its changes during the early Successor period to the empire’s collapse.

My Seleucid collection will represent the armies that came into contact with Rome to the final campaign against the Maccabees and will cover both DBA lists II/19c and d. The only difference between the two lists are the introduction of imitation legionnaires (4Bd) and the addition of LH/Cv, the latter presumably to counter the Parthian threat. Other than the minor changes, the regular army still comprises of cataphract, phalanx, elephants and scythed chariot, thureophoroi or thorakites, archers and slingers. 


Painting.
The cavalry like the infantry are divided into three groups representing the Royal Guard, the Guard and the troops of the line (katoikoi).

All cataphract are fully armoured and therefore the only discernible difference between the three groups might be horse harness and lance colour; there is no mention of pennons or plumes in the references I read. To create some difference between the three commands, I used purple for the Royal Guard command and two shades of red for the other two. I also varied the amount of brass colour between the three commands.

The colour schemes for both the elephant and chariot are a standard pattern as these would more than likely be grouped together for larger battles.

Last step is the texturing of the base and adding some grass. 


Cheers, 

Monday, 25 July 2016

Project Rome - the Seleucid

The Roman army confronted the Seleucid in Greece and later in Asia Minor at the famous battle of Magnesia 190 BC and collecting them would bring a nice departure from the variety of barbarian armies I already have.

Looking at the army list (II/19c and d) the Seleucid main component were the phalanx and cataphract cavalry. Add elephants, scythed chariots and a host of auxiliary and skirmishing troops and you have on paper what looks like a formidable army. As you can see from the photo the collection is three commands strong and not pictured are 18 elements of Galatian, archers and slingers all ready for battle.

I am using two sources to organize and paint these:
Duncan Head – Armies of the Macedonia and Punic Wars.
B. Bar-Kochva – The Seleucid Army – organization and tactics in the great campaigns.

Painting.
Reading Bar-Kochva’s book I decided to have each army as represent one of three divisions, the Royal Guard, the Guard and the troops of the line (katoikoi).


I do not intend to detail the organization of each, but will merely state each would have their own colour theme.

The Royal Guard would include the cavalry units Royal ile and Agema and the infantry, the Argyraspides (silver shields). 

The Guard came from the Greek and Macedonian settlements and for these I am using bronze for their theme colour.

The katoikoi or troops of the line were recruited from non Greek and Macedonian settlements and I am giving these bronze shields but with a different colour trim. The thorakites (4Ax) would ideally pass for imitation legionnaires and all six elements will have white shields but with differing trim.


Eighteen elements are done and will be varnished later this evening, but now I can make a start with the mounted figures; cataphract, scythed chariot and elephants. 

Friday, 22 July 2016

Project Rome - the Gallic, concluding test games.

Test game two
Stunned at the short duration of the game and a defeat, Rome leafed through old text books on tactics dealing with barbarian rushes. Securing a hill position they would now fight the barbarian in the old way.


To counter the barbarian rush and their superior number of cavalry and chariots the Roman line did not move off the hill and one their turn refused their left flank. The triarii were deployed between the principes while auxilia protected the flanks and anticipating the impetuousness of the principes, reserve troops were close at hand to fill any gaps or take advantage of an open enemy flank.


By turn five, the Gallic storm lost its momentum and the game. Final score 4 – 2 for Rome with the principes honoured for their sacrifice.


Test game three
Rome selected similar terrain and deployed below the crest line of a hill, skirmishers hidden in the wood would catch any enemy approaching the hill position.


This time the Gallic horde held a tighter rein with the cavalry and used them to support the left flank and chariots were placed between the warband; this was done to help strengthen the increased breadth of the warband (single Wb were placed between two deep columns).


The principes managed to hold their position and give side support to the triarii which helped destroy four warband and win the game. Score 4 - 1 for Rome.


Epilogue
Rome meeting the Gallic army on the open field is inviting disaster as was experienced in game one. The Gallic player could easily have not selected gentle hills but with five mounted elements saw advantages to having them than not.

Anticipating the eventual loss of blade from the warband and placing adequate reserves to take their place played an important part in the second and third game.

I do have a second Gallic army with same composition with the exception all warband are 4Wb. These were not used as I wanted to test the Gallic advantage of speed. This worked well in game one with the warband wheeling and avoiding the hill position.


Next series against Carthage will prove very interesting.