Tuesday 26 October 2021

Gracchus in Celtiberia (179 BC)

Following the Second Punic War, Rome began a slow process of expanding its control over Hispania from its two provinces of Hispania Citerior and Hispania Ulterior. Both consuls pushed their respective frontiers further northward reaching the lands occupied by the Lusitanian and Celtiberian tribes.

Not all would acquiesce to Roman control and some like the Celtiberian would require a large-scale effort to bring them to heel. For the upcoming campaign. the senate extended the command of Lucius Postumius Albinus and Tiberius Gracchus for another year. Albinus would move against the Vaccaei before meeting Gracchus in Celtiberia. Meanwhile Gracchus focused his sights on Munda as his first objective. Munda fell, as did many other cities, but as Livy notes, many that capitulated were made in bad faith as the departure of Gracchus signalled the resumption of hostilities.

In 179 BC, two sharp engagements took place near Mons Chaunus and serve as an inspiration for the following games. The first battle brings the vanguard of Gracchus in contact with the Celtiberian culminating to a decisive battle three days later. For this simulation, the first battle is played as a standard game of twelve elements finally doubling in size as the vanguard joins with the main body. Rome will have a single command of 24 elements to face two Celtiberian commands of 12 elements each, minus the respective losses incurred in the first engagement.


Battle near Mons Chaunus

Like spectres rising up from the earth, the Celtiberians broke from cover to surprise the legion. Scrambling to form line from march column, the proconsul ordered the Latin auxiliaries to secure the high ground to either side of the pass while the legion formed for battle.

It did not take long for the Celtiberian to sweep the hill clear of Latin defenders on the left flank. On completion of the first phase, the Celtiberian scutarii moved toward the legion.

Having lost the high ground on the left, the proconsul would not move the legion forward until the situation on the flanks was rectified. Latin auxilia and velites sent back to recover the heights and the timely arrival of the triarii improved the situation on the left.

Despite the Celtiberian advantage of the high ground, the Roman continued to hold its position on both flanks and centre. Now fully engaged, the lines of legionnaires and scutarii swayed back and forth with neither side breaking.

On the left, the Latin auxiliaries gained the heights and turn the tide forcing the Celtiberian to break off battle (4 – 2).

Game notes; losses remain lost for the subsequent battle.


Three days later…

Gracchus deployed the combined force with legions in centre, on the right, Latin auxiliaries were positioned on the foothills of Mons Chaunus and on the left near the woods were the Latin auxilia of the vanguard.

The Celtiberians placed their strongest tribe on the left to meet Gracchus leaving the smaller tribe to meet their previous day’s combatants. Intent on securing the heights on Gracchus’s right, the Celtiberian warlord sent all his caetrati which easily secured the heights. This done, the scutarii of both tribes made a rapid advance toward the awaiting legions.

Both legions were fully engaged and taking severe loses. Adding further discomfort, Celtiberian light horse had circled the Roman rear to engage the Latin cavalry. The Latin cavalry bolted leaving the triarii to face the new threat.

The situation became desperate for Rome as gaps in the line were quickly filled with enemy scutarii. Despite the heavy losses (6 – 1), Gracchus regained control of the situation by moving fresh units including his personal bodyguard. That change brought a glimmer of hope as the enemy were beginning to falter (6 – 4).

Having suffered defeat three days earlier, the smaller Celtiberian tribe broke. Seeing their right flank collapse and incurring further casualties among their own tribesmen, they too joined the general retreat leaving a thankful Gracchus to hold the field (6 - 7).


Game notes.

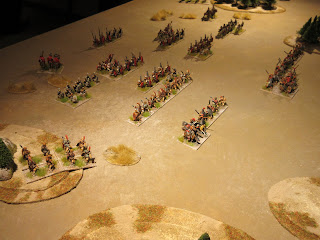
From Livy’s description, the first engagement takes place near a pass in the mountain chain. The Roman player deploys first giving the Celtiberians a slight advantage by deploying second. Three difficult hills are placed on the board as seen in the first photo.

The second battle brings together all Rome’s forces (minus losses of the vanguard) under one command, e.g., one die. The Celtiberian differ as they field two separate commands one of which have lost troops from the previous engagement. One die for each command might seem an unfair advantage, but this is compensated by the lower break-point for each Celtiberian command. The terrain consists of three difficult hills forming a mountainous range on one side (Mons Chaunus) and two woods on the opposite side. The scatter material is optional, but looks good.

Tuesday 12 October 2021

The Triakontaschoinos 275 BC

"Land of the Thirty Schoinoi" described a region dividing Ptolemaic Egypt from the Nubian kingdom of Meroe. From here, piratical raids by the Nubian forced Ptolemy II Philadelphus (284 BC – 246 BC) to send an army and seize the region and eradicate their presence. This was of course of primary importance, but there were other concerns, such as securing the gold mines located there and demonstrate Ptolemaic rule over the native population of Upper Egypt, thereby eliminating any potential threat of rebellion.

Terrain

The campaign took place in an area between the First and Second Cataracts of the Nile River, known to be a haven for Nubian raiders. Choked with boulders, the waters between the two-cataract made navigation by ships impossible, neutralising any option of a naval landing by the Ptolemaic army. Overland, the march southward was for the most part over arid and difficult terrain.

Terrain pieces to be placed by the defending Nubian are; 1 x waterway, 2 x difficult hills, 1 x dune and if playing the double size command option, add 1 x BUA.

Ptolemaic force

1 x General (3Kn), 1 x Xystophoroi (3Kn), 1 x Tarentine horse (LH), 2 x Macedonian phalangites (4Pk), 5 x Greek and mercenary peltasts (3/4Ax), 1 x javelinmen (Ps), 1 x Cretan archers (Ps).

Nubian

1 x General (Cv), 1 x cavalry (Cv), 2 x tribal archers (3Bw), 5 x tribal spearmen (Sp), 2 x tribal swordsmen (4Bd), 1 x herdsmen with bows (Ps).

Note: The composition of the Ptolemaic force has been adjusted to reflect the declining number of Indian elephants as its source had long been blocked by Seleucus. A victorious campaign by Ptolemy II would open potential trade route southward to procure the African breed.


Battle

Reaching the First Cataract, the Ptolemaic force deployed in echelon formation hoping to pin the elusive Nubian against the eastern bank of the Nile River. Encountering stiff resistance by Nubian spearmen, the assault lost momentum resulting in the phalanx becoming isolated from its auxiliary support resulting in heavy loss of casualties, compelling the Greeks to retreat (4 – 2).


Catching the Nubian in the open, the Greeks deployed a strong right wing with all the cavalry and the phalanx leaving the auxilia to form a left wing. The Greek right wing bowled over the Nubian opposition to roll up the Nubian army and earn a decisive victory (4 – 1).


Recovering from their defeat, the Nubian took a defensive position near the Second Cataract. Both sides deployed in similar formations as before, but the Nubian held the advantage of terrain protecting both its flanks. Nubian archers on both flanks contained the advance of the Greek wings leaving the auxilia and phalanx to make first contact. Nubian swordsmen made quick work of destroying two units of auxilia forcing the Strategos to commit his bodyguard and the Xystophoroi. Unfortunately, this came too late as the entire left gave way forcing the Greeks to retreat (4 – 1).


A resumption of the campaign was postponed as the situation in Syria and potential invasion by Antiochus I required immediate attention.

Tuesday 5 October 2021

The Franks and the German Confederation 406

 The great German migration of 406 moved along the Danube to skirt the territories held by the Alamanni and Burgundi before reaching the Rhine. However, their search for a suitable crossing was contested by the inhabitants of the eastern bank of the Rhine, the Franks. Friction between the two great tribes escalated and in the summer of 406, several intense engagements took place leading to a final battle on August 23rd, ending with the Vandals losing 20,000 men and King Godegisl, yet the late arrival of the Alan forced the Franks to withdraw. That winter and faced with near starvation, the German confederation crossed a frozen Rhine River to enter the Gallic province of Western Rome. 

Alan arrival

One of the difficulties of creating a scenario for the final battle is the timely arrival of the Alan. The conventional method is the cast of one die each turn to determine a successful arrival. Alternatively, one’s score can denote the number of turns before arrival on the field. Another solution was devised for our test games and is not for the faint-hearted. 

In this scenario, the Vandal die cast will remain hidden (dice cup), this will be revealed after incurring the first element lost. Alan arrival is successful after one element lost (1,2), two elements (3,4) or three elements (5,6).  To compensate what may seem a disadvantage, late arrivals may enter at any board edge on the  Vandal player’s following bound.  


The forces

Using the army list from DBA3 we have the following composition of forces.

Ripuarian Franks

1 x General (Cv) or on foot (4Wb), 10 x warriors (4Wb), 1 x archers or javelinmen (Ps).

 Hasdingi Vandals (King Godegisl)

1 x General (3Kn), 1 x nobles (3Kn), 7 x warriors (4Wb), 1 x dregs (Ps), and an allied contingent 2 x Alans (LH) arriving later.


In the series of three test games, the attacker did pursue an aggressive game knowing that off table troops could enter at any board edge.

Game one, the Alani arrived on the third bound (a score of one element lost) to seal a Vandal victory, 5 – 3.


Game two
, a similar score allowed the Alani to enter on the fourth bound. Unfortunately, the Franks were on a killing spree to reach 4 – 0 by turn five.

Game three, the Franks did not move from their initial position, risking an Alani arrival reaching the Frankish rear. After an initial clash and the loss of an element each, the Vandal needed one more element to have the Alani join the battle. As if on cue with a pip score of six, the Franks dealt a killing frenzy to secure a 5 – 1 victory just before the arrival of the Alani.