Saturday 29 October 2016

Improving the Campaign System - Eutropius 398 AD

The year 398 AD saw the end of civil strife within the empire, however, the barbarians were quick to seize an opportunity to invade and plunder the Illyrian region and the provinces of Asia Minor. This campaign focuses on the eastern conflict and how it was saved from a Hunnic invasion by the Master of Offices, Eutropius. The situation in the east was grim as the eastern field army had yet to return from the West and attempts by the eastern generals to expel the Huns proved ineffective such that Eutropius took supreme command. 

Historically, the campaign started in the spring of 398 ending with the Huns retreating across the Caucasus, but for our scenario Eutropius begins preparations in January of 398 AD.

Later Imperial Rome vs. the Huns
II/78b Eastern Roman Army {1}
1 x general (Cv), 2 x equites (Cv), 2 x horse archer (LH), 3 x legionnaires (4Bd), 3 x auxilia (4Ax), 1 x archers (4Bw).

II/80d the Huns
1 x general (Cv or LH), 11 x horse archers (LH).

{1} The Eastern Roman list is modified to reflect the absence of the field armies and reliance on border troops, therefore the 4Kn are replaced by Cv and border troops from Mesopotamia, Osrhoenae, and Armenia replace the palatine units.


398 AD, January to February.
Both sides had spent the winter months in preparation (building points) for the spring campaign. Eutropius decided to catch the Huns, weakened by lack of fodder, with a surprise attack in late February.


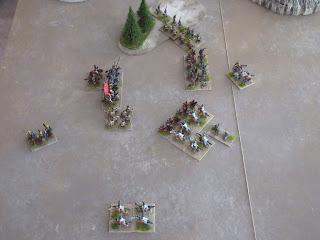
A few sparse wood and barren fields proved no obstacle as the Roman army marched forward to meet the Hun. Anticipating their mobility, Eutropius reinforced his battle line with cavalry and held a small reserve covering the left.

Moving steadily forward, the legions with auxilia support swept up the hill to engage the main body under command of their general. Despite the small loss the Roman infantry were driving the Hun back.


As expected, the Huns probed the left flank but their effectiveness was blunted by the auxilia and skirmishers. These in fact turned quickly turned the tide by eliminating large number of horse archers signalling a retreat of the Hunnic horde. Victory for Rome, 6 – 2.


398 AD, March.
Quickly following up his victory, Eutropius caught the Huns in the hilly region of Eastern Anatolia. Both sides were reduced in strength as the pursuit had outstripped any possibility of reinforcements.

The difficult hills forced the Huns to deploy in two groups, but this would prove no hindrance as each had clear orders. Rome used the hill and wood to secure her left flank while the right flank was prepared to execute their specific orders to counter the Hun threat.


As expected, the Hunnic flank manoeuvre came as no surprise and Rome countered with a reinforced line. The main Roman body would use the advantage of number to crush the Hunnic main group.


The reinforced right flank mauled the Hunnic flank attack while the main Roman group added their efforts to end the battle. Victory for Rome, 3 – 1.


398 AD, April – June.
Pressed by his commanders to continue the pursuit, Eutropius wanted to replace his losses, though slight by comparison to the Huns and await news from Constantinople. He reminded his commanders the passes were still blocked until the summer.  By mid-June the army was ready to deal with the Huns.  


After two crushing defeats, the Huns could find little reinforcement from small groups returning from their forays in Armenia and the domains of the Sassanid.

The Hunnic main force formed a line between the rocky hills and wood and as the battle developed began withdrawing allowing the Roman infantry to advance forward. The only noticeable action was taking place on their extreme left pulling the Roman cavalry away from the main battle group.

The slow and steady retreat unnerved Eutropius and confident of the Roman cavalry action on the right moved his cavalry reserve forward.


As expected, the Huns made an all out effort charging the Roman line simultaneously in the hope of a breakthrough. It was a valorous attempt by the Hun, but victory was securely in Roman hands. Score for Rome 3 – 1.


Epilogue

The Huns did carry the booty and slaves off beyond the Caspian Gate but there would be very few Huns to enjoy their spoils. I am pleased with the results of this scenario as it duplicated actual events, though it is unknown how many battles were fought Eutropius was victorious, though short lived.

Thursday 27 October 2016

Greco-Bactrian in battle array

Two commands of Greco-Bactrian are now ready to do battle against the Seleucid and nomadic tribes.

One command comprises a mix of troop types to include nobles (3Kn), pike, thureophoroi, Cretan archers and elephant. The miniatures are all 15mm Old Glory and come from the Successor list.


Command number two are the mobile option listed for the Greco-Bactrian. This comprises of Iranian lancers (3Kn) and Greek cavalry (3Cv) supported by horse archers. This list very similar in composition to the Sassanid II/69a list which I enjoy using.


The Indo-Bactrian sub list is being considered but a project that will have to wait in the queue with other priorities. 

Tuesday 25 October 2016

Severan Rome vs. the Tervingi

The Tervingi (Visigoths) became a thorn in the side of the Middle Imperial but for the Later Imperial Rome as well. From the Dniester they set off raiding the Eastern Empire and migrated to the Danube basin in their flight from the Hunnic menace, their army would meet the Romans at Adrianople.

II/64a Middle Imperial Rome (Western)
1 x general (Cv), 1 x equites (Cv), 1 x equites Illyriani (LH), 4 x Legionnaires (4Bd), 3 x auxilia (4Ax), 1 x archers (4Bw), 1 x cataphract (3Kn).

II/65 Tervingi
1 x general (3Kn), 1 x noble cavalry (3Kn), 8 x warriors (4Wb), 2 x archers (Ps).
Allies: II/67b


Game one
The battlefield was typical for the Balkan region, rugged hills, forests and small settlements and here the two armies would clash. Both armies secured the right flank on rugged hills with Rome having a slight advantage of wood securing their left.


Both armies moved cautiously forward and a short time later Roman horns were heard up and down their line to signal the general attack. The sudden attack caught the Tervingi off guard and despite their lines buckling under the weight of the heavy infantry, the Roman assault was contained.


Recovering from the onslaught the Tervingi unleashed their own fury which surprised the Roman infantry. In less than one half hour, the Roman line disappeared. Score 5 - 2 for the Tervingi.


Game two
The Tervingi deployment had two minor adjustments, dense columns of warband were positioned on each flank while Rome interspersed auxilia and cataphract to stiffen the heavy infantry.


Both lines wheeled to the right seeking advantage, the Tervingi had secured the wood behind the Roman left flank and the Roman light horse were looking for similar opportunities on the opposite flank. The Tervingi were quick to seize the opportunity and flooded the Roman centre with attacks by warband columns and the noble cavalry. Score 4 – 2 for the Tervingi.


Game three
The final battle had the Tervingi positioned with her flanks covered by wood and difficult hill. Rome deployed in a similar fashion as the previous battle but placed her cavalry support on the left flank.


The Tervingi wheeled right dropping back two units on the left to cover any Roman attack on that flank.


The Tervingi charged first and with a high pip score could reposition supporting units to add weight to key spots in the Roman line.


The tactic did work well for the Tervingi but Rome was not slow to take advantage of those units breaking through. Amid the dust the Tervingi general was seen pursuing the Roman commander and at this point all control was lost as both sides were delivering killing blows. Score tied 4 – 4.


The dance of death continued for another round with both sides even, 5 – 5. Suicidal attacks were made by scattered bands on both sides, but this time Fortuna smiled on Rome. Score 7 – 5 for Rome.


Saturday 22 October 2016

Severan Rome vs. the Caledonian

Historically, the campaign against the Caledonian was to be Emperor Severus’s final one and they like the emperor pass away into history. Future military operations in Northern Britain would have to contend with the more aggressive Picts. 

II/64a Middle Imperial Rome (Western)
1 x general (Cv), 1 x equites (Cv), 1 x equites Illyriani (LH), 4 x Legionnaires (4Bd), 3 x auxilia (4Ax), 1 x archers (4Bw), 1 x cataphract (3Kn).

II/60 Caledonian
1 x general (LCh), 2 x chariots (LCh), 8 x warriors (3Wb), 1 x javelinmen (Ps).


Game one
Rome met the Caledonian army crossing the fields which dotted the valley floor. Deployed in the standard fashion, heavy infantry in centre flanked by auxilia and cavalry in reserve, they remained in position awaiting the Caledonian rush.


On the given signal, Rome moved forward, the infantry line opening their left to allow the reserve cavalry to attack two warband columns.


The slaughter was immense as the valley floor was littered with nearly half the Caledonian army. Score 0 – 5 for Rome.


Game two
The following battlefield had similar characteristics as the previous, difficult hills and a few grain fields which allowed the Roman army to deploy in an extended formation. Adding units of cavalry in the first line the Roman army dwarfed the Caledonia thought they had equal numbers.


Wheeling to the right, the Roman line easily overlapped the Caledonian dense formations.


The auxilia were able to contain two dense columns of warband while the heavy infantry made short work of crushing several smaller formations creating large gaps in the Caledonian battle line. This gave the Roman cavalry an opportunity to flank a number of warband and chariot units including the general’s. Score 1 – 6 (g) for Rome.


Game three
Difficult hills now lined one side of the battlefield and it was here that most of the Caledonian infantry were deployed leaving the open ground for the chariots and light troops.


The Caledonian plan was to sweep the hills clear of Roman auxilia and flank the Roman heavy infantry while the chariots would keep the remaining Roman troops occupied. The fields were sodden from a heavy downpour which would create problems for the Roman right wing.


Unfortunately, the Caledonian lacked the stamina to clear the hills of auxilia giving the Roman heavy infantry supported by the reserve cavalry time to break up their centre formations. Score 0 – 4 for Rome.


Tuesday 18 October 2016

Severan Army vs. the Later Moorish

Those readers who have followed the history of the Roman Limes will know that North Africa held a peculiar status; it lacked a formal defensive system of walls and forts. Since the Augustan period as the number of coloniae in North Africa increased, land estates became fortified strong points which served well enough to frustrate the raiders from the Atlas Mountains. Here is one punitive expedition resulting in three battles.


II/64b Middle Imperial Roman (Western)
1 x general (Cv), 1 x cavalry (Cv), 1 x horse archer (LH), 4 x legionnaires (4Bd), 3 x auxiliary (4Ax),  1 x archers (4Bw), 1 x Cataphract (3Kn).

II/57 Later Moorish
1 x general (LH), 5 x light horse (LH), 6 x javelinmen (3Ax or Ps).


Game one
Exiting the valley space the Romans could see a cloud of skirmishing cavalry and foot were quickly approaching.


The legion quickly moved forward and would drive through their ranks with auxilia supporting the effort on both 
flanks.


The legionnaires in their excitement were quickly leaving their supports behind. A unit of reserve cavalry was sent to support the legionary left, but help would not arrive in time to help the right flank now engulfed by hordes of Moorish foot troops. The situation was very tense as the score evened up, 3 – 3.


Rome now delivered a well coordinated counter attack catching a number of enemy off guard, some cut off from friends or had their flight blocked were quickly cut to pieces. Score 6 – 3 for Rome.


Game two
Rome could see her right flank fully exposed to the open waste land and to compensate the army deployed in a compact formation almost inviting the Moors to lap around while Rome worked from a central position.
That was the plan.


The Moors did send light horse to occupy the Roman right, but took measures to first clear the wood of auxilia before committing the entire army.


Encountering still resistance in the wood, Rome used the moment to move her legions forward hoping to catch the enemy off balance.


This had the desired effect of shattering the Moorish effort into disjointed attacks. Unfortunately, Rome had the better of the opportunity. Score 4 – 1 for Rome.


Game three
Rome caught the Moors at a disadvantageous moment as her army was split by a series of hills. The legions would quickly move forward while the cavalry followed in support.


Some time elapsed between signalling the various units that a storm rising out from the desert was nearly missed. This sent Roman units scrambling to form a line of troops on the left flank while the legionary units held their advance in check.


The situation became so desperate the entire cavalry reserve was committed to stave off the Moorish attack.


In less than 30 minutes (2 bounds) all was quiet again as the dust trails or Moors were seen retreating. Score 6 - 2 for Rome.


Thursday 13 October 2016

The Greco-Bactrian 250 – 130 BC.

The Greco-Bactrian army are the last collection planned for Project Rome. They were selected as an interesting opponent for the Seleucid and Parthian armies already in my collection. Plenty of material can be found on the Internet about the Greco-Bactrian to include the classics available as e-books, archaeological findings; coins minted during the period and of course plenty of painted armies in 15 and 25 mm.

These, pictured below, are 15mm figures from Old Glory and are enough to build both options listed for II/36a; one a mix of cavalry, pike and elephant and the second consisting of entirely of mounted troops; 5 x 3Kn, 4 x Cv and 3 x LH.

The latter option is currently on the work bench as they require more work. Looking at the link you can see SS16  the two poses which represent the Iranian Lancer and Greek cavalry. The three packs ordered will give me 4 x 3Kn and 4 x Cv with an extra element of Cv to be used as a general.

The right hand of the Iranian Lancer was lifted so as to wrap around a brass wire spear. Unfortunately, nothing else could be done with the pose as the position of the left hand made a two handed grip impossible, these wear a cloak making the position of the left arm fixed.

The Bactrian Greek trooper comes in one pose, javelin held across the chest. This was carefully lifted from the torso and positioned to appear throwing the weapon. This took quite some time but it was worth the effort.


The horse archers (Arachosian, Bactrian) LH are from the Later Achaemenid Persian list and with all such figures I cut the bow loose from the body and reposition them adding more variety. I will add a headdress from Milliput to half of the figures to build two distinct units.

The figures for the command element come from the Xystophoroi pack and two packs were purchased. The extra figures will make three general officers (3Kn) for the Seleucid and the remaining two are allocated to the Pergamene army.


Now the painting can begin. 

Tuesday 11 October 2016

Severan Army vs. Early German

The Early German army lists spas a long period of time confronting four different periods of Rome. During the late 2nd early 3rd century we read more of more barbarian tribes taking advantage of Roman civil strife to invade the Empire. The following three battles actually take place in terrain familiar to the Early German, forest.  

II/64b Middle Imperial Roman (Western)
1 x general (Cv), 1 x cavalry (Cv), 1 x horse archer (LH), 4 x legionnaires (4Bd), 3 x auxiliary (4Ax),  1 x archers (4Bw), 1 x Cataphract (3Kn).

II/47g Early German
1 x general (Cv), 2 x cavalry (Cv), 8 x warriors (4Wb), 1 x javelinmen (Ps).


Game one
The Roman infantry deployment equaled that of the entire German position; however, their formations were noticeably deeper and could prove troublesome. The field between the two armies was devoid of any hindering obstacles and as a precautionary measure auxilia were placed in the wood.


Taking advantage of the slow advance by the Germans, the Roman infantry line wheeled to the left forcing the enemy to funnel their attack, but first the wood would have to be cleared of German skirmishers.  


Battle lines now met and the barbarians confined in their deep formations were getting the worst of the situation. Roman cavalry reserve was moved forward to support any breakthrough made by the legionnaires.


The barbarian numbers now pressed their advantage as they slew half the legionary troops. Hearing the cry of victory on the right, the commander could not notice German cavalry has successfully broken out of their predicament and would be moving to the Roman rear. The signal was given to retreat, score 4 – 3 for the Early Germans.


Game two
From the Roman position one could noticeably see the German line nearly matched that of the deployed legion and auxilia units. The German cavalry were dispersed to both flanks and noteworthy there were fewer columns of infantry.


The barbarians struck first to send a shock wave through the Roman line quickly destroying a large part of it leaving frenzied Germans facing the Roman general.


After losing another Roman unit the call for retreat was ordered leaving twice as many Roman dead as barbarians, score 4 – 2 for the Early Germans.


Game three
Grouping all her cavalry on the left flank, the barbarian line appeared just as long as that of Rome.


Forming two divisions, the left hand division would engage the Roman cavalry while all the German infantry would attack the legions as they climbed up the hill. This was successfully done catching the Roman line in disarray.


Rushing downhill the Germans breached the Roman line in a number of places; the German cavalry could add more casualties to bring the final score to 4 – 1 for the Early Germans.