Friday, 14 October 2022

Battle of Hereford 760 AD

 Battle

During his early reign, King Offa of Mercia, was beset by constant incursions by a number of Welsh kingdoms, Brycheiniog, Gwent and Powys being the most aggressive. The Battle of Hereford, fought in 760, is noted briefly in the Annales Cambriae (Annals of Wales) as a major engagement involving all three kingdoms against the Mercians led by King Offa. Later sources describe the Welsh victory significant, as it “freed themselves from the influence of the Anglo-Saxons”. 

Location

From the map coordinates given for the battle, Hereford is in close proximity to a ford over the river Wye. The settlement, suggested by one source, would become fortified as a result of the battle, therefore the hamlet of Hereford should be open. Terrain pieces to be placed, the River Wye, BUA (hamlet), difficult hill and wood. 

Forces

Welsh: III/19a are invading.  

Middle Anglo-Saxon III/24b 

Sources

Battle of Hereford

https://en.wikipedia.org/wiki/Battle_of_Hereford

List of Anglo-Welsh Wars

https://military-history.fandom.com/wiki/List_of_Anglo-Welsh_wars#Eighth_Century

History of Wales (Battles and other significant events in Post Roman Wales)

https://thehistoryofwales.typepad.com/t/2012/12/significant-battles-and-military-events-in-the-period-428-796.html

Castles Forts Battles

http://www.castlesfortsbattles.co.uk/midlands/hereford_castle_city_walls.html


Re fighting the battle

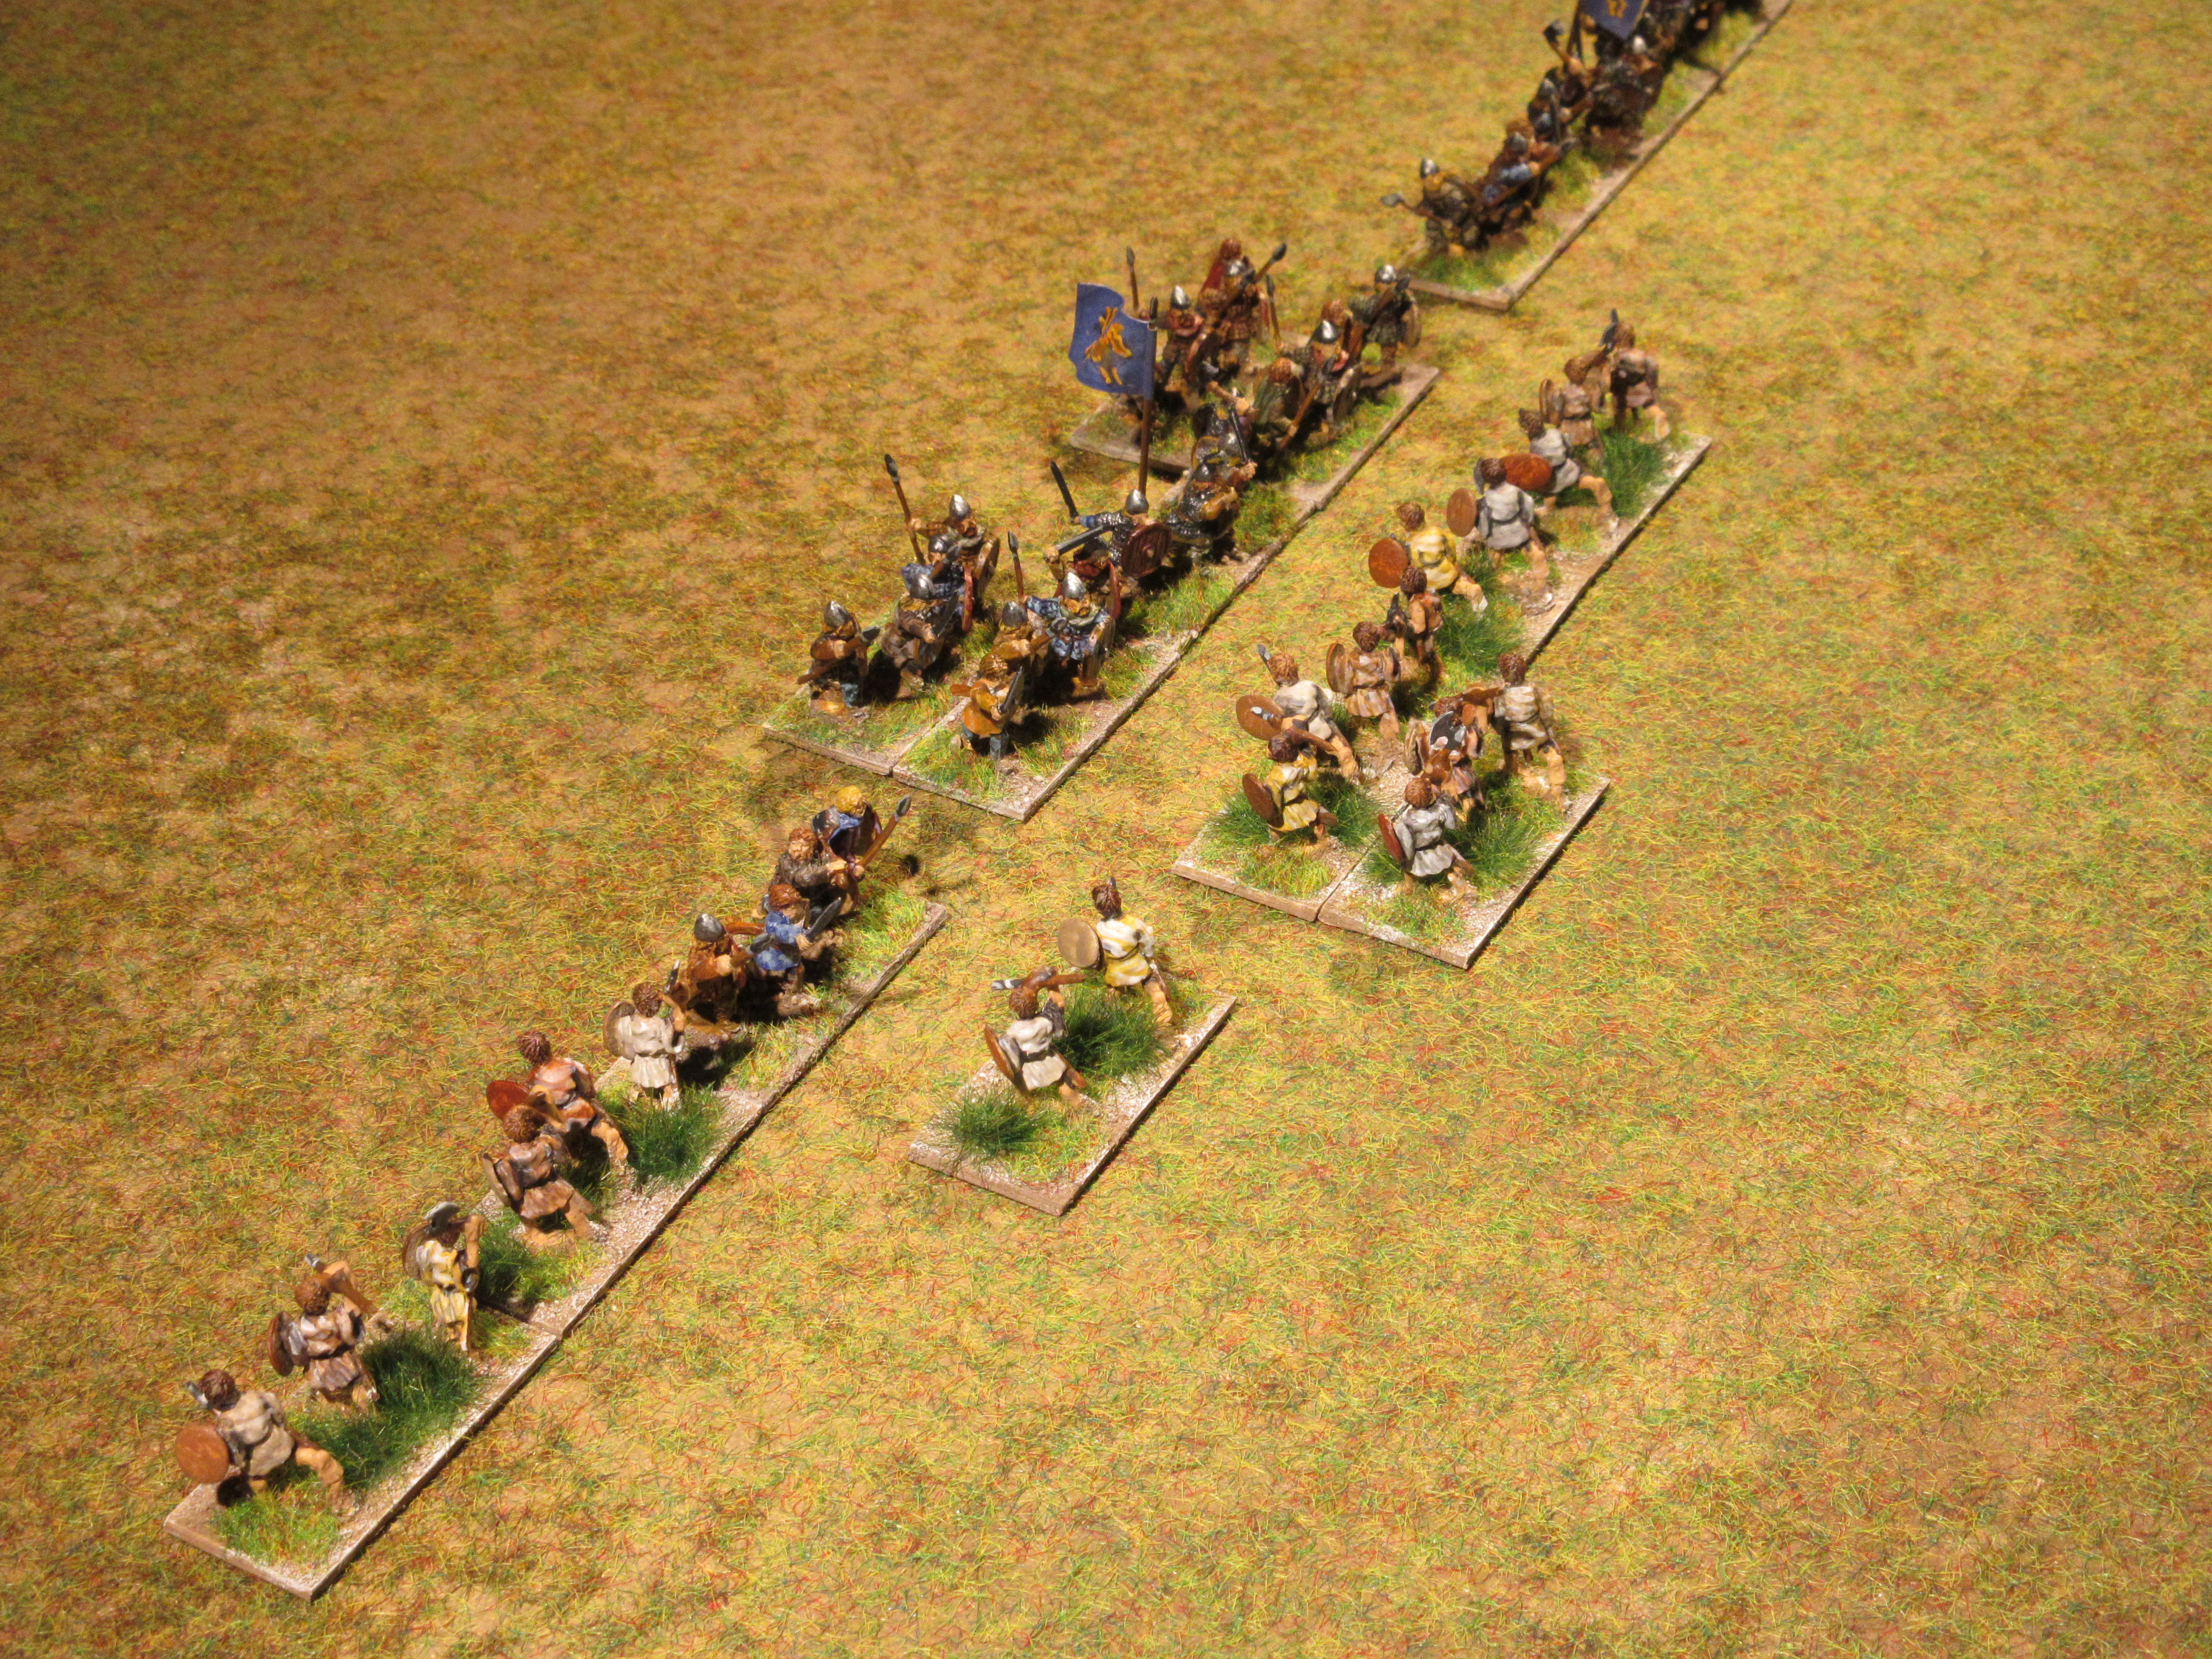
Both battle-lines formed three groups, for the Welsh, Gwent and Powys formed on the flanks of main force from Brycheiniog and similarly, the core of the Mercian army led by King Offa were supported by the powerful lords within the realm.

As the armies advanced, the Welsh proceeded to overwhelm the Saxons on the left causing a near collapse of that wing. To their surprise, the attack on the Saxon centre was repelled.

Despite the chaos on their right, the Saxon centre recovered and were able to maul the Welsh to their front to reach a narrow victory, 3 – 3g

Second battle

Details of the actual battle, such as size and deployment are sketchy, a second battle was played and reversed the deployment areas for each army, leaving Hereford in possession of the Welsh. The Saxon approach to Hereford was not well timed as gaps appeared as they approached the Welsh position.

The Saxon centre, led by Offa, struck the Welsh centre sending their king back. Unfortunately, the Saxon support elements were less successful leaving an exposed Offa to be quickly surrounded.


King Offa survived the assault as Saxon reserves quickly moved to aid their king, leaving Offa to renew his fury against the Welsh king. This continued for a time, sending the Welsh king recoiling, while laughing and yelling “Fool, look behind you”. Cautiously turning to look behind, Offa saw the Saxon centre gone. A Welsh victory, 4 – 0.


Saturday, 1 October 2022

Battle of Rhuddlan 797 AD

The battle

In 797 AD, King Coenwulf of Mercia seeks to re-assert his domination of Gwynedd. In his defense, King Caradog gathers his Welsh forces which include those of Powys and Dyfed. The battle proves to be indecisive as both forces meet again the following year in Snowdonia.

Location

The Ordnance Survey map of 1871 sites the battle in a field to the North West of Rhuddlan. This location is described as marshland bordering the river Clwyd to the east and by steep hills to the west. Our battlefield will have two difficult hills on one side and two boggy grounds placed facing each deployment area.

Forces

Welsh: III/19a, an option, represent Powys and Dyfed as allies of two elements each.

Middle Anglo-Saxon: III/24b.

Sources

From EBKHistorical Chronology of the Early British Kingdoms.


The re-fight

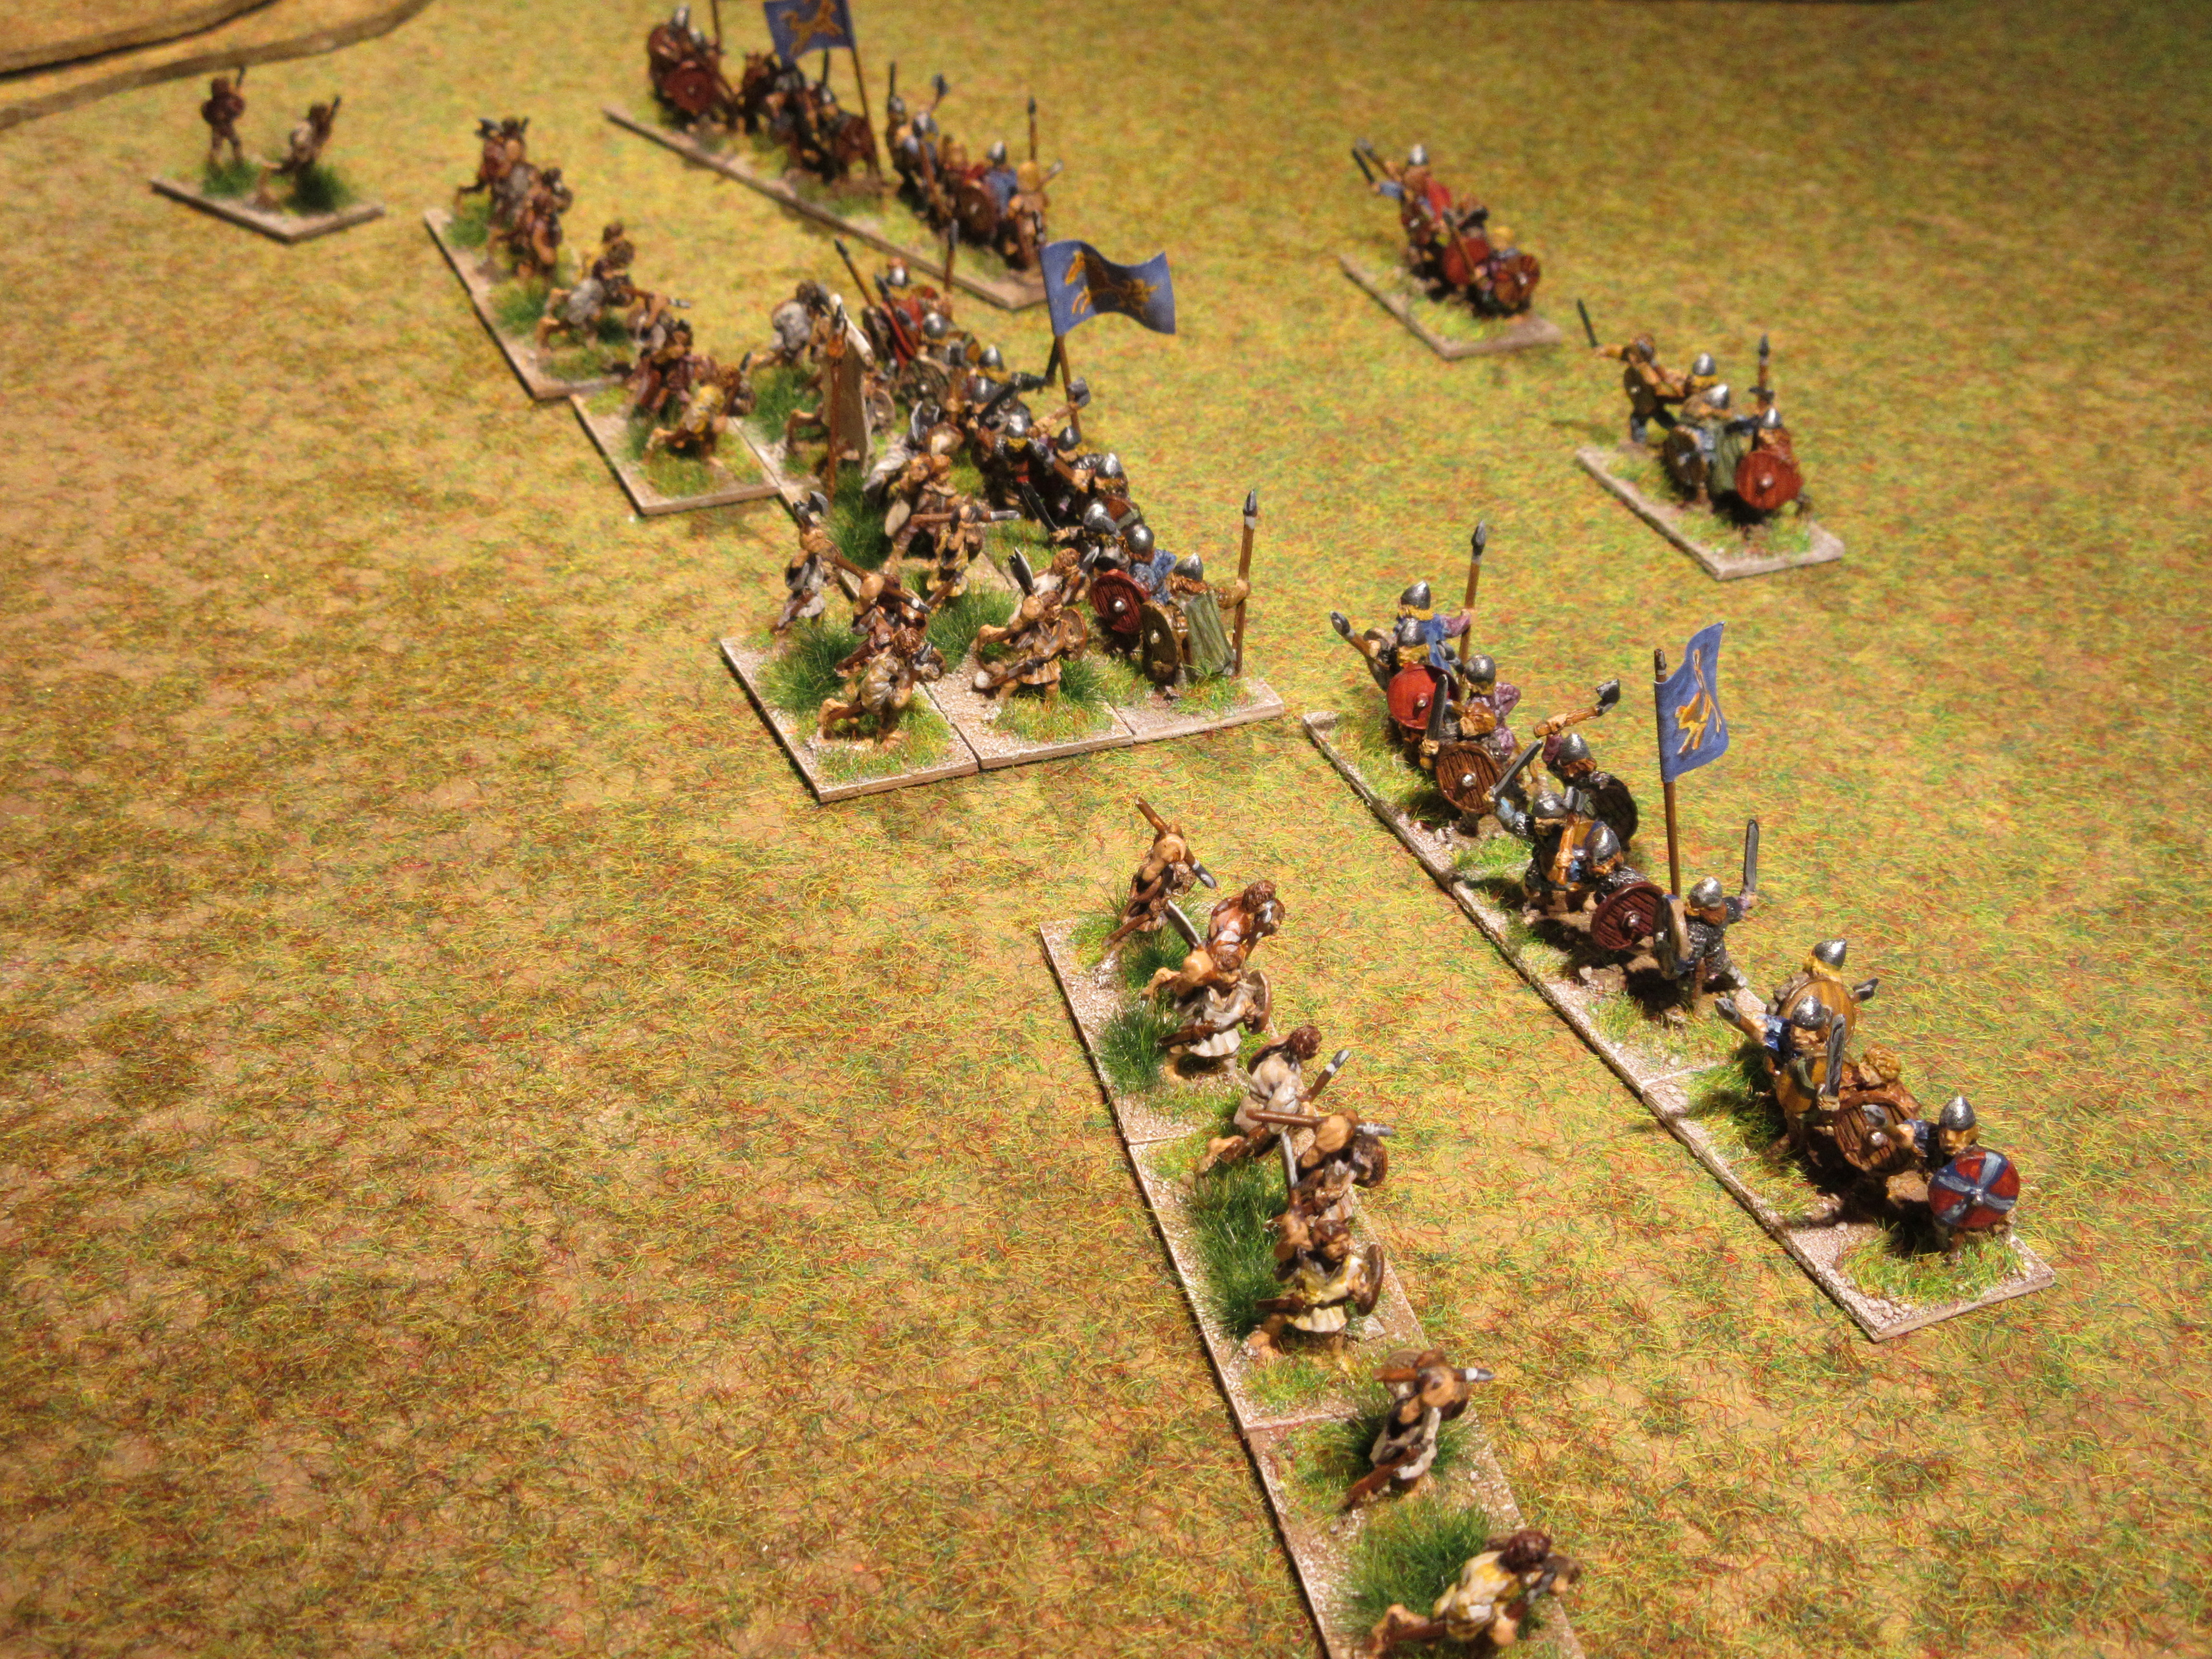
Due to the limited amount of open ground, King Coenwulf reinforced his flanks with extra troops; these would fend off Welsh flanking attempts as he pushed his line forward. The Welsh line was noticeably broken by the boggy ground offering an opportunity for the Mercians to destroy one flank.

Both armies marched cautiously forward and sensing some confusion on the Mercian side, King Caradog quickened the pace of his left.

As the main battle lines clashed, King Caradog deployed Welsh skirmishers to harass the Mercian right while wheeling his own bodyguard to turn the Mercian line.

The battle quickly cascaded into a slaughter as King Coenwulf fell as did other thegns of Mercia sending a tremor of despair among their ranks. Further losses incurred by Mercia forced them to flee the field. Welsh losses were insignificant (3g-1). 


Note:

Each subsequent test, the Welsh proved tenacious winning the majority of their battles with the Mercian commander thrice succumbing to a Welsh axe. Other Dark Age battles will follow.

Saturday, 10 September 2022

Enemies of the Carolingian

Noting the strengths and weaknesses of enemies for a particular army is a useful exercise when competing in tournaments, however, the information gathered here is meant to enhance scenarios between two historical opponents. This set takes a look at the tactical strengths and weaknesses of opponents of the Carolingian in the collection. The list long with a few armies having sub-lists.

Reviewing the Carolingian list, you will note a few alternative troop types reflecting regional differences, such as the province of Aquitaine or the division of the realm following the death of Charlemagne.

III/28 Carolingian 639 – 888 AD, Terrain Type: Arable, Aggression 3

1 x General (3Kn), 2 x caballari (3Kn), 2 x Swabian or Bavarian caballari (3Kn//4Bd) or [1 x Gascon javelinmen (Ps) + 1 x Gascon light horse (LH)], 1 x caballari (3Kn) or 1 x Thuringian cavalry (Cv), 4 x select levies (all Bd or Sp until 814, thereafter all Sp), 1 x archers (3Bw or Ps), 1 x archers (Ps) or lesser levies (7Hd).


The Enemies of the Carolingian

 II/73 Old Saxon, 250– 804 AD, Terrain type: Arable, Aggression 2

Saxon warband caught are easy prey for Frankish knights if caught in the open, therefore a defending Saxon will select a hamlet, boggy ground, scrub, and possibly an enclosure to increase the longevity of warbands when confronted by Frankish knights. Troops moving through rough ground would do so in column, increasing their vulnerability. A river would add another level of complexity to the mix of terrain.  

II/83b Later Visigothic Army 622 – 720 AD, Terrain type: Arable, Aggression 1

A well-balanced mix of knights and spear supported by skirmishers and auxilia. Difficult to dislodge from a defensive position, best to lure toward an open plain. Attacking, avoid matching troop types as battle can degenerate into a long slogging match.

III/1b Western Slav Army 741 – 1003 AD, Terrain type: Arable, Aggression 1

The majority of foot are spear-armed and with few cavalry and archers in support, expect a defensive position with a number of choke points. Carolingian blade is best used against a Slav shieldwall and supported by skirmishers, these can attack exposed enemy flanks or rear. Enemy archers may prove a nuisance, use skirmishers to neutralise their threat.

III/1c Southern Slav Armies 476 – 896 AD, Terrain type: Forest, Aggression 1

Similar in composition as their western neighbors, spearmen are a lighter type supported by open order archers. Suggest driving enemy into or beyond woods will isolate them from their commander. Slav infantry can out distance own infantry, therefore, reserves should be placed to deter enemy flanking threats.

III/13a Avar Army 632 – 826 AD, Terrain type: Steppe, Aggression 1

The Avar have similarities with the Breton; but lack useful terrain. Pinning the Avar against gullies or rivers should be high on your list otherwise follow the tactics suggested against the Bretons.

III/18 Breton Army 580 – 1072 AD, Terrain type: Arable, Aggression 1

Breton armies are highly mobile and can face off against Frankish knights and infantry. Denying the Breton maneuvering room, form Frankish spear in line forcing the enemy to engage or give ground. Frankish cavalry can protect the flanks of the infantry and conversely if fighting on open ground reverse the order with cavalry and flanks protected by heavy infantry. Keep the date 814 in mind.

III/21a Italian Lombard 584 – 774 AD, Terrain type: Arable, Aggression 1

The majority of the early Italian Lombard are heavy cavalry supported by archers; the latter will create problems for your cavalry. An effective tactic of the Lombard is to close quickly against your cavalry while archers and skirmisher attempt to envelope your line. Much will depend who deploys first, but neutralising the archers should become a priority.   

III/21b Italian Lombard 775 – 1076 AD, Terrain type: Arable, Aggression 1

Coming under the umbrella of Frankish control, half of the heavy cavalry are replaced by spearmen creating a composition troop type mirroring the Carolingian. History records a frequent use of the allies listed which may tip the balance in a game.  

III/26b Croatian Army 627 – 1089 AD, Terrain type: Littoral, Aggression 1

Solid auxilia wielding javelin and axe account for bulk of the army following by a good number of mounted troops. The threat of a littoral landing is also present, however, using the auxilia may not be the best choice. Expect difficult hills defended by auxilia, but this should be welcomed as you can focus your attack on their cavalry and camp.

III/28 Carolingian 639 – 888 AD Terrain type: Arable, Aggression 3

Following the death of Charlemagne, the kingdom did lapse into a period of civil strife among its successors. From a historical perspective, armies should reflect some regional differences avoiding a mirror image of the other. For example, Aquitaine would have Gascons in its ranks, while Swabians and Bavarians would be present among the eastern Frankish kingdom. Allies would also play a role during the civil upheaval.   

III/29 Thematic Byzantine 650 – 963 AD Terrain type: Hilly, Aggression 1

This is the only army not present in the collection.

III/33 Early Muslim North Africa & Sicily 696 – 1160 AD Terrain type: Aggression

Lacking sufficient shock troops, they do make up with a highly mobile army on land as well as by sea (littoral landing). Make use of the sea to pin the Muslims against or have them take flight in that direction. Your knights may become vulnerable when pursuing, so care should be taken to have adequate support nearby.

III/34a Andalusian 710 – 765 AD Terrain Type: Arable, Aggression 3

This sub-list is similar to the Early Muslim, but its home terrain will offer a fine selection of terrain suitable for light troops, expect much use of rough ground. Use your cavalry to engage their cavalry, the advantage of number should bring enemy infantry out from their defensive positions.  

III/34b Andalusian 766 – 1172 AD: Terrain Type: Arable, Aggression 1

Quite similar to the previous sub-list with a few minor additions. There are a number of useful allies that can cause problems, such as the Feudal Spanish.

III/35a Feudal Spanish Army 718 – 950 AD, Terrain type: Hilly, Aggression: 1

Cavalry account for 1/3rd of the army with skirmishers forming a majority supported by spearmen. May pose a difficult fight if the maximum number of hills are placed as these will channel your approach. Spanish skirmishers reign supreme in such terrain; therefore, care should be taken to protect flanks and rear areas.

III/40a Viking Army 790 – 849 AD Terrain type: Littoral, Aggression 4

Lacking cavalry, fast blade will be disadvantage by an attack from your knights, therefore a defending Viking will make good use of difficult hills, marsh and a river to break up an enemy assault. Deploying an extended line seems less likely, but do expect a reserve forming a second line placed behind or split positioned at either flank.

III/40b Viking Army 850 – 1250 AD Terrain type: Littoral, Aggression 4

Solid blade of the ‘b’ sub-list presented different opportunities as these are less mobile and will avoid selecting difficult ground; a river and BUA would be better terrain choices. Solid Vikings foot will repel cavalry on even scores, but destroy knights. Using Frankish spear to pin, cavalry and skirmishers can attack exposed Viking flank or rear.

Tuesday, 9 August 2022

Enemies of the Pre-Feudal Scots

The following technical and tactical tips are meant a reference tool for ME when playing historical games or designing scenarios. Against each opponent, the Scots were placed in ideal and worst-case positions, generating a number of useful ideas, most of the enemies of the Scots were tested with the exception of the Norse Irish and Anglo-Norman, Similar exercises are planned for the enemies of the Nikephorian Byzantine and Norman armies.


II/81d Strate Clyde, terrain type: arable, aggression: 1

The Strate Clyde have a strong cavalry presence, accounting for a third of its total number, enough to threaten the vulnerable flanks if spearmen are able to pin the Scots pikemen. 

To counter this, single pike elements can deal with the cavalry leaving other pike units to break through their shieldwall. Against pike cavalry will flee on a result of “twice as many” and here an advantage can be gained by directing their flight toward rough or bad going. Of the optional terrain, a river would inconvenience flight and woods or BUA (hamlet) could obscure an enemy general’s control of his troops.    


III/24b Middle Anglo-Saxon, terrain type: arable, aggression: 2

Close formation spear and blade are a tough combination to beat especially if allowed to deploy in formation overlapping your own. In these situations, the Scot should utilise its movement advantage if fighting on an open field.   

Splitting the Scots in two divisions worked well, a small group occupying the Saxons to their front leaving the main division to defeat their opponents. Comprising the latter division are two pike columns, the Galwegians and the commander leaving the thegns to serve as a link between the two divisions.


III/40a, b Vikings, terrain type: littoral, aggression: 4

Fast blades of an ‘a’ sub-list can cause a few headaches if used well. Deployed in extended line, they will easily overlap the Scottish line. Movement matching the Scots, they can easily be re-positioned to place the Scots on the back foot. In close combat, they remain in contact on even scores, fighting the thegns (4Wb) being the only exception. 

Similar tactics used against the Saxons did work. Here, the two warband elements and the general were placed between two pike columns to help develop breakthroughs during combat. 

Against the solid blade of the ‘b’ sub-list presented other opportunities. Being less mobile, these Vikings will repel most Scots on an even score in close combat. With a higher aggression factor, the Scots should be defending, making littoral landings unlikely. Preferred optional terrain pieces should be a river, boggy ground, wood and a hamlet.


III/45 Pre-Feudal Scots, terrain type: arable, aggression 1

Not much to report here, just that the games ended quickly. A flanked column of pikemen and the loss of the general will end it for one side. It is however, advantageous to have one unit in reserve to reposition elsewhere during the game. 


III/52 Norman, terrain type: arable, aggression: 3

Expect tough battles if blade appear in significant number; these will blunt the effectiveness of pike columns. Norman mounted account for half the army, therefore attention to terrain selection can mollify that advantage, if not possible, a few pikemen in single line is an alternative solution. 


III/72 Anglo-Danish, terrain type: arable, aggression 1

Not much different than fighting the Middle Anglo-Danish. However, if Great fyrd (7Hd) are deployed in number, use the skirmishers to lure them out of formation.  

Thursday, 14 July 2022

Pre-Feudal Scots

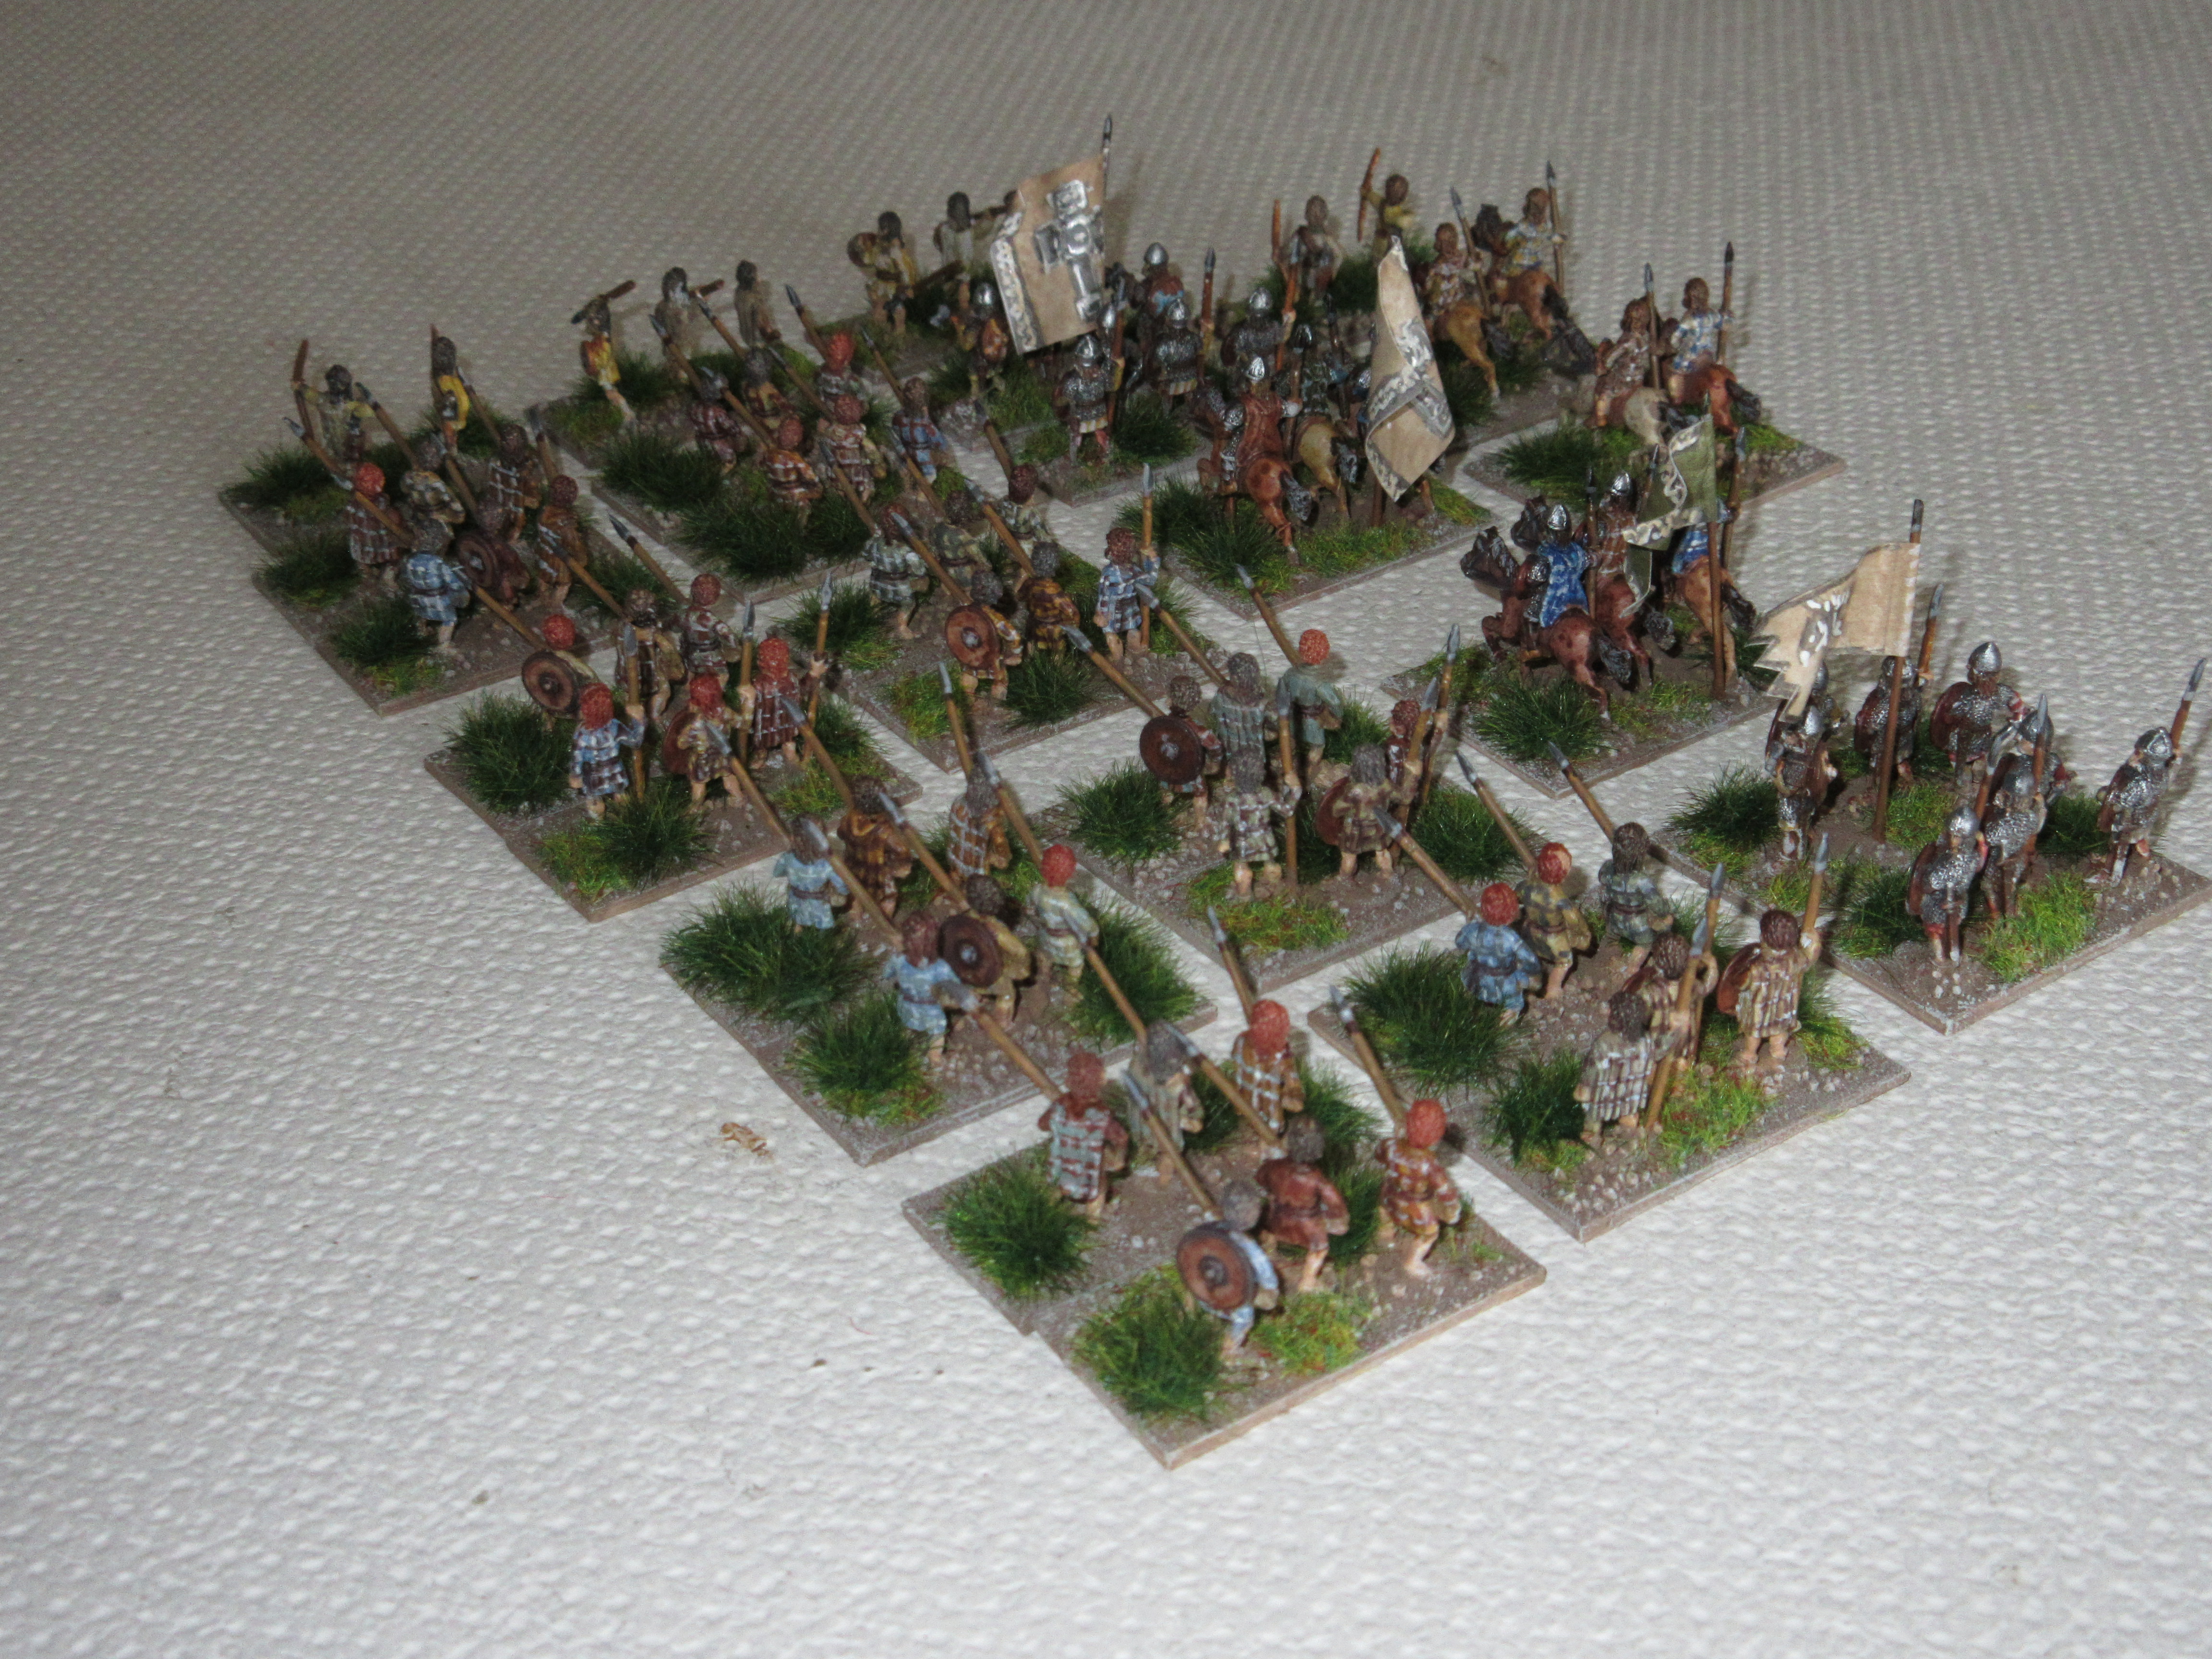
These were recently added to the collection and hopefully they will deliver a migraine to my Normans. The figures are Feudal Castings, still available from Thistle & Rose (USA) and although their website is still in production, they do have a FB presence from where you may view their line. 

These are clean castings with minor variations of poses. Organised in a similar manner as the earlier Picts, the army is bolstered with a small number of mounted and thegns for support.

Before painting the plaid designs, I tested colour combinations of ground and colour of stripes that would work well together. Six colours where chosen and I experimented with different but complementary colour for stripes.  

Clothing for command and thegns were given a brighter shade of colour, possibly a Norse influence. The entire collection represents two commands including options, giving a total of 28 elements. Of the eight enemies listed, I lack the Anglo-Danish and Scots Isles and Highlanders. 

The banners are conjectural and could fit for the period of the 9th to 11th century, these are the Celtic cross and a few animal motifs for conservative leaders. Extra banners were made as these can be exchanged.


Additional detail. 16-07-2022

Looking at the photos, I decided the plaid designs needed an improvement. With thinned white paint and my smallest brush, I highlighted the plaid. This tightened the design of the plaid. 


Thursday, 7 July 2022

DBA3 - the double size command.

Many of our recent games we have enjoyed using 24 elements for a command, replacing the standard 12. Increasing the number elements and using one die for pips, approaches closer to what we read in history; opening skirmishes, concentration of effort against a particular point, shifting the attack to another area, a lull in battle to regroup or reform lines.

Rather than offer another battle report, I will use a recent game between the Fatamid and Zirid Berbers in Sicily (1067), to illustrate some of the finer points of DBA24. 

The look

Firstly, the game table is one and a half times larger, resulting in fewer discarded terrain pieces. In fact, an allowance is mode for an extra optional terrain piece to be selected by the defender. 

The army

The number for each troop type listed is doubled, this also allows for two commanders; a general and one subordinate general, how the latter functions is explained here in detail. The number of elements forming an allied contingents are also increased.    

In this particular battle, the generals (Cv with flags) can be seen in the second line. Both sub-generals were lost in game one, creating a critical moment for both commanders as many troops found themselves beyond command distance. That error was rectified in game two. 

Zirid army

1 x Ayyub ibn-Tamin (Cv), 1 x sub-general Ali ibn Tamin (Cv), 2 x Berber lancers (Cv), 6 x Berber light horse (LH), 3 x Berber javelinmen (3Ax), 3 x Black slave spearmen (Sp), 2 x Arab archers (4Bw), 6 x Berber javelinmen (Ps).

Sicilian Muslim army

1 x Ibn al-Hawas (Cv), 1 x sub-general (Cv), 6 x Berber lancers (Cv), 2 x Bedouin cavalry (LH), 4 x archers (4Bw), 6 x abid al-Shira (4Bd), 4 x Berber archers (Ps).


One die used for pips

Some may find this strange, however, due to the increased number of turns to reach a decision, good and bad pip scores balanced out. On average, these games were finished after an average of 8 or 10, twice that needed for a standard 12 element game. There were some exceptions, such as that of Clovis versus the Alamanni, both warband armies, which finished in 4.  

Deploying 24 elements

You will discover, moving 24 elements as one groups will become unwieldy, better to deploy your army into smaller groups, for example a centre, two wings and a reserve. Even with a bad pip score, one or two of these will maintain the momentum of your assault. Experience has demonstrated the folly of too many single element moves, these may become inert as subsequent pips will be needed elsewhere. 

More melees

I can recall a few standard games were my opponent lost four elements in one bound, thus ending the game. As armies become locked in combat, the increase in the number of melees will not necessarily mean more casualties, often more recoils and even scores will be the result.

This is the moment when the loss of a general can become critical, as the momentum of an attack grinds to a halt. 

Renew an assault or look elsewhere? 

We have seen many assaults die as a general could not sustain the momentum, supporting elements were too far away to be of any use or they were never deployed. Preparation is key; and moving reserve troops in a timely manner is equally important as moving front line troops into a subsequent combat. Even better is to use a low pip score to move a general before troops move beyond command reach. 

In our second game, both sides profited from the previous battle to form fewer groups. The generals were also better positioned to maintain control over their troops. 

Regrouping scattered units

Approaching the final stage of the battle, it will become beneficial to regroup scattered elements and form groups. Reformed troops can improve their chances to renew combat or maintain the position serving as a deterrent.  


On turn nine, the Zirid army (on the left) used all 6 pips to reform scattered elements to improve their position and capacity to renew an assault.  

Depending on the mix of troops types, a game can be completed in +/- 45 minutes or two in an evening. 


Thursday, 30 June 2022

Sicily 1061

Following their victory at Civitate in 1053, the Normans turned their efforts toward Byzantine and Lombard holdings in Apulia, Calabria and Campania. These would eventually become the Duchy of Apulia ruled by Robert de Hauteville or better known as Guiscard. Together with his brother Roger de Hauteville, the way now lay open for a campaign across the Straits of Messina.

Ousting the Byzantines in 830, the Aghlabids gained control of Sicily, they were later displaced by the Fatamid juggernaut. The Kalbid dynasty ruled as vassals of the Fatamids until the last emir’s death in 1052 creating a political void later evolving to a civil war among the Muslim entities. the Christian population on the island appealed to the pope for assistance and to resolve this, the pope named Robert de Hauteville, Duke of Sicily. Not having control on the island, Robert and Roger did not turn down the opportunity to invade the island. Fortuna further smiled on their venture as Ibn al-Timnah, emir of the eastern territories called on the help of the Normans.   

A successful foray in 1060, both de Hauteville brothers formed a new expedition using Messina as a base of operation. Robert returned to Italy to suppress a revolt, leaving Roger to continue the advance inland. Ibn al-Timnah joined the Norman force with his army and together they marched on the bastion near Enna, held by Ibn al-Hawas. Refusing to leave his fortifications, the Normans laid waste to surrounding countryside. This had the desired effect, as al-Hawas left the protection of his fortress to deploy for an open battle.

Norman forces.

1 x Roger de Hauteville (3Kn), 1 x Serlo de Hauteville (3Kn), 10 x milites (3Kn), 6 x milites (4Bd), 4 x Sicilian Greeks (3Ax), 2 x archers (Ps).

Muslim forces.

1 x Ibn al-Hawas (Cv), 1 x sub-general (Cv), 6 x Berber lancers (Cv), 2 x Bedouin cavalry (LH), 4 x archers (4Bw), 6 x abid al-Shira (4Bd), 4 x Berber archers (Ps).

The composition of the Muslim army uses the Fatamid army list, while this is not certain, one could easily use the North African and Sicilian list for this battle. The Normans and Fatamid are listed as enemies of one another, Sicily would seem the most logical location for their confrontation.


Battle

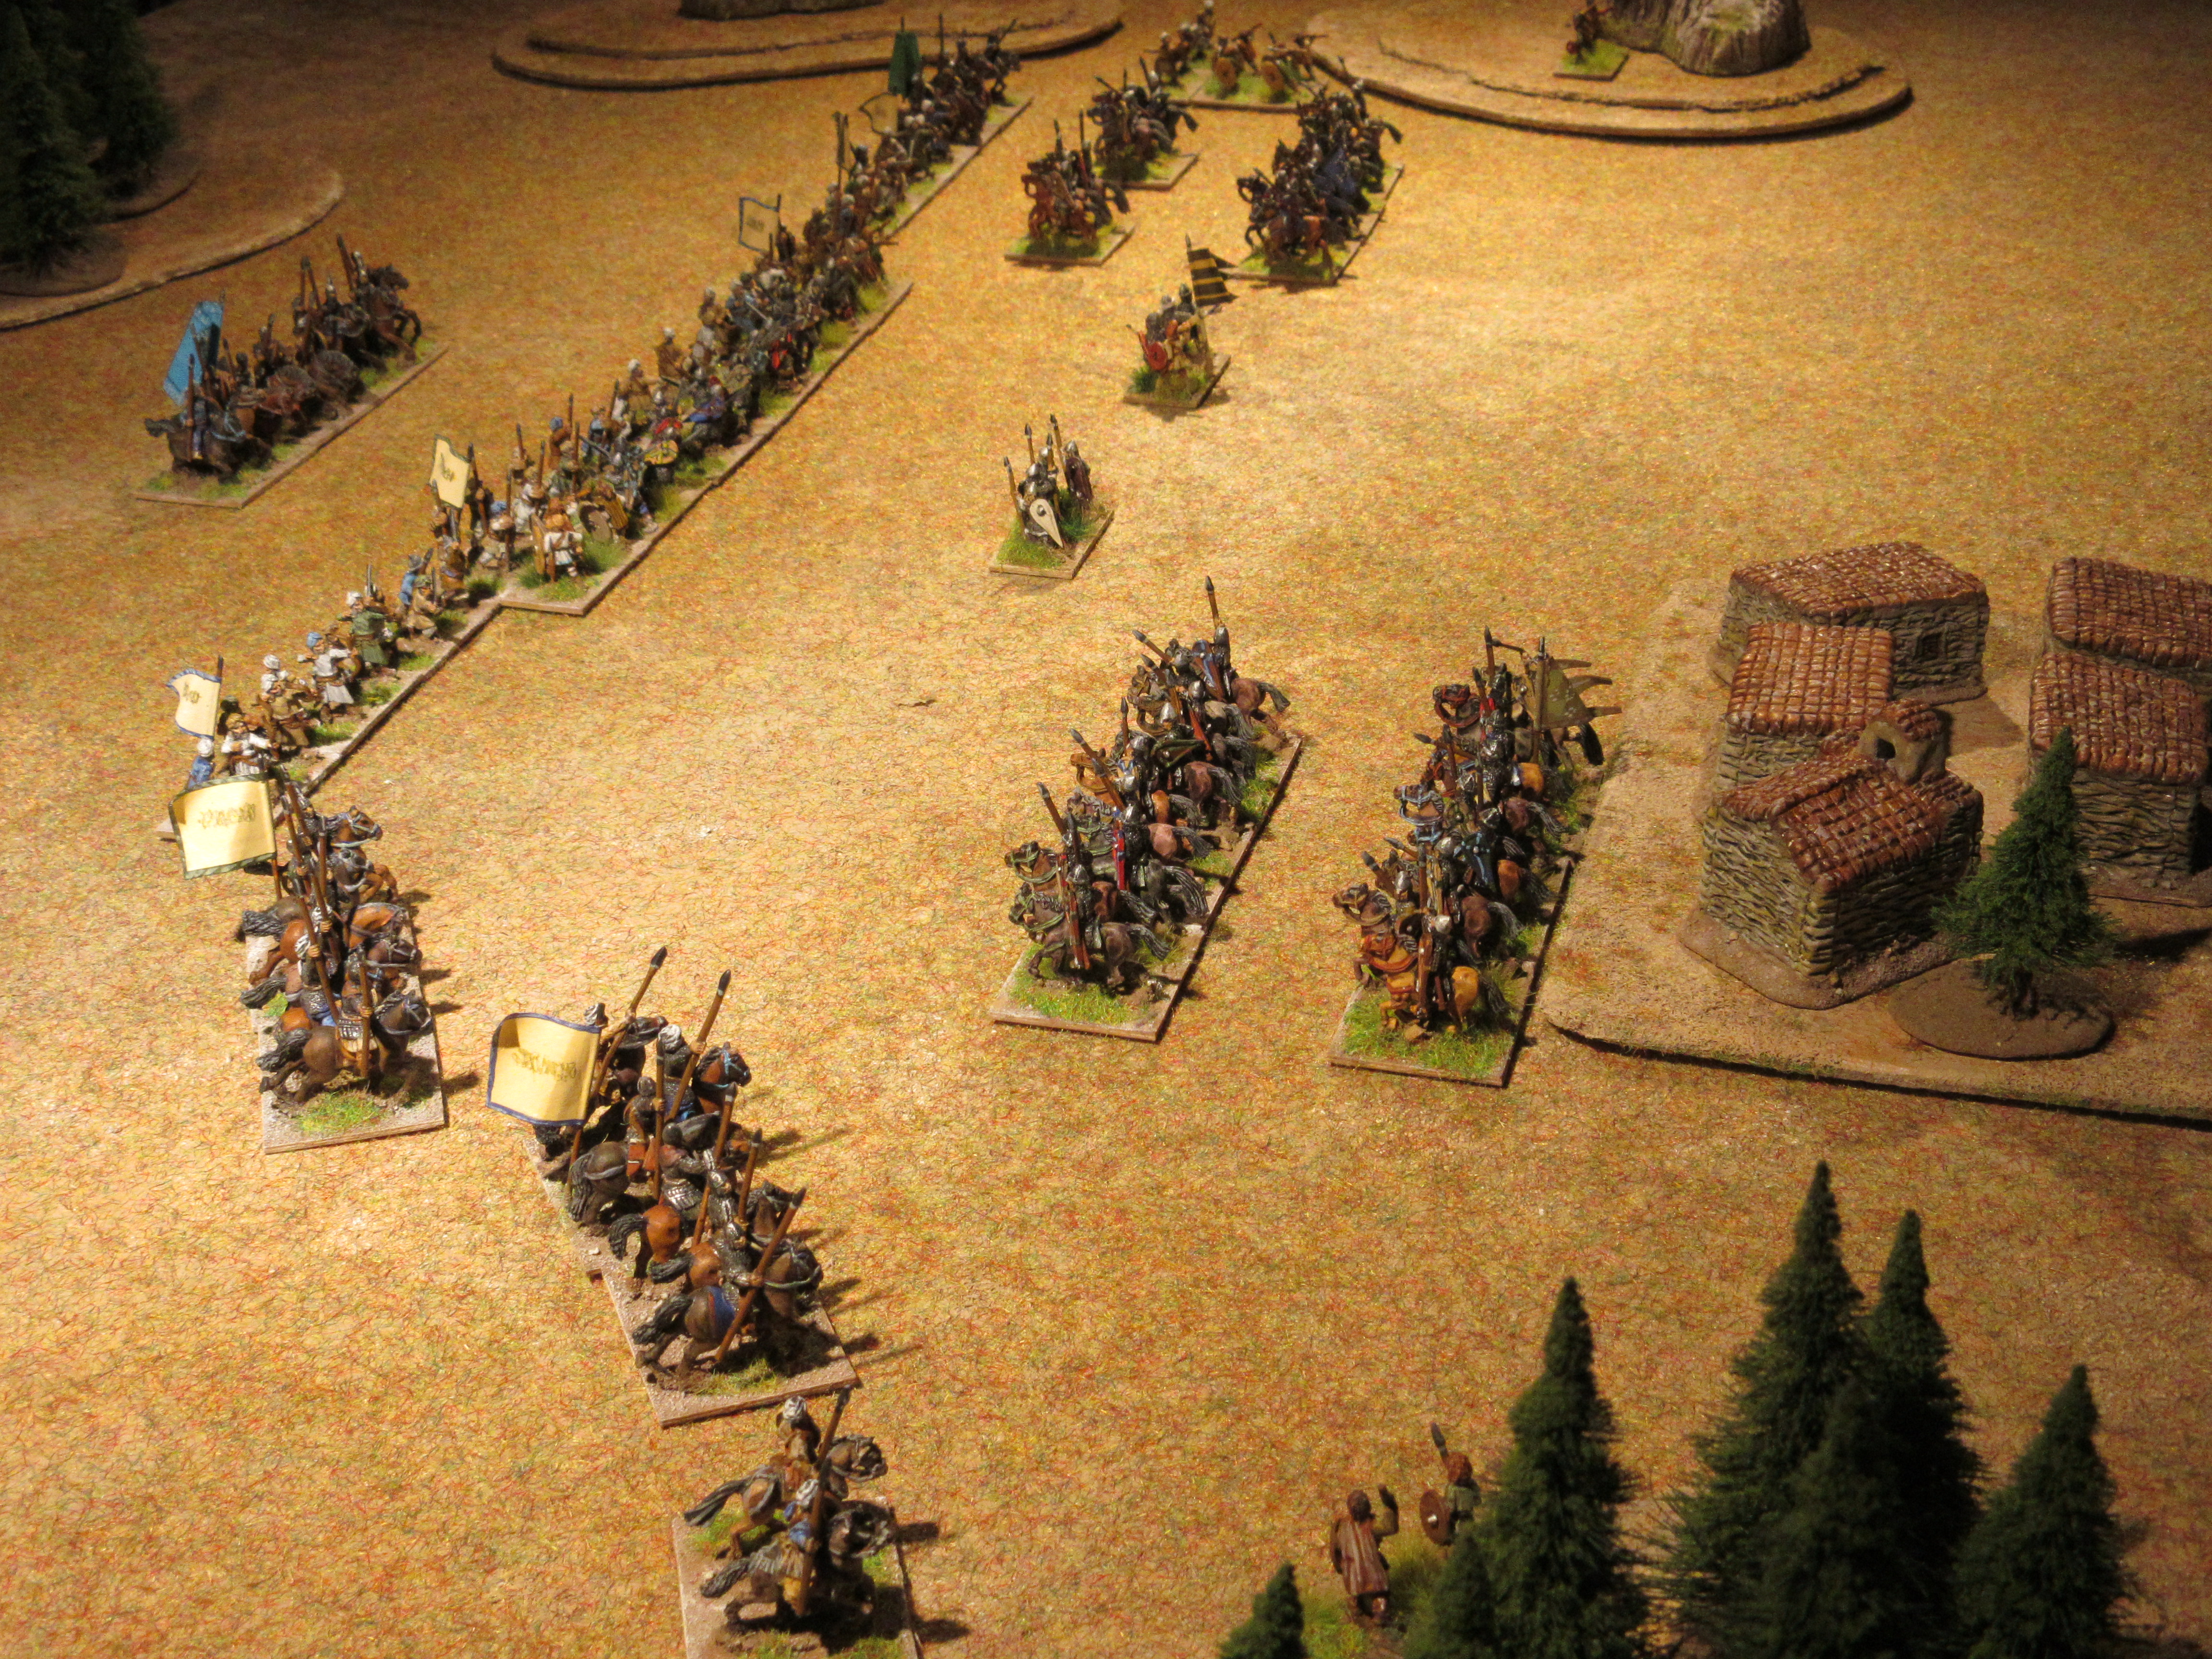
The Norman battle line was hampered by woods effectively dividing their line in two. To face this, the Fatamid deployed their army in two lines, the first held the cavalry with infantry forming behind.   

Seeing the Norman advance, Fatamid cavalry made a tactical retreat to a position behind the infantry.

Unfazed, the Normans continued their advance keeping pace with the dismounted knights to their right.

The battle lines clashed, Norman milites meeting Fatamid Ghulam cavalry. Norman knights on foot made short work cutting swaths through the Fatamid line. Norman second and third line of cavalry moved forward to widen the gaps in the Fatamid line, eventually sealing a victory. Score Normans 8 – 4.

To determine if the victory was an accident, a second battle was done using the same the same pieces to generate a different battlefield.


Second Battle

Terrain no longer hindered the Norman deployment and both armies placed their infantry in centre with cavalry and light troops positioned on each wing.

The Fatamid rapidly closed the gap between the centre and on the Fatamid right, Ghulam cavalry caught Norman cavalry positioned in front of the village. These became the target of the Armenian archers bringing both lines of Norman cavalry into disarray.

This led to disaster from which the Norman milites could not recover. Losing control over the battle, the decision was made to retreat leaving the field to the Fatamid. Score Fatamid 10 – 6.

One more time

Both armies deployed in a similar manner as before, with one exception, the Norman left was positioned further back.

This time, the Normans advanced in echelon with the dismounted knights leading. To negate any possible threat on the right, Sicilian Greeks held Fatamid light troops in check. As the lines struck, small gaps appeared in the Fatamid line, which were filled from the reserves.

In less than an hour (4 turns), Fatamid casualties fell rapidly to Norman knights on foot, no longer were there Fatamid to be seen. This left Norman troops on the right to turn on the enemy centre forcing the Fatamid command to call for a general retreat. Score Norman 9 - 2