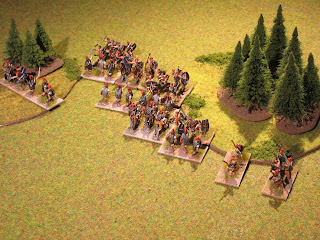
Following their victory over Rome at the Battle of Arausio, the Cimbri and Teutones crossed into Hispania.
From
Livy, Book LXVII, fragment.
"The Cimbrians, having ravaged all the
country between the Rhine and the Pyrenees, pass into Spain; where they
continue like depredations. The Cimbrians are put to flight by the
Celtiberians: and returning into Gaul, they join the Teutons."
The
Historical Match up.
Re fighting the confrontation between the Celtiberians
and the Barbarian coalition is challenging as so much
remains unknown. Both combatants have diverse home terrain (hilly and forest) so I
opted for a compromise and placed the three matches in arable terrain; this still offers both sides the use of difficult hills and forest. More importantly however, this would give me an opportunity to use my newly constructed
Celtic village.
Game 1
The Cimbri had sufficient room to deploy their army
between the village and wood. Facing them were the Celtiberians in a line which
easily extended beyond Cimbri line.
The Celtiberians right flank moved ahead of the main
body as they were eager for battle. The supporting caetrati had outstripped
them to make first contact.
The Celtiberians on the right encountered stiff
resistance with one dense column driving the scutarii back. The Celtiberian
left were driving their opposition back and rapid slaughter of one warband left
a gaping hole in their line.
Regaining their composure, the Celtiberians on the
right counter attacked the exposed flanks of one dense formation of the Cimbri
to quickly roll up the Cimbri left flank which prompted a general retreat. Score 4 -1 for the Celtiberians.
Game 2
This time, the Cimbri deployed closer to their camp
leaving the Celtiberians no choice but leave their position near the village.
Due to the constricted nature of the terrain, the Celtiberian formed in deeper
ranks.
The Cimbri shuffled forward giving time for the
scutarii and caetrati to deploy into a line.
The battle became general up and down the line with
neither side giving much ground. During this and the previous bound, there were
a high number combats with even scores. Here, the denser formations of warband
repelled the looser formation (‘fast’) Celtiberians. Both sides experienced
light casualties (1 – 1).
The battle now took a fiercer turn as both sides were
taking advantage of exposed flanks and isolated units to bring the number of
casualties to a critical level (3 – 3).
The situation favoured the nimble Celtiberians as they
inflicted a few more casualties to save the day. Score 5 – 3 for the Celtiberians.
Game 3
For the final match, the Cimbri rested their flanks on
the two dense wood. It was hoped the cover would work to their advantage.
The rapid approach of the Celtiberians gave the Cimbri
just enough time to set up position in time to see caetrati closing the
distance.
The edge of the wood on the left were easily held by
the Cimbri warband. The wood on the right was in question as scutarii were
supporting the caetrati. To counter this, the Cimbri sent a unit of warband to
even the battle.
The Celtiberian effort in both woods now stalled it
was time to move the majority of the army into battle.
In the ensuing conflict the Celtiberians lost most of
their caetrati, but Cimbri casualties were not far behind (3 – 2).
The battle turned as Celtiberians were streaming out
of the wood followed by victorious Cimbri warband. This heralded a general
retreat and first loss for the Celtiberians. Score 4 – 2 for the Cimbri and Teutones.


Another nice looking game!
ReplyDeleteThank you Phil,
ReplyDeleteThe next battles will be larger ones.
Looks as if the Celtiberians are fierce enough to just about hold their own!
ReplyDeleteYes they are.
ReplyDeleteIt is for that reason that they were sought after as allies.