Tuesday, 24 September 2019

Parthia vs. the Early Sassanid

The Battle of Hormozdgan marked the eclipse of the Parthian Empire by the Sassanid. In this engagement, an all cavalry force of Sassanian met the Parthian army and her allies. Composition of the forces for this test are listed below. Both sides field 24 elements making one large command. As Parthia are initially defending, terrain pieces are selected from the arable list, but are limited to what one can expect in the arid region of the south.

Game 1 saw both sides manoeuvring bringing some units into position to skirmish. On the fourth turn, casualties began to mount and with the loss or Sassanid levy I realized I fielded the incorrect sub-list. Ardashir I had no horde. The game was played out in either case, with the Parthians ending the game with a fine 6 – 8 victory.

Game 2 saw the Sassanid with a corrected army composition which improved their game. This did end in a Sassanid victory, but game three demonstrated better deployment and tactics and report can be read below.

Game 3
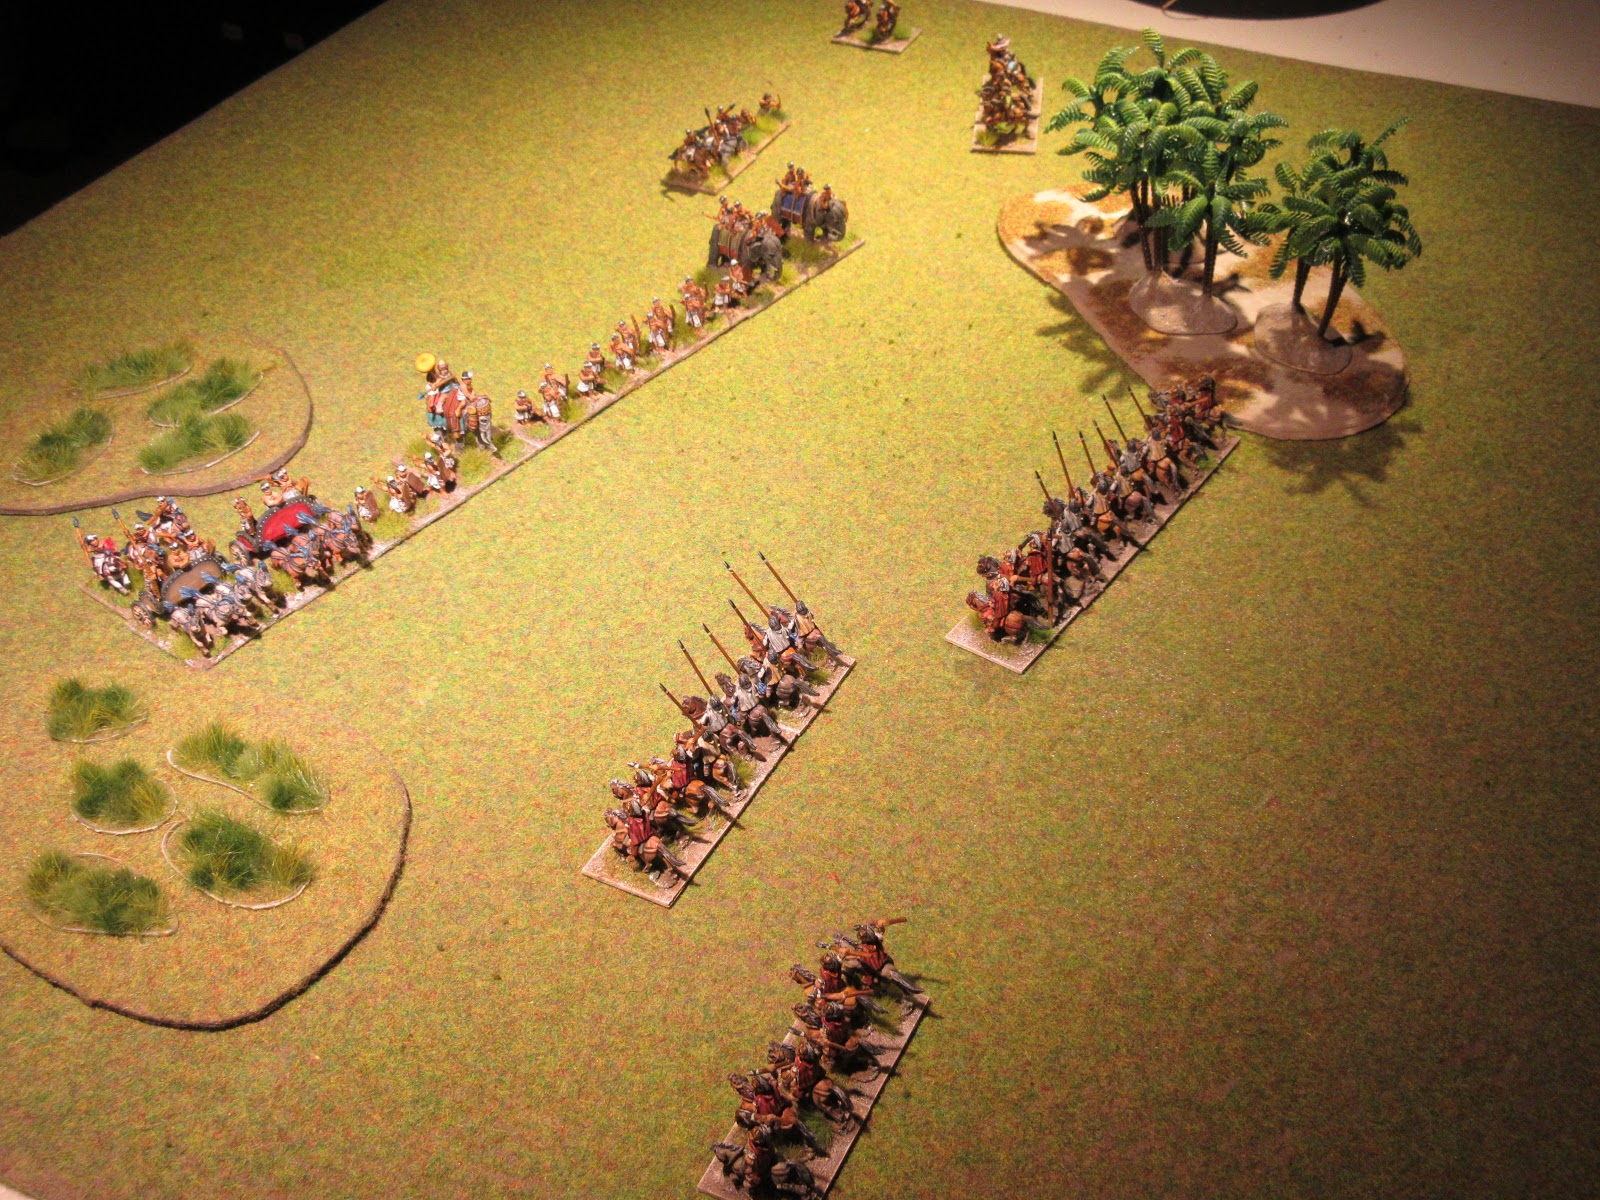
Parthia, as defender, deployed first placing its militia archers forward with horse archers covering their flanks. Behind them were the noble armoured cavalry and further back were single units of horse archers positioned to support the cataphract cavalry or protect the rear area from enemy activity.


Sassan formed its main battle line in three divisions with left and centre groups comprised of asavaran cavalry and the right division formed by the majority of tribal horse archers. Each division was supported by an equal number of noble or asavaran cavalry forming a second line.  


Parthia moved slowly forward keeping pace with the militia archers. Sassan responded by probing the Parthian left. Easily repulsed, this may have been a distraction to mask the real assault developing in the centre as the asavaran moved forward. This caught the Parthian horse archers off guard resulting in a few casualties. 


Parthian militia responded by showering the asavaran cavalry, who recoiled back from the fire storm. Undeterred, the centre division renewed their assault bringing them into contact with the Parthian armoured cavalry led by their subordinate general. 


Buckling under the asavaran charge, the Parthian subordinate general fell sending a wave of uncertainty among the Parthian in centre. Sensing an opportunity to widen a gap in the Parthian line, Ardashir (CinC) moved his reserve line of nobles (recognizable by their flags) to add their weight to the combat.


As the combat continued in the centre, the Parthian commander moved his armoured cavalry but noted the Sassanian entire left wing and its reserve were moving forward to engulf the Parthian right. In a quandary, the Parthian commander’s choice became clear as all that could be seen of his centre were the Sassanid cavalry regrouping with Ardashir at their head. 


Unable to continue the fight, Parthia signalled a general retreat leaving the field to the Sassanid. Score 4 – 9, a victory for Sassan. 


Double the number listed below will bring the total to 24 elements for each command.

Parthia
1 x General (4Kn), 2 x nobles (4Kn), 7 x tribal horse archers (LH), 2 x militia archers (3Bw).

Sassanid
1 x General (3Kn), 2 x nobles (3Kn), 6 x asavaran cavalry (Cv), 3 x tribal horse archers (LH). 


Tuesday, 17 September 2019

Arab Conquest vs. the Sassanid

Continuing the larger command test series (24 elements) the Sassaniid now confront the Arab Conquest army of the ‘b’ sub-list. The army now include a complement of Jund cavalry which effectively increases their mobility in battle. The later Sassanid generals are now cataphract cavalry, with the remainder of the army comprising of the usual asavaran cavalry, elephants and levy.


Game one proved a narrow victory (7 - 8) for the Sassanid and the Arab Conquest rebounding the following turn with a 5 – 8 + Hd, victory to even the score. 

In game three, feeling confident, the Arabs deployed their infantry in three groups leaving sufficient opening between for supporting cavalry to move through. As defender, the Sassanid deployed first forming a more conventional battle line supported by two reserve formation. Light horse was positioned on the flanks to extend the battle line. 


The Sassanid moved cautiously forward leaving the Arabs to seize the opportunity to strike first. Arab archers moved through the village while infantry advanced against the light horse of the Sassanid army. Driving them back would open a gap for the supporting Jund cavalry to fall on an exposed flank.


The Sassanid assault on the Arab centre destroyed several units of infantry prompting the Arab commander to commit his reserve to stem the tide. On the right of centre, Jund cavalry fell on the open flank of the Sassanid levy dispersing them to the four winds. 


The Jund cavalry quickly followed up their success to engage the elephant on that wing, On the opposite wing, the elephant wreaked havoc among the Arab infantry whiel the conflict in-between remianed in question.


Gaining the upper hand, the Sassanid opened gaps in the Arab line prompting the Arab general (SG) in that sector to move forward. 


Smashing its opposition, the elephant moved to attack the general. Seeing the conflict nearby, Asavaran cavalry joined the melee to bring down the subordinate commander breaking the Arab resolve to continue the battle. Score 9 – 5 + 2 Hd for Sassan. 


Sassaniid Army 404 – 651 AD
1 x General (4Kn), 6 x Asavaran (Cv), 2 x vassal horse archers (LH), 1 x elephant (El), 2 x levies (7Hd).

Arab Conquest 639 – 660 AD
1 x General (Cv), 4 x Jund cavalry (Cv), 1 x Muslim archers (3Bw), 5 x swordsmen (4Bd), 1 x javelinmen (Ps).  

Double the above quantities to bring the total to 24 elements.


Tuesday, 10 September 2019

Late Imperial Rome vs. the Sassanid

Those of you who have regularly followed this blog may remember the games played between armies with uneven numbers or those between commands comprising of 18 elements. Following a tip from the Fanaticus Forum, I continued my experiments with an even larger command size and moved the scale to 24 elements.

For these tests, Rome invaded Persian territory giving the Sassanid choice of terrain features from the arable list. Aside from the obligatory BUA, the other features, two difficult hills and scrub, seemed appropriate for an arid clime. The gameboard was increased by half producing a area measuring 120 cm x 80 cm.

In the first game, the Sassanid deployment formed a crescent curve with the levy and elephants forming its tips and Asavaran cavalry forming its base. The Immortals and generals formed a central reserve behind the centre and tribal light horse took positions on both flanks. 

Rome countered this by placing its legions and auxilia to contain the levy and elephants and the clibanarii, equites and generals formed a central reserve to deal with the Asavaran cavalry. The battle opened with the levy supported by elephants surpassing all expectations by crushing their opposition leaving the asavaran to pick off isolated units. Rome could not respond well enough which ensured a Sassan a decisive 8 – 2 victory.


Rome, now defending, revised its deployment to fit the constricted open ground between scrub and difficult hills. This meant all the cavalry were positioned in the second line. Opposing them, the Sassanid formed two wings with its levy and elephants on the right and on the left the majority of the Asavaran cavalry. Behind them, the Immortals and generals formed a reserve. This novel deployment had the opposite effect for the Sassanid as the legions and auxilia made short work of crushing the Sassanid cavalry to earn and 8 – 0 victory.


while attention was devoted to one sector. I decided to modify this and utilise the second general to pass on commands thereby extending the CinC’s control a further 8BW. (Note, only the CinC could benefit from the +1 bonus for combat). This small change help speed the game in the subsequent two tests. Each game became less chess-like and developed as actual battle would with assaults stalling, regrouping of elements to continue an assault or concentrate an attack elsewhere. Game three proved another victory for Sassan (Sassan 8 – 3 + Hd) which took seven turns to complete. However, game four was exceptional and here follows an expanded report.


Late Imperial Rome vs. the Sassanid.
In the final battle, Rome placed its legions in centre and on either flank were equal numbers of Clibanarii and auxilia. Archers were placed to extend the battle line further. Each were supported by the equites and both generals and the remaining cavalry formed a central reserve. The Sassanid matched their opponent placing an equal number of levy and elephants on its flanks filling the gap between them with Asavaran cavalry. The Immortals and both generals formed a reserve and more Asavaran cavalry and tribal light horse were placed to support each flank.


Roman plans to destroy the levy and elephants went astray as the Sassanid right struck first. Casualties fell evenly on both sides but the severity of the fight blunted any further effort to continue leaving both commanders to look elsewhere to gain leverage. The centre was next.


In the centre, the Asavaran cavalry made repeated assaults against the legions and heavy fighting caused casualties for both sides. Nonetheless, gaps appeared in the Roman line with the Sassanid intent on widening the gap between the Roman centre and its left flank. Sensing the treat, both commanders moved their reserves forward as the score reached an even 6 – 6.


To further relieve the danger to the centre, the Roman commander ordered the uncommitted right flank to engage the enemy. Here, the auxilia swept over the hill to threaten the Sassanid line while the remaining troops engaged the levy and elephants. This had the adverse effect as the Sassanid demonstrated greater fortitude and mauled the Roman cavalry and archers. This tipped the balance forcing Rome to call a retreat leaving the field to the Sassaniid, score 8 – 6.


The Roman army was twice the following: 
1 x General (Cv), 2 x clibanarii (4Kn), 1 x equites (Cv), 2 x light horse (LH), 3 x legionnaires (4Bd), 2 x auxilia palatina (4Ax), 1 x archers (4Bw).  

The Sassanid also doubled the following for its single command:
1 x General (Cv), 6 x Asavaran cavalry (Cv), 2 x tribal horse (LH), 1 x elephant (El), 2 x levy (7Hd).

Saturday, 20 July 2019

Prince Igor confronts an Orc-Goblin raiding party.


This was our first opportunity to use the D3H2 and for this test we had an Orc-Goblin raiding party invade a minor Kislev principality mirroring the army list of III/48 Rus. Armies were 24 points each with generals free for each side. The Rus fielded their spearmen, skirmishers, Bulgar allies and a pack of wolves to add a touch of fantasy to their side and the Orcs deployed a behemoth (troll), Orc warband, skirmishers, Goblin horde supported by Goblin riders and a shaman.

Game one.
Three wood and a small hamlet framed an open ground sufficient for both sides to deploy their troops. The Rus spearmen formed two lines echeloned to the right and skirmishers took positions on either flank with the wolves. Prince Igor and his Bulgar allies formed a central reserve.

Placing their behemoth in centre, the Goblin horde formed to its left and Orc warbands on the opposite side displaying a formidable line. The Orc shaman took a position to the right of the line.

Both sides moved eagerly forward as there was no shortage of pips; this brought both sides into early contact. The Rus shield wall broke at one point but the jubilant Green skins were flanked and destroyed on the following turn.

Solid battle lines quickly dissipated as casualties mounted for both sides. The Rus, taking advantage of the chaos cut down a number of isolated units to seize victory with a score 8 – 12.  


Game two.
The Orc commander took the opportunity to replace the shaman for a viable number of warband and Prince Igor. for his victory was given Hero status for the cost of two spear.

The Rus again defending, formed their shield wall resting its right flank on a wood. To its left were the Bulgar allies supported by all the skirmishers.

The Orcs, now reinforced with extra warband deployed in a similar formation feeling confident of success. The Orcs moved quickly forward to close with the Rus, however, their advance stalled as both flanks were threatened by the presence of skirmishers on their right and howling wolves on their left. Adding further to Orc discomfort the Bulgar knights cleaved a number of Goblin horde to the right of the battle line.

Sensing the ‘do or die’ moment, the Orc general sounded his war horn to be answered with a deafening roar of the warbands and behemoth. Charging full tilt into the Rus shield wall and as the dust settled the Rus still formed an unbroken shield wall with green-skin corpses forming a rampart. Coupled with earlier losses the Orcs retired off the battle field leaving the Rus victorious with a score of 1 – 12.  


Some observations
On a positive point, my opponent (Jan) did like the freedom of element selection. Discarding the shaman as a poor investment, aside from its cost, pips were needed for scrying. With this in mind, the warband would make a better option.

The composition of the Rus closely followed their army list including the Bulgar nobles (3Kn) as allies. Rus skirmishers cost less than standard foot troop and for their reduced cost this permitted the use of wolves (beasts).

Both games moved quickly despite the increase score needed for victory; 12 points are required for victory. Comparing this to a standard ancients game, the fantasy games take several turns more to reach a decision. 

A revenge match is scheduled in two weeks. 

Tuesday, 30 April 2019

Battle of Magnesia 190 BC


The Battle of Magnesia has remained on our ‘to do’ list for quite some time as our primary obstacle was reconciling the troop strengths for the DBA big battle option. Ancient and modern historians are in conflict to the actual numbers as Livy and Appian quote 70,000 Seleucid which seems high by modern historians against a total of 35-40,000 for Rome and Pergemon. We decided to use the Seleucid Army by Bar Kochva for his detailed analysis of the deployment and battle. Using the figures quoted above, this works out to a ratio of 7:4.

Regarding the strength of the Roman force I am not convinced that this exceeded 35,000 as anyone familiar with Livy’s history of the War with Hannibal are aware that consular armies were relatively fixed at 20 to 25,000 troops. This gives us two Roman legions, two Latin legions, each with its component skirmishers and cavalry. Following the end of the Second Punic War there is little evidence of any reforms that would generate an increase of troop strength for the consular army. For this project we will use the figure quoted above and plus the 10,000 Pergamene troops led by Eumenes.

Historical numbers to elements
Readers who regularly follow this blog are aware of the number of historical refights we have done with unequal sized armies. Most however, seem small incomparison to Magnesia, but we were up for the challenge. Using our ratio of 7:4, Rome/Pergamene would consist of three commands of 12 elements each, For the Seleucid, this produces a total of 63 elements which will be deployed among four commands.  

While researching the army strengths for both sides, I found Luke Ueda-Sarson’s website extremely helpful as he lists the various contingents for a DBM game. Using Livy and Appian as references and the DBM historical scale, this came to 236 elements. Dividing this quantity by four for DBA we arrive at a total close to our original abjective. 
 
Number of Commnads
The decision to organize the Seleucid in four commands is based on the historical account of the battle. The Seleucid engaged Rome successfully on their right while incurring an opposite result on their left and the latter resulted in a cascade of setbacks for the Seleucid army eventually leading to the collapse  of the army. Fielding four commands for the Seleucid felt about right as both wings would have higher pip priority than the two central commands. The following list is tentative as the comporsition of left center and left wing commands may change slightly.  

Composition of the Seleucid army:

Right Wing
1 x Dahae horse archer (LH)
6 x Argyraspides (Pk)
3 x Cyrtian and Elymain skirmishers (Ps)
1 x Antiochus (3Kn)
1 x Agema (3Kn)
2 x cataphracts (4Kn)
3 x Mysian archers (3Bw)
17

Right Center
2 x mercenary foot (4Ax)
2 x Galatian (4Wb or 4Bd)
1 x elephant (El)
1 x Philippos (4Pk)
15 x phalanx (4Pk)
21

Left Center
1 x levy skirmishers (Ps)
2 x elephant (El)
6 x Cappadocians and other peltasts (3Ax)
1 x Mercenary foot (4Ax)
1 x Galatian (4Wb or 4Bd)
1 x mixed levies (7Hd)
1 x Seleucus (3Kn)
1 x Companions (3Kn)
2 x cataphracts (4Kn)
17

Left Wing
1 x Zeuxis (3Kn)
1 x Galatian cavalry (Cv)
1 x Tarantine cavalry (LH)
2 x Elymain archers (3Bw)
3 x Cretan, Cyrtian, Tralian skirmishers (Ps)
1 x Scythed Chariot (SCh)
9
Total elements = 64


Each Roman command lists both Roman and Allied (Latin) types. This is done for the convenience of players wishing to duplicate the historical deployment of troops. Do note, the totals may be subject to change following our test games.

Roman and Pergemene allies
 
Allied Left Wing
2 x velites (Ps)
2 x Hastatii (4ax)
2 x Princepes (4Bd)
1 x Triarii (Sp)
1 x aliied cavalry (Cv)
Roman Left Wing
1 x velites (Ps)
3 x Hastati, Principes (4Bd)
1 x Triariii (Sp)
1 x Tiberius Sempronius Gracchus (Cv)
14

Roman Right Wing
1 x velites (Ps)
3 x Hastati, Principes (4Bd)
1 x Triariii (Sp)
1 x Lucius Cornelius Scipio (Cv)
Allied Left Wing
2 x velites (Ps)
2 x Hastatii (4ax)
2 x Princepes (4Bd)
1 x Triarii (Sp)
1 x aliied cavalry (Cv)
14

Pergamene
 
1 x Eumenes (3Kn)
1 x Xystophoroi (3Kn) or Galiatian cavalry (Cv)
1 x thureophoroi (4x)
2 x Achaeon thureophoroi (3Ax)
4 x Peltasts, Cretan, Traillian, Masdyene skirmishers (Ps)
9
Total elements = 37
 

Illustration: Hellenistic bronze plaque, discovered during the German archaeological campaigns in the Acropolis of Pergamum at the end of the 19th century. The piece, which was lost and of which there remained only a pen-and-ink illustration by Alexander Conze (1913), likely depicts the Battle of Magnesia in 190 BC. The Roman infantry, the Seleucid phalanx and the Attalid cavalry are shown. – Wiki (public domaain)

Thursday, 25 April 2019

More Mauryan Indian


This final batch of figures complete the Classical Indian collection. There are sufficient elements to field the first three lists of book II – Republican, Mountain and Classical. All figures are Old Glory and although the infantry are similarly dressed the cavalry show slight differences in colour.

There were some minor conversions; spears were shortened to a javelin length and reposition to bring an animated look to them and Milliput helmet with turban was sufficient promotion to make a standard javelinmen into a general.

The Mauryan can now field three commands for a big battle option with their most likely historical opponent of matching size being the Seleucid. A game is planned during next month’s flurry of holidays. 


Infantry for three lists; Classical, Republican and Mountain.


Cavalry for the Classical and Mountain army list.


Elephant and chariot corps


The Classical Indian in battle array.


Tuesday, 9 April 2019

Mauryan Indian vs. Graeco-Bactian (cavalry option)


We followed up our previous set of games with a second set using the Bactrian all cavalry option. Historically, such a force would most likely counter the nomadic incursions of the northern regions of the kingdom but an unlikely encounter against the Mauryan Indian seemed too good to pass up.  The Graeco-Bactrian are invading the tropical region of the Mauryan kingdom which in this case had woods and marshy ground. Army composition can be found below.


Game one.
After reading the Byzantine treatises Strategikon by Maurice I decided to impress the Mauryan with a bit of fancy deployment. The Mauryan placed their troops in the  ‘hammer and anvil’ formation which had served them well in the past.


The Bactrian began the battle with a left hook by the cavalry wing with the Iranian lancers in support. The Mauryan were prepared for such a maneuver and countered the assault with their chariot corps supported by their cavalry. 


Unfortunately, the Iranian lancers fell foul of the Mauryan archers leaving the Bactrian spearhead powerless to continue with their assault. Blunted and broken, this was a fine example that some treatises should remain on the book shelf. Score 4 – 0 Mauryan Indian.


Game two
The Bactrian humbled, now deployed in one large group with Iranian lancers in front flanked by cavalry and to its right a small column of light horse archers formed up to support them. The Mauryan infantry formed the center with the mounted troops evenly divided on both flanks. 


In successive waves, the Bactrian assaulted the Mauryan left flank committing two-thirds of its total force to the effort.  


The Mauryan countered this threat by wheeling the archers left to pelt the supporting lancers with arrows.


This action developed into a desperate struggle with both sides losing heavily. The gods smiled on the Bactrian as they were able to claim a narrow victory in the final moments of the game. Score 4 - 3 Bactria.


Game three
With a victory for each, both sides were eager for the final engagement. The Mauryan anchored their right near the marshland area leaving the open ground for the infantry and elephant corps. Facing them in one long extended line were the Bactrian with lancers in center flanked by their cavalry. Bactrian light horse formed to the far right beyond the wood. Their task was to encircle the Mauryan force and immobilize the elephant corps.


The battle opened with the light horse executing their orders prompting the Mauryan to drop troops back to cover their exposed left. The remainder of the army wheeled right and closed the distance between the two armies.


Bactrian cavalry on the left effectively neutralized the Mauryan chariot corps isolating the archer group of its right wing support. The havoc created by the Bactrian light horse forced the Mauryan commander to feed more troops to hold the Bactrian threat to its flank. 


Mauryan archers moved close enough to inflict damage among the lancers, but this was poor compensation for the heavy loss to the right wing forcing the Mauryan to abandon the field. Score 4 – 2 Bactria.


Army composition:

II/36a Graeco-Bactrian (all cavalry option)
1 x General (Cv), 3 x Arachosian/Saka horse archers (LH), 4 x Iranian lancers (3Kn), 4 x Bactrian (Cv).

II/3a Classical Indian 500 BC – 175 AD
1 x General (El), 2 x elephants (El), 2 x 4 horse chariots (HCh), 2 x cavalry (Cv), 3 x archers (4LB), 1 x javelinmen (4Ax), 1 x wild tribal archers (Ps).


Note:
The latest edition of Armies of the Macedonian and Punic Wars by Duncan Head has rejected the Iranian lancer figure as being Graeco-Bactrian but possibly a Chionite Hun or similar of a later period. The figure originally thought to have come from a Bactrian Silver cup was wrongly dated and is actually from the 3rd to 5th century AD. This begs the question who were the lancers and what did they look like?