Tuesday, 28 April 2020

The Zanj


Following the completion of the Arab restoration project, the homeless elements that remained unused seemed to cry out for useful employment. There were plenty of archers, cavalry and camelry. My first thought, these could become the core of a Qaramita army, however, to do this would require a substantial order of camel mounted troops. Thinking further, the four elements of Zanj were made for the Abbasid and an army of Zanj (III/50) would prove to be a better option.

The great Zanj Rebellion was carried out for the most part by African slaves with cavalry and leaders coming from the Arab tribes. The slaves could easily be converted from the large collection of Dervishes in my collection, these have a large contingent of Hadendoa.


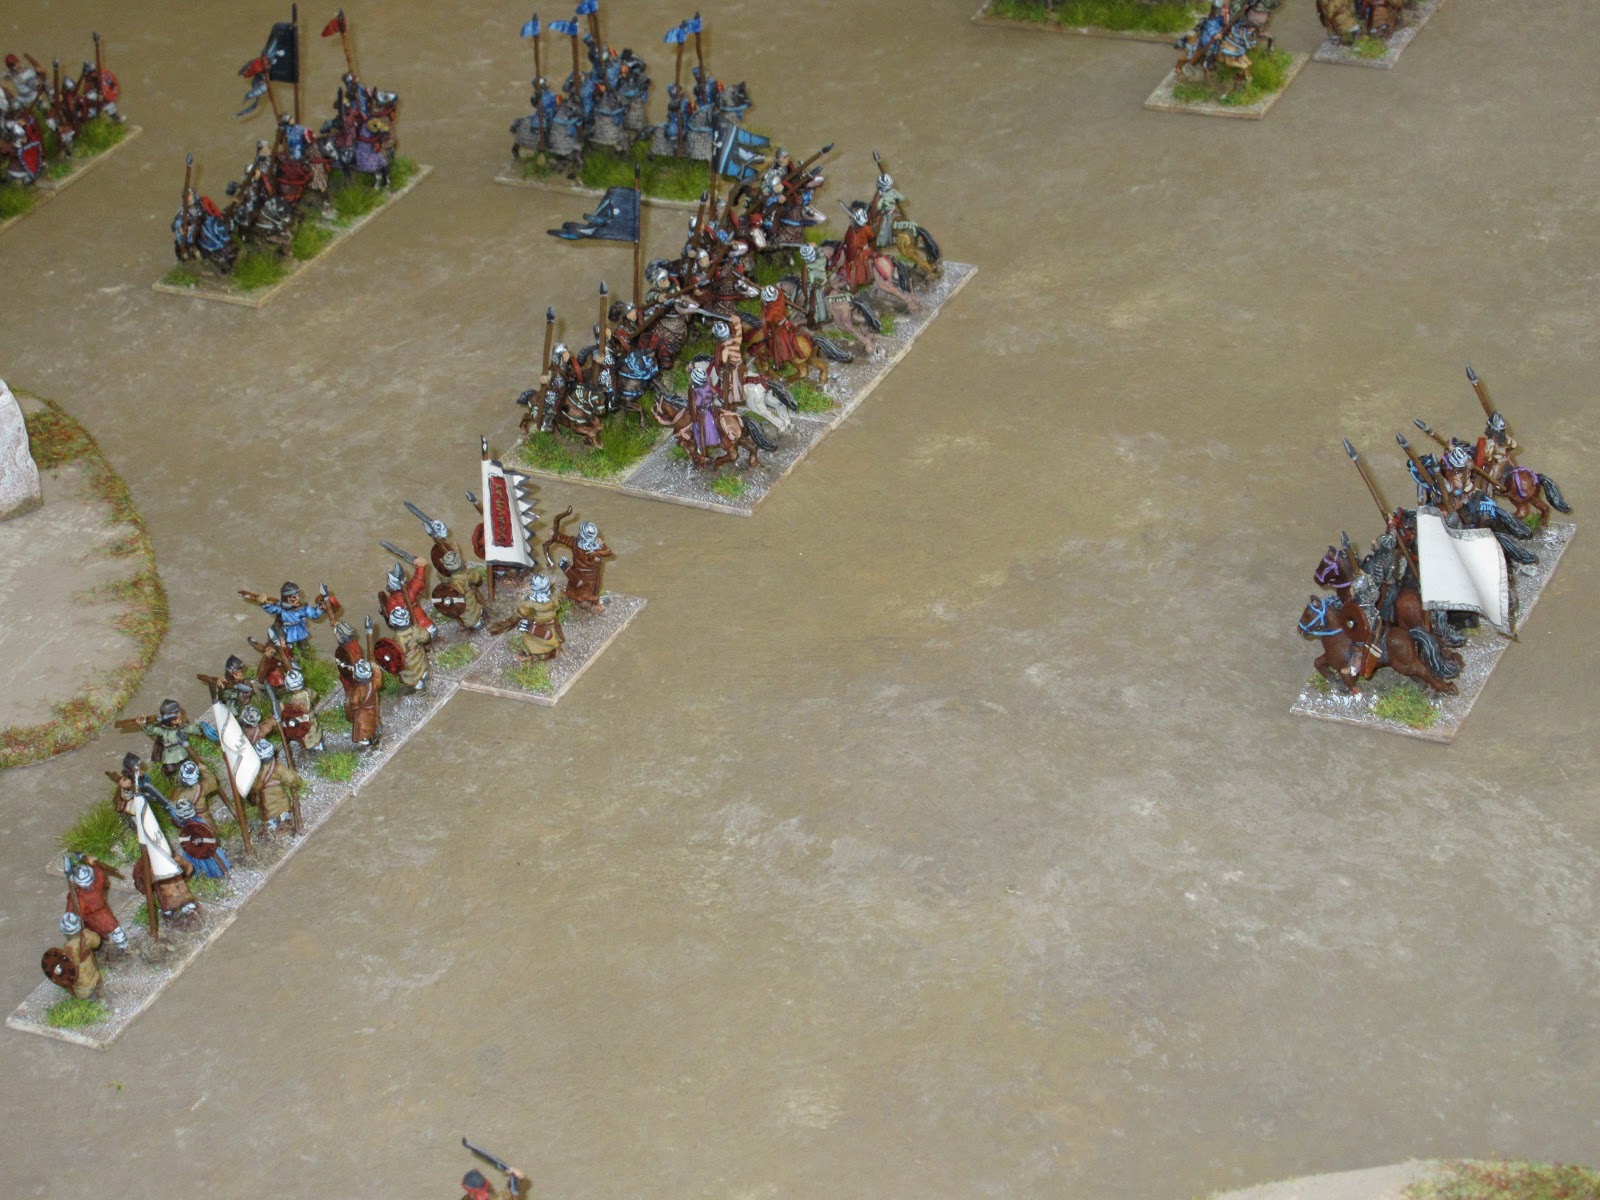
To make these, the slave troops would need a different hair style, or wear a turban or head band. The troops selected are seen in photo one and in the foreground are two boxes brimming with Sudanese and Hadendoa.

Aside from the Hadendoa the Sudanese figures would serve for the leaders and archers are extra Biblical Nubians. The spoon shaped swords were trimmed to become the standard saif model and trimming the hair-do would make room for a turban or headband.  


By the end of the week, the army should be completed and with photos posted to the blog.

Between painting, I have been working on a variant set for DBA3 to simulate the amphibious nature of the conflict. Before posting these to the blog, I will complete a timeline of events to give readers a sense of this unusual and long conflict.


01- 05- 2020

The Zanj in battle array.

In the forward rank are the formidable swordsmen (4Bd) supported by archers (3Bw). On the left of them are the skirmishers (Ps) and to their rear, the Zanj horde (5Hd) and positioned on the opposite flank are the tribal Bedouin light horse (LH) supporting the rebellion. In centre are the command elements in three options; Cv, 4Bd or 3Bd.


Next week, the timeline of the Zanj revolt.

Wednesday, 15 April 2020

East Romans vs. the Hamdanid


Raiding parties had become a perennial occurrence for the Byzantine Empire and by the mid-10th century, the Bedouin felt emboldened to strike deeper into the Anatolian plain. As general, Nicephorus Phokas revitalised the East Roman army well enough to not only counter the raids but undertake punitive expeditions into the heart of the emirates of Aleppo and Mosul.  

Game one
Pursuing one such raiding party, Nicephorus sent a flying column to block its passage through the Taurus mountains. Traversing the Taurus mountains, Bedouin scouts reported Romans were blocking their path.
Despite the narrowness of the terrain, the Bedouin commander deployed infantry on both flanks with a screen of light cavalry in centre. Behind this line, heavy and light cavalry were positioned as a reserve.


The opening moves by the Bedouin fell foul to some miscommunication leaving the right wing to move forward unsupported. The infantry of the right wing quickly took casualties as the East Romans counter attacked with such rapidity not seen before.


The Dailami were first to fall leaving the hills on the right in East Roman hands. Roman cavalry charged the Bedouin spear and overwhelmed a number of units.


In an effort to counter balance the situation on the right, the Bedouin commander ordered units on the left and centre to engage the Romans. The effort gathered little momentum. Seeing the right wing broken, the Bedouin fled leaving their plunder behind. Score 8 – 1 for the Nikephorian Byzantine.  


Nikephorian Byzantine
2 x general (Cv), 8 x kavaillaroi (Cv), 2 x light horse (LH), 2 x Klibanophoroi (6Kn), 6 x skoutatoi (8Bw), 2 x Rus auxilia (3Ax), 2 x archer (Ps).
The Emir of Aleppo
2 x general (Cv), 2 x lancer (Cv), 8 x Arabitai (LH), 2 x Dailami (4Ax), 8 x thughur (Sp), 2 x archer (Ps).


Game two
With the East Roman army fully occupied with the Emir of Aleppo, the Emir of Mosul sent his own raiding party into former Armenian land. Gathering his forces, the Strategos moved to intercept the Bedouin before they could cross the frontier. To his surprise, the Bedouin were arrayed for battle with infantry in their centre, the Bedouin light horse on the left and Kurdish allies on the right.


The East Romans led with their right wing with the cavalry (Klibanophoroi) of the centre moving in echelon behind. The Arabitai did not stand their ground but moved away exposing a second line further back.  
Hesitation struck as the East Romans found themselves outnumbered and their flank threatened.


The hesitation was an invitation that the Bedouin gladly accepted. The ensuing clash of proved devastating for the East Romans leaving survivors to recover their wits as they fell back on their reserve formation. This had a knock-on effect as Cavalry formations in centre now ground to a halt leaving the Strategos to shift his effort elsewhere.


It was at this moment; the Kurds decided to demonstrate their prowess and charge the East Roman cavalry with the shock sending them back on their second line. The situation became desperate as East Roman were quickly suffering casualties on both wings. To relieve the pressure, the Strategos ordered the infantry forward.


In less than an hour of combat, both wings of the East Roman army were neutralised and the final indignity was the loss of a unit of Klibanophoroi to Kurdish bowmen leaving a flummoxed Strategos to call a retreat. Score 8 –1 Dynastic Bedouin.


Nikephorian Byzantine
2 x general (Cv), 8 x kavaillaroi (Cv), 2 x light horse (LH), 2 x Klibanophoroi (6Kn), 6 x skoutatoi (8Bw), 2 x Rus auxilia (3Ax), 2 x archer (Ps).
The Emir of Mosul
2 x general (Cv), 2 x lancer (Cv), 8 x Arabitai (LH), 4 x thughur (Sp), 2 x archer (Ps) plus Kurdish allies: 4 x cavalry (3Kn), 2 x archers (3Bw).

Saturday, 7 March 2020

Refurbishing the Arab Collection


The Task
Several years ago, the Dark Age project was expanded to include a number of Muslim armies, Fatamid, Bagdad Buyid, North African to name a few. In my enthusiasm I painted ten in quick tempo and looking back at recent photos decided to re-do them with a bit more care.

As we play more double size commands, I decided to consolidate the Muslim collection as the principle enemies of the Nikephorian Byzantine, the Fatamid, Dynastic Bedouin and the Iqshidid Egyptian. 


Clothing would be given a dark base colour and highlighted in a lighter shade, dark blue – light blue, dark green – light green and so on. The turbans, painted with a bit more care, have more folds, the clothing colours have better eye appeal as do the archers. Colour schemes and banners set apart the three main adversaries and this is explained below.

The Fatamid
Clothing - All turbans have a colour which is also found as a topcoat for another miniature and these are red, blue, and two shades of brown. The same colour selection is used for the shields with a few painted with a horizontal bar painted in an off white or cream.

Banners – From D. Nicolle’s Medieval Warfare Source Book, volume II, the Fatamid had green and yellow flags in a variety of size and shapes. Further searching I found it was not uncommon to have quotations from the Koran painted on the banner. Inscription will be done in gold or white.


Second on the list are the Dynastic Bedouin, specifically, the Emirate of Aleppo. These took less time to paint and were a joy to do.

The Dynastic Bedouin
Clothing – These differed somewhat from the Fatamid; turbans would be mostly white with a few tan coloured in between, Topcoats had fewer brown, but more red, blue and purple. I reasoned the brighter colours would be prevalent among the settled inhabitants. This also can be seen among the shield colours.

Banners – These would be of similar size and shape but basic colour would be an off-white or cream. A dark vertical bar would have text painted is silver or white. Kurdish allies would have similar flags, but painted red.


Useful Sources
Armies of the Dark Ages 600 – 1066, Ian Heath, 1980
Medieval Warfare Source Book, David Nicolle, 1986
Saracenic Heraldry, Leo Aryeh Mayer, 1933


The Tulunid/Iqshidid Egyptian (29-03-2020)

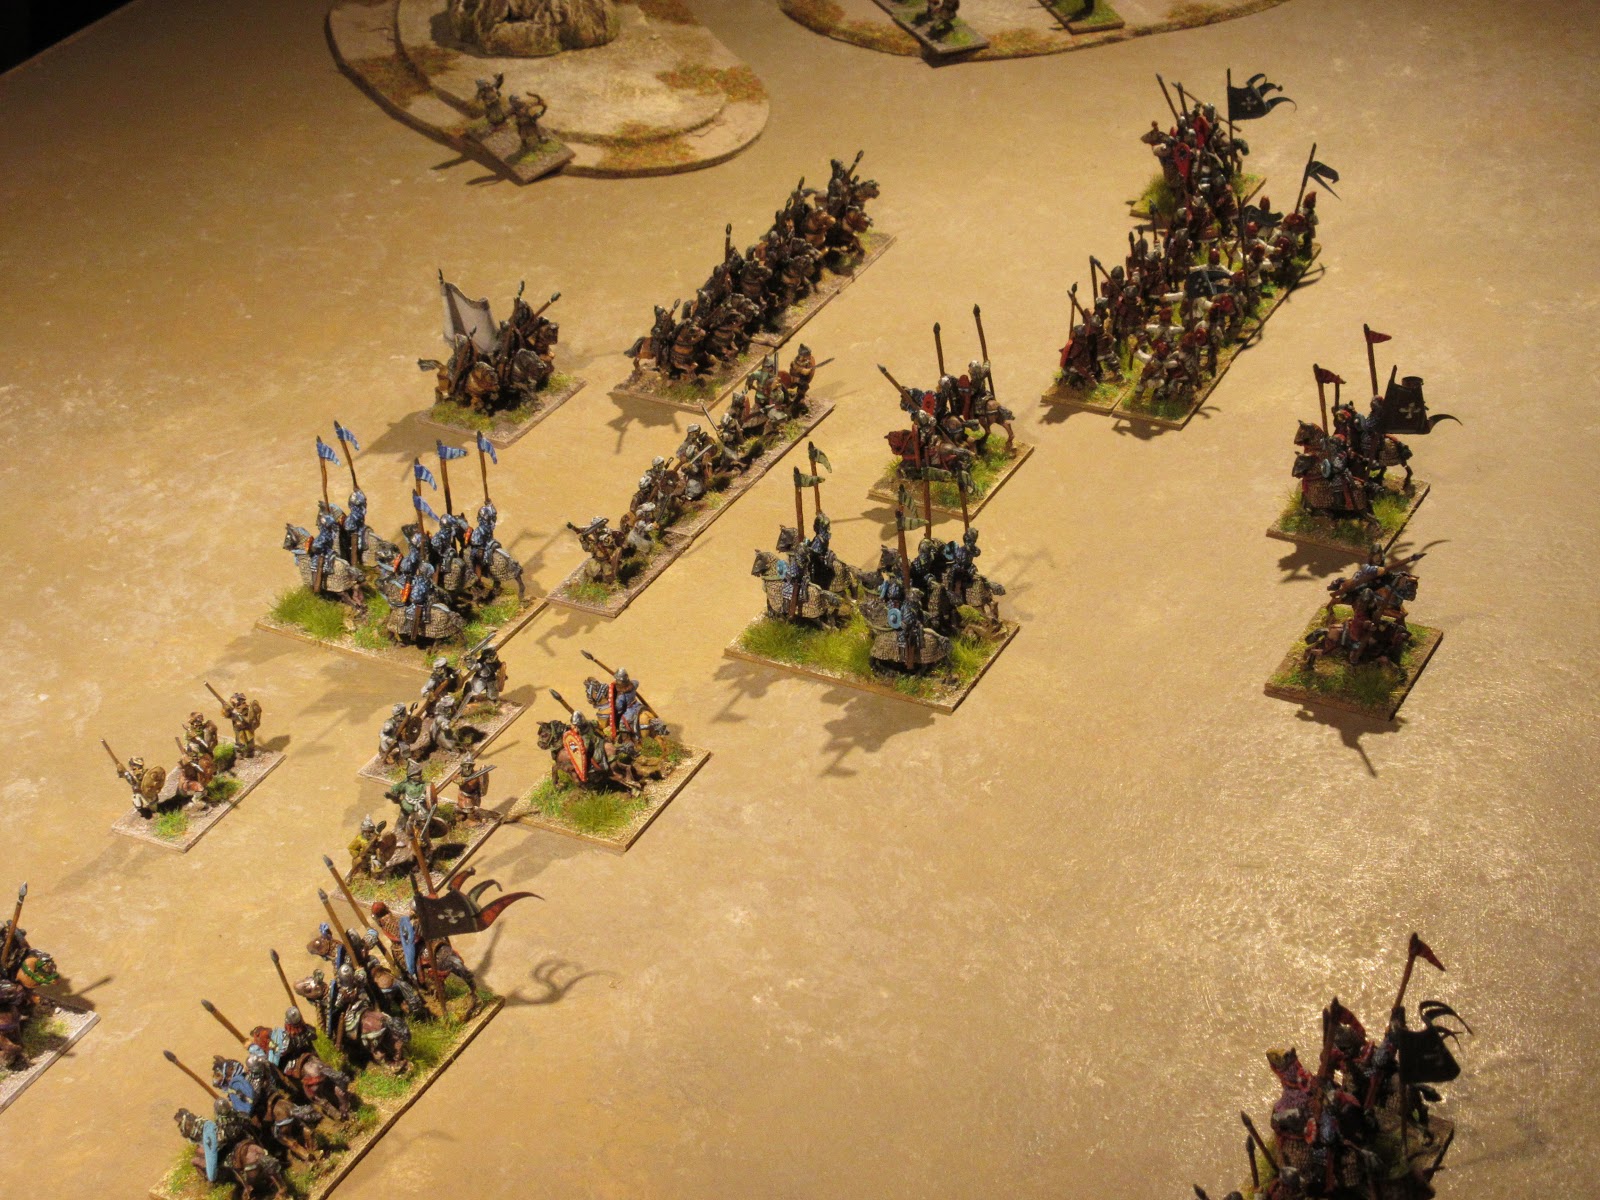
The Tulunid/Iqshidid are next in the queue. Photo one is an overview of the elements collected for this army. All the infantry will be rebased to improve the distribution of poses among the blade and bow. Infantry on the left of the photo will have their javelins replaced with spears. At their rear are two elements of cavalry which will form three light horse leaving the Ghulam cavalry the only elements untouched.


Photo two displays the ravages of bases lost with the figures now repositioned on their new bases. Next step is to replace javelin with spear.  


Clothing – Having rebelled against the Abbasid Caliphate, I had doubts about using black for their clothing and as a minor concession, the turbans would be painted mostly dark colours with a few in white. Topcoats would follow a similar palette as the Fatamid, red, blue and two shades of brown.

Banners – Most likely banners would have remained unchanged from the Abbasid model and colour. Therefore, banners are black with some colour sections and/or tails with gold lettering. If not accurate at least they would look cool.

The Egyptians in battle array


Compare the older paint work in this old battle report between the Tulunid Egyptian and the Abbasid.


The Abbasid (07-04-2020)

These complete the refurbishing project. I have lost count of all the turbans I have painted, but the experience was well worth the time. The early figures used as Zanj found their way to one of the three armies and new ones were needed as both ‘a’ and ‘b’ sublist of the Abbasid require them. 

The new Zanj blade are Fuzzy Wuzzy from the Old Glory colonial range. Hair was cut down and filed as were their shields. With small amounts of Milliput I attempted to fashion skull caps which did not work well, but other head gear did and some have dreadlocks. I am pleased with the result and also for the fact that this took one week to complete.

Clothing – Turbans remained black, but topcoats are painted in various shades of red from their original black. The colour may not have been historical but they would look very smart. The same colour scheme was used for the mercenaries and skirmishing troops as well. Mounted units had very little clothing to see as they were covered in chainmail, vambraces and metal leg protection. 

Banners – New flags were made. These remained black, but I added an additional colour to give an accent to the banner. Those for the infantry are a standard shape and large triangular banners were made for the Ghulam cavalry. 


Latest additions 30-09-2021

Nine elements representing the city militias and freebooters have been added to the collection. The figures are a mix of Old Glory Arab and Sudanese Ansar from their colonial range plus a few Essex. The ‘solid’ horde are now on larger bases, 40mm x 40mm, with an additional number of figures. This greatly improves their appearance and some armies, such as the Syrian IV/6c, have both types.


Tuesday, 25 February 2020

Nikephorian Byzantine vs. Iqshidid Egyptian


During the last decade of Iqshidid rule (935 – 969 AD) financial constraints had reduced the number and quality of the army guarding the northern frontier of Syria (al-Sham). By contrast, the Byzantine army experienced a resurgence under the guidance of their future emperor, Nicephorus Phocas. These reforms included the implementation of new formations and weapons, a revision of tactics for both foot and mounted troops and rigorously honed by constant training and drills.  

Game one.

The Iqshidid Egyptians deployed their battle line with spear and sword armed infantry in centre with light troop holding the rocky ground on both flanks. Ghulam cavalry were positioned behind in support and on the far right, the Bedouin light horse. In contrast, the Byzantine positioned all their cavalry as its main battle with the Klibanophoroi taking a central position. Both kavaillaroi wings were supported by an equal number of skoutatoi.


The Egyptians opened battle by bringing forward their skirmish line on the right. The Byzantine replied by moving their own psiloi on the right and brought forward in echelon the kavaillaroi and Klibanophoroi. 


The Byzantine kavaillaroi charged first followed by the Klibanophoroi. The Egyptian line buckled but held. Both sides lost casualties, but the Byzantine were gaining ground. To quicken the pace, the skoutatoi supporting the right wing were moved forward.


The supporting skoutatoi was fortuitous as the loss of a few kavaillaroi now exposed the Ghulam cavalry to a withering fire. A constant shower of arrows sent enemy cavalry scrambling safety. 


Keeping the initiative, the Strategos reformed his kavaillaroi for the final phase and moved forward the skoutatoi on the left flank. The situation was now desperate for the Egyptians as Byzantine skoutatoi loosed their arrows with devastating effect on both infantry and remnant units of cavalry. finally sending the Egyptians in rout.


Score 8 – 4 Nikephorian Byzantine.


Game two
Pursuing the Egyptians further south, the Strategos found the enemy prepared for battle. This time the cavalry took a centre position with infantry forming on either flank. The Byzantine deployed in standard formation, but due to the constricting nature of the terrain kept units close together. To match the enemy line, the Rus and psiloi were positioned on the far left using the rocky ground for cover.


The charge of the Byzantine kavaillaroi and Klibanophoroi shattered the first line of Ghulam cavalry. Reforming the kavaillaroi allowed the skoutatoi time to take up their new position to support their next charge. Further to the right of the Byzantine line, other kavaillaroi pursued enemy light troops into the rocky ground eventually cutting most down.


Harassed by archery fire the Egyptian foot on the right made several attempts to close with the skoutatoi. Unfortunately, their effort was in vain as the deafening sound of a thousand hooves could be heard signalling the end.

Score 8 - 4 Nikephorian Byzantine.


The Nikephorian Byzantine continue this series with battles planned against the Dynastic Bedouin (Emirate of Aleppo) and the Fatamid Egyptian.

Thursday, 6 February 2020

Consular Rome vs. Numidia


Following the death of King Micipsa in 118 BC, the succession to the throne was intended to be jointly held by Jugurtha and Micipsa’s  two sons Hiempsal and Adherbal. Not wishing to share the throne Jugurtha had Hiempsal killed and forced Adherbal to an open battle. Defeated, Adherbal fled to Rome for help to which Rome sent emissaries to mediate. A decision was reached resulting in the division of the kingdom into two equal parts.

In 112 BC, Jugurtha resumed his war with Adherbal finally besieging him in his capital of Cirta. Rome again sent emissaries but Jugurtha postponed the diplomatic talks until Cirta was captured. Jugurtha succeeded, however, seizure of the city had cost the lives of many of its residents including the Italians. Their deaths were unfortunate as it brought Jugurtha in direct conflict with Rome which they responded by sending an army under the command of Lucius Calpurnius Bestia. 

Game one
Jugurtha took up a defensive position with hills and wood protecting his flanks. Bestia deployed his troops in a traditional manner to confront the mobile Numidians; hastati and principes in the first line flanked by the allied troops with reserve troops behind each wing.


Seeing little activity from the Numidians, Bestia moved his right wing forward to pin the enemy’s close formation troops against the wood and ordered the left wing to seize the hill near the enemy's centre. From the position on the heights Roman infantry could pin Numidian reserves while the main assault took place. 


The lack of activity from the Numidian proved deceptive as their light cavalry attacked the supporting allied cavalry enabling a small number of Numidian horse to encircle the Roman right wing inflicting severe casualties.
Meanwhile, the battle for the hill became hotly contested with Rome gaining little ground; both sides suffered heavy casualties 


Allied cavalry recovered well enough to send the Numidian light horse in retreat and the timely support of reserve allied troops neutralised the threat to the Roman right wing. In centre, velites kept the Numidian elephants occupied while the triarii added their weight to the battle to tip the balance. Jugurtha called for a general retreat, giving Rome a costly victory (8 - 6).


Game two
Pursuing Jugurtha further south, Bestia found the Numidian army amongst similar terrain. Numidian light troops covered the slopes of the hills on their left and the woods to their right. Deployed as before, Bestia would send his allied infantry to clear the enemy light troops before committing the centre.


To Bestia’s surprise, the Numidian centre opened to allow the elephants to move forward to engage in battle.


The elephants successfully pushed the centre line back but Roman hastati and principes easily dispersed their opposition; both battle lines quickly became disordered as units became isolated. Dust clouds could be seen in the distance signifying the approach of Numidian cavalry. 


The situation became desperate as Roman casualties quickly mounted (6 – 2), not only did Numidian cavalry threaten both flanks but the elephants were causing serious damage in the centre.


The Numidian whirlwind slowly died (low pips) giving Rome a brief respite to redress their formations; reserve troops strengthened the centre giving both flanks time to fend off the Numidian cavalry. Having seized the initiative, Numidian casualties began to steadily mount. After a hotly contested battle lasting four hours (16 turns), the Numidian host left the field giving Rome a second Pyrrhic victory, 8 – 7.


Historical note.
Jugurtha later surrendered to Lucius Calpurnius Bestia and negotiated a favourable peace treaty. Bestia's rivals in the Roman senate were not pleased and named a new consul, Metellus, to continue the conflict. Equally unsuccessful, it would take the efforts of a newly elected Gaius Marius to set in motion the capture of Jugurtha, earning him a triumph in Rome.

Consular Army
2 x General (Cv), 2 x equites (Cv), 8 x hastati/principes (4Bd), 4 x triarii (Sp), 4 x allies (3/4Ax), 4 x velites (Ps).

Numidian Army
2 x general (Cv), 8 x horsemen (LH), 8 x javelinmen (Ps), 2 x elephant (El), 4 x Roman trained javelinmen (4Ax),

Wednesday, 15 January 2020

Umayyad vs. Alan


Not all the people known as Alani moved westward during the period of the great migration. Those Alani who settled in the northern Caucuses sought a life as farmers and cattle herders, nonetheless, in emergencies they could muster a cavalry force of nearly 30,000 according to Arab sources. As early as 715 AD, the Umayyad invaded the Kingdom of the Alani only to be repelled. Later invasions by the Umayyad and equally unsuccessful, encountered the Khazar allied with the Alani.


Game one
Awaiting the arrival of the Alani, the Umayyad positioned its infantry in centre with the bulk of its cavalry deployed on the open right flank. Hills secured the left flank and here, archers supported by cavalry were placed. The approach of dust clouds finally settled revealing the bulk of their army facing the Umayyad right flank forcing their general to revise his plans.


To meed the impending threat, the Umayyad general shifted his reserve formations from its position on the left flank to the right. No sooner were the orders given the Alani were seen moving forward. 


The situation on the Umayyad right becam desperate as new lines were adjusted to meet the Alani attack. In the maelstrom of charge and countrecharge of lancers and horse archers, the Umayyad subordinate general was severely wounded and carried off the field. A panic gripped the Umayyad right forcing the Umayyad commander no alternative but to call a retreat. Score 8 - 2 for the Alani.  


Game two
With reinforcements, the Umayyad continued their campaign north of the Caucuses and found the Alani prepared for a fight. A light cavalry screen shielding their heavy lancers positioned in a second line and meet the Alani deployment, Umayyad spearmen, supported by archers formed the Umayyad centre with the bulk of the cavalry forming a reserve. Smaller detachments of cavalry protected the extreme left and right flank.


Umayyad infantry line right wheeled so as to approach the enemy better and have the left less exposed to an Alani flank attack. On the Umayyad right, Jund cavalry easily dispersed Alani light horse but the threat on the left flank was now critical. 


Moving relentlessly forward, the Umayyad infantry drove the Alani light cavalry back and seized the rough ground to threaten the Alani position. This forced the Alani to commit their lancers to action. 


Casualties fell heavily on both sides, yet both commanders were determined to battle despite the cost. The anticipated Alani attack on the enemy’s left flank however, could not gain ground and pressure from the Umayyad right forced the Alani commander to call for general retreat. Score 8 – 7 for the Umayyad


Both armies are doubled in size as single commands (24 elements).
Umayyad
1 x general (Cv), 3 x Jund cavalry (Cv), 3 x spearmen (Sp), 2 x archers (3Bw), 1 x archer (Ps), 2 x Bedouin and Ghazis light horse (LH).
Alani
1 x general (3Kn), 3 x nobles (Kn), 7 x horse archers (LH), 1 x camp follower archers (Ps).

Tuesday, 7 January 2020

Consular Rome vs. Iberians

Following Rome’s victory over Carthage, ending the Second Punic War, the senate reviewed its overseas policies with respect to Hispania. During the conflict with Carthage, Rome successfully invaded the peninsula at two areas which later to became the provinces of Hispania Ulterior and Hispania Citerior. Following the war, the process of Romanization of the Iberian tribes would take nearly two centuries to reach its completion during the reign of emperor Augustus. Hispania would prove a vital testing ground for tactics and reforms of the military. 

 
Game one
After a period of capturing towns and villages, Rome found the Iberian horde offering battle positioned between two steep hills. A village split their line in two and this offered the consul an opportunity to defeat the enemy in detail. Holding the Iberian right wing back, Rome would focus its attention on the Iberian left wing, first clearing the hill of its defenders to take advantage of an exposed flank. The Iberians had other plans and caught Rome off guard with the rapidity of their assault on the Roman left. This placed the Roman left-wing scrambling to establish a new defensive line. 


The situation on Rome’s left escalated such that reserve units of triarii and hastate were taken from the main assault. This kept the Iberians in check but had the unfortunate result to weaken the main assault easily held back by the Iberian centre. Losses on both sides were high but seeing no opportunity to turn events around, the consul called for a retreat.  Score 9 – 8 for Iberia.


Game two
Following their victory, the Iberians pursued Rome forcing them to give battle. Near an abandon village, Rome deployed in its familiar formation with legions in centre and on its flanks, the allied infantry. 


The Iberians began the battle moving its right flank against the hill position held by velites and allied troops. Outnumbered, it was not long before the hill position had been swept clear of its defenders giving the Iberians a view of an exposed Roman left. 


Seeing the rapid assault on the hill position, the consul ordered a rapid assault on the Iberian centre. Reserve units of triarii were repositioned to deal with the Iberian threat from the hill, but as the Iberians were busy plundering the Roman dead the threat did not seem imminent. 


The Roman assault on the Iberian centre quickly gained ground as the hastati and principes cut through their line. Seeing the collapse of his centre, the Iberian warlord called for a retreat. The battle proved costly to both sides, but Rome held the field. Score 8 - 7 for Rome


Both armies are double sized single commands.
Polybian Roman
1 x General (Cv), 1 x equites (Cv), 4 x hastate/principes (4Bd), 2 x triarii (Sp), 2 x allies (3/4Ax), 2 x velites (Ps).
Iberian
1 x general (Cv), 1 x horsemen (LH), 6 x scutarii (3/4Ax), 4 x caetrati (Ps)