In 12 BC, Drusus launched a major campaign against the Germanic tribes bordering the North Sea, conquering the Batavi, Frisii and the Chauci near the mouth of the Weser. He continued his campaign in 11 BC, to conquer the Usipetes and the Marsi and in the following year, the Chatti and the resurgent Sicambri. Upon reaching the Elbe River however, further campaigns were cut short in the summer of 9 BC by his death resulting from a riding accident.
Terrain:
The Batavi
defend their littoral homeland, giving the defender a waterway, two marsh, one
wood and a BUA (hamlet).
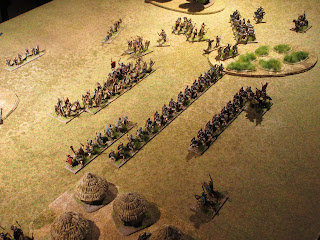
Game one
Deployed in
dense columns, the Batavi army positioned itself on a stretch of ground between
marsh and woods. To meet the Batavi, the legion formed the centre and, on its
flanks, the auxilia. More auxilia infantry and the cavalry extended the line to
overlap the Batavi army.
Approaching in two groups, the Batavi on the left soon came under heavy ballistae fire.
The unrelenting hail of bolts forced the left wing to change its course in an attempt to engage the artillery.
Stripped of their supporting left wing, the main body of Batavi continued their advance, spurred on by the presence of their warlord. Unfortunately, the Batavi could make no impression against the legion and the left wing likewise failed in their assault against the ballistae. Denied any hope of a victory, the Batavi were routed when Roman equites struck the open flank of the main body. Rome 8 – 2
Game two
A
subsequent battle found the Batavi deployed in three groups, between the marsh
and village. The far-right was personally led by their warlord, giving command
of the centre and left flank, to the sub-general.
Rome
deployed in its standard tactical formation.
The Batavi right struck first, moving its skirmishers to clear the wood ahead. With their warlord present, the Batavi warriors moved to engage the auxilia positioned on that flank.
The situation on the Roman left reached a critical point when half the auxilia infantry and supporting equites were routed, leaving the ballistae unprotected. To deal first with the threat to his left, the commander halted the advance of the legion to send reserve cohorts to deal with the situation.
Undeterred by the presence of Roman cavalry, the Batavi continued their destruction of the Roman left
The danger to the left contained, the legion resumed its march against the Batavi centre.
However, the Batavi struck first. Moving in two groups, the battle in centre became hotly contested, both sides nearing a breaking point. Standing firm, the legion held its ground to deny the Batavi their chance of a victory. Rome 9 – 6.
Observations
The option for a littoral landing was not employed, Rome could easily counter its use. This left a head on clash with the legion the only option for the Batavi. The dense formation of ‘heroes’, invaluable in melee, unfortunately slowed the tempo of attack. What followed, developed into a Roman killing exercise.
Game two offered a greater challenge. Under direct control of their warlord, the Batavi right overran the Roman flank, delaying the main assault by the legion. The situation eventually reached a critical point when the Batavi destroyed, auxilia, cavalry and artillery in rapid succession. At this point, things did not move smoothly for Rome, as further casualties in centre gave Rome a narrow advantage of 7 – 6, nearing the end of turn seven. With a pip score of one, Roman equites joined an existing melee to help tip the balance in favour of Rome.
The
Batavi
1 x general
(Cv), 1 x sub-general (3Wb), 4 x heroes (4Wb), 14 x warriors (3Wb), 4 x
skirmishers (Ps).
Early
Imperial Roman
2 x General
(Cv), 2 x equites (Cv), 8 x legionnaires (4Bd), 6 x auxilia infantry (4Ax), 2 x
archers (4Bw), 2 x light horse (LH), 2 x artillery (Art).


No comments:
Post a Comment