Tuesday, 25 July 2023

Roman Tour – the Sarmatae

Though Domitian’s reign lasted fifteen years, it is described as ‘ruthless but efficient’ by Alain Gowling in his review, The Emperor Domitian. Military campaigns were defensive in nature leading to the expansion of the Limes Germanicus. Nonetheless, every emperor pursues some military operation to strengthen their reign and in 83AD, a campaign against the Chatti earned him the title of Germanicus.  The following year Domitian ended Agricola’s campaign in Britain, reportedly for economic reasons, likely to curtail the governor’s popularity surpassing his own. A few years later, the war against the Dacians required troops to be withdrawn from various parts of the empire, however, the threat also involved additional players, the Suebi and Sarmatian. 

Striking early to raid northern Illyria, Sarmatian raiders attempted to recross the Danube. A legion and auxilia cavalry have been sent to intercept the raiders before they reach the Danube.    


Game one

Rome positioned its legion and auxilia in two wings with the right positioned behind the intervening fields. The Sarmatae deployed the heavy cavalry in extended line matching the length of the Roman infantry. Sarmatae skirmishers are placed near the wood ready to support the cavalry.

The Sarmatae cavalry advance easily moved through the fields, however, the line was no longer contiguous but formed three lines in echelon with the right leading.

Roman equites on the right spurred forward to harass the enemy cavalry on the left, auxilia infantry on the left were given a similar objective and confront the Sarmatae light troops.

Both Sarmatian flanks under pressure required assistance. Stripping the centre of troops did ease the pressure on both flanks, but the main assault on the Roman line had been delayed. The hesitation was caught by Rome who launched a counter attack against the enemy right.

Caught off balance, the Sarmatae were forced to take a decisive action and gathered as many uncommitted cavalry to charge the Roman centre.

The stiff resistance by Roman infantry was unexpected and took a heavy toll on the Sarmatae cavalry to include the loss of their warlord causing the Sarmatians to rout. Rome 5+g – 0.


Game two

Renewing the fight, Rome deployed in a similar manner as before, the Sarmatae however, sent its skirmishers to infiltrate the wood on the Roman right.  

The intervening fields offered little obstacle as the Sarmatian cavalry, forming two wings, approached the Roman line at a steady pace. Sarmatian skirmishers successfully negotiated the woods fulfilling their objective, to harass the supporting auxilia.

The Sarmatian cavalry levelled their heavy lances charged the Roman line. As if struck by lightning, the Roman right disappeared under the hooves of the Sarmatian cavalry. The loss of the legion was immediately felt, sending the survivors to rout. Sarmatae 4 – 1.


Observation

Both battles were fought in relatively open terrain. This would normally be a death sentence for Rome, but a proactive Roman could turn events to his/her advantage. Both games, each side profited from favourable pip scores and a proactive Rome managed a victory in six turns. Game two, a passive Rome lost the battle in four.

 Early Imperial Roman

1 x General (Cv), 1 x equites (Cv), 4 x legionnaires (4Bd), 3 x auxilia infantry (4Ax), 1 x archers (4Bw or Ps), 1 x light horse (LH), 1 x artillery (Art).

Sarmatae

1 x General (3Kn), 7 x noble cavalry (3Kn), 1 x scouts (LH), 3 x skirmishing archers (Ps).

Friday, 14 July 2023

Collision Course – Late Medieval era

By way of an introduction to the collision course variant for Jan, I had two identical Late Medieval German armies meet on a relatively open arable land, consisting of a small hamlet positioned along a road and woods. Readers may recall the ‘fine-tuning’ of the German lists I designed to reflect the feudal, city state, clerical and mercenary options for 1440 - 1518. Follow the link to read:  

Basically, the number of knights in wedge formation is reduced to one, retinue pikemen, classed as solid horde with nine figures placed on 40mm x 40mm bases, are present in both armies.


Battle

The vanguard and the first element of the main body of both forces are deployed on the table.

Four turns pass as both forces move out of column to line, one side producing three lines in echelon, the other reposition troops in two divisions.  


Another hour (4 turns) is needed to shuffle battle lines to charge distance. One side has wheeled its left division forcing the enemy to conform. The attack is supported by artillery and here, crossbowmen effectively fend off an attack by enemy knights.

As the lines close, both knights in wedge formation destroy enemy pike as they pass one another.   

Quick off the mark, a subsequent charge by supporting knights destroy the remaining pike to tip the balance and win the contest.


In retrospect

Both armies comprise a mix of troop types requiring at least four turns to shake columns into line and anther four to shuffle the lines to a point of no return. Once contact is made, a few turns are needed to reach a win.    

Having a perfect plan is nice, but be prepared for the unexpected. The sequence of elements within each column may cause delays as it moves from column to line as would the proximity of columns would cause a shortage of space.

Another cause of worry is the third column. A high score may bring the column ahead of plan or worse, consistent low pip scores, may delay its arrival.

Thursday, 6 July 2023

Roman Tour - Meroitic Kushite

During the reign of Caesar Augustus, the conquest of Egypt gained for Rome an immense wealth and source of grain. It also had to contend with Meroitic raids on its southern frontier. In response, the Roman governor of Egypt, Publius Petronius, invaded Nubia and after a three-year long campaign a peace treaty between Augustus and Queen Amanirenas was made. Note, sourcing Gaius Petronius online, one can find a map illustrating the area of campaign in Nubia. 

From Augustus to the late 2nd century, a lucrative trade developed between the province of Egypt and Nubia and permanent garrisons were established at the First Cataract, Philae and Syene to protect the vital route. The region remained relatively quiet for the next two centuries. 

Game one.

Rome secured a gentle hill for its centre on a gentle hill and holding the rocky ground on its left were the auxilia. The Kushite horde advanced on the Roman centre ignoring the legion to its left.

The advance of the legion altered Kushite plans as troops were sent to face the threat on its left. 

The assault by the legion floundered offering the Kushite a moment to pursue its original plan and attack the Roman centre. 

The legion regained its second wind to inflict casualties among the tribesmen. The assault on the hill lacked the desired result prompting the Nubian general to call a general retreat. Rome 4 – 2.


Game two.

The Kushite battle array stretched nearly 750 paces prompting Rome to do likewise. Rome, forming two wings, positioned the legion on the right and auxilia with artillery on the left.

The Roman advanced against the enemy line confident of a second victory. 


Unfortunately, the Kushites were equally confident and proceeded to deal the legion a severe defeat. Kushites 4 – 0


Observations.

The Kushites had phenomenal good fortune to score well on successive combats against the legion. The loss of the auxilia on the far right was the icing on the cake. Romani ite domum.

Early Imperial Roman

1 x General (Cv), 1 x equites (Cv), 4 x legionnaires (4Bd), 3 x auxilia infantry (4Ax), 1 x archers (4Bw or Ps), 1 x light horse (LH), 1 x artillery (Art).

Meroitic Kushite

1 x General (Cv), 1 x cavalry (Cv), 2 x Meroitic archers (3Bw), 5 x tribal spearmen (Sp), 2 x tribal swordmen (4Bd), 1 x herdsmen with bows (Ps).


Recommended Reading

Strabo https://en.wikipedia.org/wiki/Strabo

Gaius Petronius https://en.wikipedia.org/wiki/Gaius_Petronius

Thursday, 29 June 2023

Roman Tour – Parthia

After the disaster at Carrhae in 53 BC, conflict between Rome and Parthia remained relatively quiet, with each becoming involved in dynastic upheavals along their adjoining frontier. The major campaigns of the second century, that of Trajan in 115 – 117 AD and the war of 161 – 166 AD would see the capture and sack of the Parthian capital of Ctesiphon plus the annexation of territories in Mesopotamia. Rome’s final campaign of 216 – 217 AD proved unsuccessful, but would see the downfall of the Parthian Empire eight years later. 

Game one

Preparing to meet the Parthian, Rome deployed in its standard formation of the legion in centre, auxilia on both flanks with the cavalry in forming a second line. Rome’s left, protected by woods, would be the target of Parthia’s attack to be carried out by the cataphract. Horse archers would probe for openings on the enemy flank and rear.. 

Confident that artillery and archery would suffice to protect its left, the legion moved forward, closing close the space and denying the Parthian any maneuver room. 


 Facing the legion, supporting horse archers failed to make any impression, losing casualties in their attempt, however, the cataphract may just turn the table.

The cataphract rode down the artillery and its supporting auxilia and rather than setting the Romans to panic, soon found themselves surrounded by cavalry and legionnaires, ending the Parthian attack. Rome 5 – 2.


Game two

Rome deployed and awaited the enemy and soon noted the Parthian would set its main assault against the open flank. 

Scrambling to reposition troops, Rome took advantage of the indecision by the Parthian to increase its pace (both sides had low pip scores for two turns).

The situation on the Roman right became desperate as horse archers pinned Roman right wing leaving Roman troops in the centre to face the onslaught by the Parthian cataphract. 

Along the Roman front, breaches were to be seen as Roman troops succumbed to the Parthian assault. Realising the situation could not be retrieved, the Roman general signalled a retreat. Parthia 4 – 1.


Observations

In game two, Rome confident of repeating a second success, positioned its troops as before. That confidence was swept away as it scrambled to defend its right flank. Sending troops from one flank to the opposite flank is not the best way to expend pips.  

Early Imperial Roman

1 x General (Cv), 1 x equites (Cv), 4 x legionnaires (4Bd), 3 x auxilia infantry (4Ax), 1 x archers (4Bw or Ps), 1 x light horse (LH), 1 x artillery (Art).

Parthia

1 x General (4Kn), 2 x cataphract (4Kn), 9 x horse archers (LH).

Tuesday, 20 June 2023

Roman Tour – Nomad Arab

The Arab tribes of the pre-Islamic era roamed the arid regions from the southern tip of the Arabia peninsula to the Euphrates River. Those tribes that settled along the trade routes would eventually become the ruling dynasties of many city-states. Other tribes, made their livelihood breeding domestic animals (camels, sheep) and supplemented their wealth by plundering the caravan routes. Both types have their own sub-lists under the Nomad Arab.

Emperor Augustus found the city-states were best able to deal with the tent-dwellers of the eastern frontier, but on rare occasions, a punitive expedition would be equally effective.  

Game one

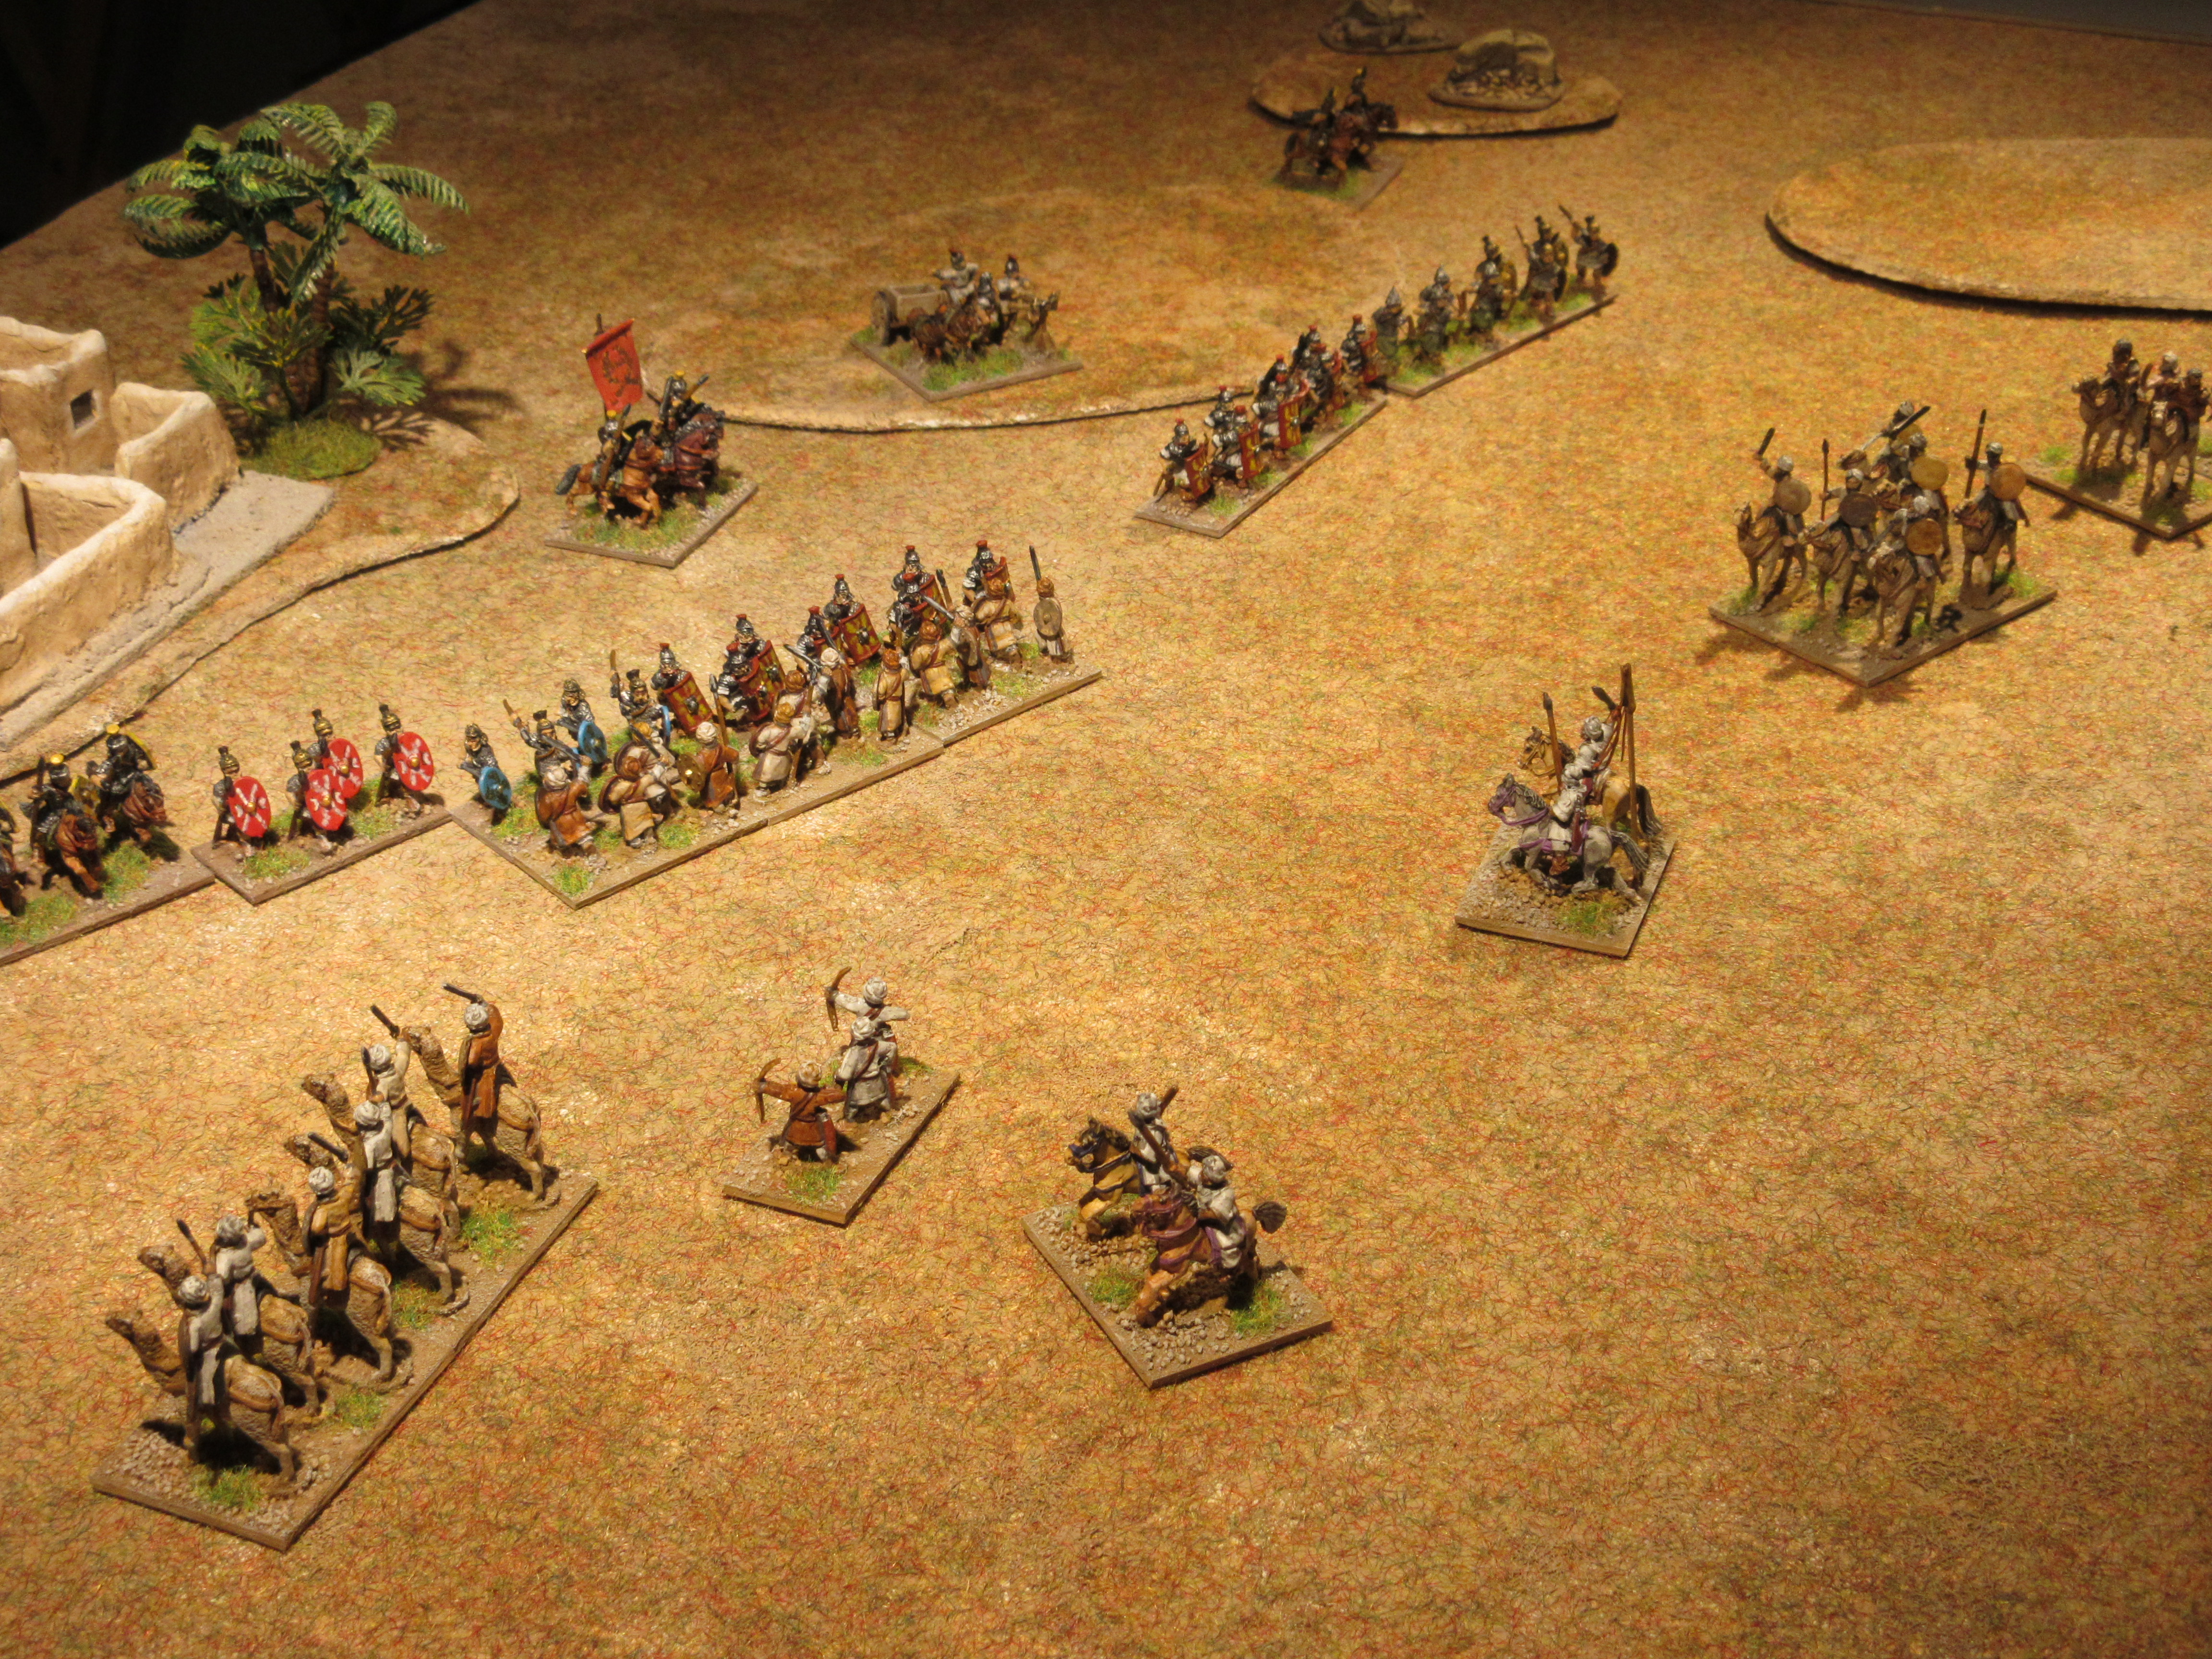
The Roman legion and auxilia formed their line on the open ground between two gentle hills to face the Arab host opposite. Eager to clash with the beardless ones, the Arabs launched its entire camel corps against the Roman left. 


This assault did not have the desired result and after incurring heavy losses among the camel mounted troops and elsewhere, Arab will collapsed. Rome 4 – 0


Game two

Availed of another opportunity, the Arabs revised their deployment. Camel riders were evenly distributed to both flanks and tribal swordsmen were placed in centre to face the legion. 

Rome held its ground and awaited the Arab assault. To avoid the missiles from bold-throwers, the Arab swordsmen drifted toward the Roman right. To pin the Roman left, the Arab right wing made its advance. 

The Arab attack on the Roman left flank proved a feint as the entire column changed direction to support the main assault. This forced troops from the Roman left to follow in pursuit. 

The Roman pursuit proved a mistake as the wily Arab changed direction again to catch their pursuers off guard. The blunder was costly and tallied with those suffered on the right forced the Roman general to call a retreat. Nomad Arab 4 – 0. 


Observation.

In game two, the feigned attack on the Roman left and change of direction was an inspiration delivered by high pip scores. Realising the threat, archery fire proved effective at splitting the Arab column in two offering pursuing Romans an opportunity to catch the head of the Arab column. Mistake.      

Early Imperial Roman

1 x General (Cv), 1 x equites (Cv), 4 x legionnaires (4Bd), 3 x auxilia infantry (4Ax), 1 x archers (Ps), 1 x light horse (LH), 1 x artillery (Art).

Nomad Arab

1 x General (LH), 1 x light horse (LH), 1 x scouts (LCm), 4 x camel riders (Cm), 3 x swordsmen (4Bd), 1 x archers (3Bw), 1 x skirmishers (Ps).
Thursday, 15 June 2023

Roman Tour – the Nabataean

Researching military conflicts between Nabataea and Rome has proved sketchy. From the reign of Augustus to its annexation by Trajan, the Kingdom of Nabataea remained an autonomous client state.

During the reign of Aretas IV Philopatris, who ruled from 9BC to 40 AD, Rome was drawn into the conflict between Aretas and Herod Antipas. The campaign reached Jerusalem in 37 AD, but further military operations were curtailed following the death of Tiberius.  

Succeeding Aretas, Malichus II ruled the Nabataean kingdom until 70 AD and remained loyal to Rome, even sending cavalry and infantry during the Jewish Revolt.

Rabbel II Soter, would become the last ruler of the kingdom, one source suggests a military campaign in 106 AD by the governor of Syria, Cornelius Palma Frontonianus, brought about the annexation as part of the province of Arabia Petraea in 106 AD.

Game one

The Nabataean lengthened their line by positioning two mounted units in the line’s centre. Rome wisely placed its mounted as a second line in reserve.

Rome opened the battle assaulting the Nabataean left flank.

Casualties mounted rapidly among the Nabataean forcing their commander to rashly attack the Roman legion. The effort came too late to prevent the complete collapse of the Nabataean left wing. A retreat was called for. Rome 4 – 3. 


Game two

Both sides deploying similarly as before, but the second battle Rome launched an aggressive attack on the Nabataean centre, led by the legion and supported by the artillery.

Sweeping the opposition away, the situation in centre became critical for the Nabataean general.  


 The fall of the Nabataean banner brought a wave of panic to the Nabataean putting them to flight. Rome 4+g-2.

Observations

The Nabataean were clearly out-matched by Rome lacking sufficient number of troops to meet the legionnaires. Fighting other Arabo-Aramean, Arab marauders or the Parthian would offer a better opportunity for victory.

Early Imperial Roman

1 x General (Cv), 1 x equites (Cv), 4 x legionnaires (4Bd), 3 x auxilia infantry (4Ax), 1 x archers (4Bw or Ps), 1 x light horse (LH), 1 x artillery (Art).

Nabataea

1 x General (4Kn), 1 x horse archers (LH), 1 x swordsmen (4Bd), 2 x javelinmen (3Ax), 5 x archers (3Bw), 1 x archers (3Bw or Ps),  1 x caravan guards (Cm).

Sunday, 11 June 2023

Collision Course

The rule variant, Collision Course, simulates the force march rule from WRG 7th edition. Modified by David Lawrence, known to Fanaticus Forum members as Macbeth, Collision Course has become a regular feature of the tournament scene in Australia. I found a copy last month and gave the set a good test.

The basics.

Armies form three columns of equal size with column one placed on the table and the head of column two within a deployment zone measuring 4BW x 4BW from the centre of the army’s base edge. Column number three remains off board and enters the game board after column two is completely on table. This costs 4 pips.  

Players must give some thought to the composition and the march order of elements of each column. Costly pip expenditure may occur when deploying from column to line if slower moving troops prove an obstacle. Fortunately, there are historical examples that one may follow.

Testing (Rome vs. Judea).

In the photo, a Roman advance guard of three auxilia and an element of legionnaires are place on the board and the CinC element leading column two. Off table are the cavalry, auxilia, bolt-thrower and archers followed by the mobile baggage.

The Late Judaean place light troops and mercenary cavalry of column one on the board and similar to the Roman march order, the army CinC leads the main body of auxilia and swordsmen. Column three, consisting of more light troops, auxilia and lastly, the mobile baggage.

Roman deployment is ready to engage the enemy.

Judaean deployment has formed three separate groups in echelon, though not by design.

Battle develops in earnest and Judea loses an element of auxilia to artillery.

Roman troops surpass themselves and shred the enemy sending them in flight.


Observations

Both sides experienced little delay bringing all three columns on the board, however much time was required to shake the columns into line. This was not through a lack of pips, but improper spacing. Rome experiences less problem having fought many battles prior.

Played three test games and thoroughly enjoyed them all. The Roman Tour is half way through its list of opponents and there will be further opportunity for more tests. Rome – Parthia should be interesting.