Tuesday, 31 May 2011
Latest work in progress
Battle of Carnuntum 170 AD
(Marcomanni Wars).
Scenario design.
The Battle of Carnuntum is
one of the many conflicts between the barbarians and Rome’s frontier garrisons.
From the time of its construction of the Limes Germanicus and the Danube Limes,
the barbarian tribes have made frequent attempts at crossing the river barrier
to wreak havoc within the provinces. Most often, Roman troops were able to successfully beat
back these attempts and followed up with a punitive expedition to punish the
recalcitrant tribes. Carnuntum was one such battle that ended differently. {1.}
Location: Nearby Carnuntum.
Using Google {2.}, Mapper
{3.} and Bing Satellite {4.} tools I was able to narrow down three possible
areas where an engagement could have taken place. Mind you, the region was heavily
forested then than it is today, but the location mountainous terrain have not
changed.
Carnuntum, located on the
Amber Road, became the capitol for the province of Pannonia Superior. At the
time of the battle, the population had reached 40,000 with a legionary garrison
and gladiator school.{5.}
The size of the Civilis
Carnuntum, legionary camp and suburbs can be seen in a documentary video of the
Carnuntum museum and displays. {6.}
Excavations have revealed a
German trade centre and settlement directly across the Danube from Carnuntum.
The crossing of the Danube
by the Marcomanni and Quadi took place between Vindobona (Vienna) and Carnuntum,
a distance of roughly 30 km. In between the two major cities are two auxilia forts
and a host of signal and watch towers along the river bank. Records are sketchy
as to when the battle took place but most agree this was during the early
Spring.
Facing overwhelming
numbers the auxilia would have fallen back toward Vindobona and Carnuntum
bringing news of the invasion with them. Within the narrow confines of the Rohrauer Forest, the Marcomanni moved toward
Carnuntum. By the second day of the invasion, enough Roman troops could be
assembled to defend the city.
Troop strengths.
The Roman Player.
The Antonine Plague had
dealt the Roman Army a major setback, but by 170 AD, troop strength were slowly
returning to standard levels. Nonetheless, they were handicapped by a lack of
training and as DBA does not make distinctions between troop classification, I
have handled this differently which will be explained further below.
Carnuntum was garrisoned
by the XIV Gemina and with the exception of a vexillation serving in a Parthian
campaign would most likely have at least 4,000 legionnaires present. Auxilia
located along the Danube and the Amber road could equal that number and further
in reserve are a number of cavalry units to include the Ala I
Ulpia Contariorum M.C.R.
Using the historical
ratios set in the rule book this equates to two commands. Several options have
been chosen to give the Roman player some local colour; from the Gladiator
school (3Bd), the Contariorum (3Kn) and numeri (Ps).
The Romans.
2 x Generals (Cv), 2 x
Equites (Cv), 8 x Legionaries (Bd), 6 x Auxilia (4Ax), 1 x Equites (Cv), 1
x Urban Cohors (4Ax), 1 x Gladiators
(3Bd), 1 x Slingers (Ps), 1 x Lancers (3Kn), 1 x Bolt Shooter (Art) = 24
elements.
The German Player.
Several years before, the Langobardi
and Obii made an attempt to cross the Danube with 6,000 warriors but were
beaten back. Balomar (King of the Marcomanni) served to negotiate a peace
between the tribes and Rome. Now in 170 AD, “Friend of Rome” returns but with a
better plan to deal a severe blow to Rome.
To reflect the lack of
training on the Roman side, the German player will have three commands, two of
Marcomanni and one of Quadi. At first glance this may
seem extreme, but a cunning Roman player, but the deployment and victory
conditions serve to give both sides a good game.
The Marcomanni
2 x Generals (Cv), 2 x
Cavalry (Cv), 16 x Warriors (4Wb), 2 x Cavalry (Cv), 2 x Skirmisher (Ps) = 24
elements.
The Quadi allies.
1 x General (Cv), 1 x
Cavalry (Cv), 8 x Warriors (4Wb), 2 x
Skirmisher (Ps) = 12 elements.
The Battlefields:
Rather than select one
possible location for a battlefield, I decided to offer players three possible
locations to game. Below links will take you to the respective tests for each
option.
Battlefield three.
Cheers,
Footnotes.
{1.}From Roman Fort in
Iza: http://www.archeol.sav.sk/kelemantia/nahran6kelen.htm
{5.} Gladiator School : http://news.nationalgeographic.com/news/2014/02/140225-gladiator-school-discovered-roman-austria-archaeology-science/
{6.} Carnuntum Documentary
(Video): http://www.historvius.com/carnuntum-1909/
{7.}
{8.}
Wednesday, 27 April 2011
DBA Early Medieval Russians
Tuesday, 26 April 2011
Medieval Russians – part three
Friday, 15 April 2011
Medieval Russians – part three
After the basic colours for face, armour, spear, belts and boots this left only the clothing and shields. Both clothing and shields I will paint white, so colour will stand out better, as I like to use thin coats of paint. Starting with the lighter colours first; breeches for one, shirt for another I will add another colour to my pallet and create a different tone or shade for the next figures. Keep in mind, as you are doing this, the colours for shirt and breeches should complement one another and not distract the eye.

About the horses, when dry brushing the horses. I use GW Bleached Bone.
Begin with the hooves as these will pick up dust first, then let your brush strokes move from the bottom up. With this method you will pick out leg, chest and back muscle, plus hair in the mane and tail rather easily.
Lastly, if you want to paint a white sock here and there, use a thin coat of white and apply this as a touch up. White socks or legs did not remain white, but turned nearly gray from dirt, dust and mud.
Gray horses, substitute white for bleached bone. With a gray undercoat, black wash and white dry brush, this technique makes painting horses a breeze.
Next, shields, flags and banners
Cheers,
About the horses, when dry brushing the horses. I use GW Bleached Bone.
Begin with the hooves as these will pick up dust first, then let your brush strokes move from the bottom up. With this method you will pick out leg, chest and back muscle, plus hair in the mane and tail rather easily.
Gray horses, substitute white for bleached bone. With a gray undercoat, black wash and white dry brush, this technique makes painting horses a breeze.
Next, shields, flags and banners
Cheers,
Tuesday, 12 April 2011
Medieval Russians - part 2
Painting figures need not be intimidating, especially when the collection depicts a less than well known army. I usually find, researching shield patterns, clothing colours, helmets and armour demands more time than the actual painting, but all that time spent searching does unlock some gems.
This posting is not meant as a tutorial, but rather a guide line for organizing your time. Most often a nice collection can be completed quickly by devoting an hour or less on a daily basis. In this example, one or two colours each day, over a few days and the Russians are now prepared for their clothing and details.
Up to this point, I have painted only the basic; face and hands, boots, armour, and spears. Shields have been painted white to accept some vibrant colour for a later. At this point, I have applied an ink wash on the leather armour and dry brushed the metal armour. I do this so as not to overlook the straps and buckles which I will paint last. There is a surprising amount of detail on these figures.

Horses. I love painting horses, but I do not spend a lot of time on them. With the mid-gray undercoating I can apply a thin coat over the entire horse. As I finish the last horse, I will apply a thin wash of black mixed with a bit of brown to cover the tail and mane. After this step, with the same thin mix, I will give all the horses socks and darken their nose, up to the bridle. You will immediately notice the muscles are better defined as are the nostrils and mouth. I need only dry brush (bleached bone) the horse to pick out muscle, tail and mane and they are done. This step will also highlight the leather harness for later painting.
Clothing and Shields – next posting
This posting is not meant as a tutorial, but rather a guide line for organizing your time. Most often a nice collection can be completed quickly by devoting an hour or less on a daily basis. In this example, one or two colours each day, over a few days and the Russians are now prepared for their clothing and details.
Up to this point, I have painted only the basic; face and hands, boots, armour, and spears. Shields have been painted white to accept some vibrant colour for a later. At this point, I have applied an ink wash on the leather armour and dry brushed the metal armour. I do this so as not to overlook the straps and buckles which I will paint last. There is a surprising amount of detail on these figures.
Horses. I love painting horses, but I do not spend a lot of time on them. With the mid-gray undercoating I can apply a thin coat over the entire horse. As I finish the last horse, I will apply a thin wash of black mixed with a bit of brown to cover the tail and mane. After this step, with the same thin mix, I will give all the horses socks and darken their nose, up to the bridle. You will immediately notice the muscles are better defined as are the nostrils and mouth. I need only dry brush (bleached bone) the horse to pick out muscle, tail and mane and they are done. This step will also highlight the leather harness for later painting.
Clothing and Shields – next posting
Thursday, 7 April 2011
The Russians are coming
On occaission, I do commission work, but restrict this to certain periods and of course 15mm scale. This most recent project are Medieval Russians DBA III/78. These are Old Glory figures, which were added to their catalogue some years back. Detailing is crisp and the mounted figures have a variety of helmet and shield types.
The figures have been cleaned and undercoated and are ready for their first colours.


The bags, located at the upper right hand corner of each photo are for my next 18th c. army - Indians (Hindu, Muslim, Moghul). These will be started during the May vacation period. These will make a nice, but temporary, addition to my "unpainted lead" collection, seen here.
The figures have been cleaned and undercoated and are ready for their first colours.
The bags, located at the upper right hand corner of each photo are for my next 18th c. army - Indians (Hindu, Muslim, Moghul). These will be started during the May vacation period. These will make a nice, but temporary, addition to my "unpainted lead" collection, seen here.
Monday, 7 March 2011
An Orc-Goblin restoration project
August 8,
2018
My style of painting has changed over the past 30
years and my collection of Orc and Goblin armies do show their age. I decided
to refurbish the collection and this is no small task as the collection is
quite large. The figures are all metal Citadel/Games Workshop and Shadow Corps miniatures
which are based as 15mm despite the figures being a standard 25mm.
As you can see from the ‘before’ photos, these were painted in the fashion colour of the
time and to protect them were given a coat of high gloss varnish. One could
almost describe the technique as ‘splash and dash’ as these took relatively
little time to paint up.
The mounted arm of this collection are Snotlings (now
Goblin) mounted on Necromunda rats and these you will see these based as light
horse (LH), cavalry (Cv) and chariot (LCh) elements. Actual armoured Goblin
figures, also mounted on Necromunda rats, form the elite element or knight
class (3Kn) and can be seen on their larger bases (40mm x 40mm).
To make this task less arduous, I will paint them 12
elements at time. As a first step toward their restoration, I sprayed these
with a matte varnish which did produce a subtle change but not enough that I
would say – ‘done’.
After considerable research I decided to follow the
description of the Orc skin colour as given by Tolkien in his novels. My first
batch of twelve is nearly done and I am pleased with the result so far. Photos
of ‘after’ should be uploaded either
tomorrow or Friday.
Before
August 9,
2018
The first Orc/Goblin command is complete with a second
command close on its heels (nr. 2 is also complete).
The base colour for these is Angrellan Earth
followed by a wash of Athonian Camoshade with Nurgling Green used
for highlighting. From my reading, this comes close to the description of
‘sallow-skinned’ Orc as given by Tolkien in his books; this can also vary from
a dirty gray, dirty yellow or cream colour.
Weapons and metal items are painted a dark gray and highlighted with a mix of light blue/mid-gray. The effect is nice as most of the figures have chainmail armour. All leather equipment is painted in various shades of brown, red-brown.
Command
nr. 1
Command
nr. 2
I am pleased with the results so far, they certainly look menacing more so than the original colour scheme. More
photos will follow as the restoration progresses, but next post will list an
inventory of the collection to give readers an idea of the project size.
August 14,
2018
Command numbers 4 and 5 comprise of both heavy and light mounted
troop types each supported by a small contingent of bowmen These offered an opportunity
to experiment with skin tone variation by simply changing the highlighting
colour; unfortunately this cannot be seen well in the photo. The Necromunda rats required very little work needing only some extra detailing.
Command nr. 3
Command nr. 4
Command nr. 5
I am fast approaching the half way mark as there are
11 commands and not thirteen as originally tallied; two commands comprise of horde
which count as half of normal value. Each command of horde therefore requires
twice as many elements to complete; both have a horde
general. These are next on the 'to do' list.
August 17,
2018
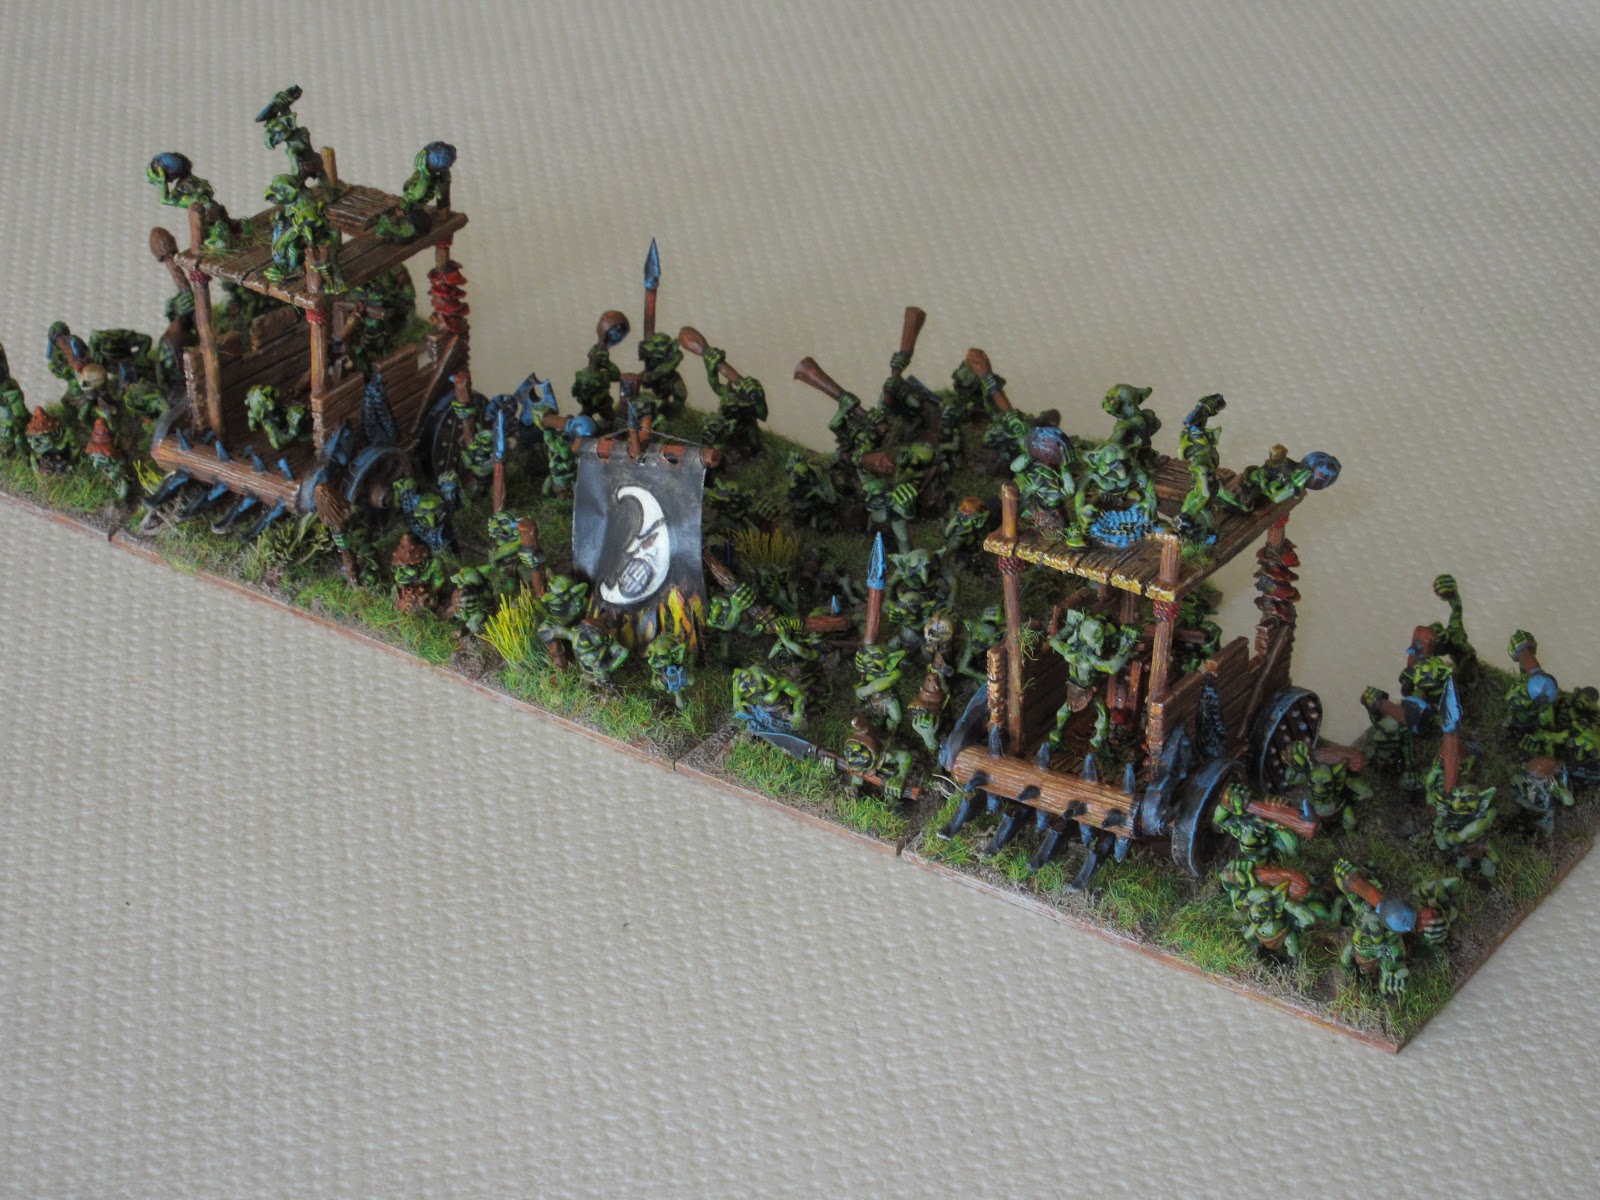
Two Goblin hordes are now complete (commands 6 &
7). Each comprise of 16 horde elements supported by two behemoths, either Stone
Trolls or Pump Wagons. At first glance, I was hesitant to do these as they
total 80 smaller figures (17/18mm) which all require the same amount of
attention as their larger brethren. Rather than apply an earth colour as a base
coat I skipped that step and brushed Anthonian Camoshade over the original
green. This created enough of a contrast that I could use Nurgle Green to
highlight the figure, which worked well. Weapons and clothing were painted in a
similar fashion as all the other groups.
If you have the 1993 publication of Warhammer Armies,
Orcs and Goblins, you may remember Stone
Trolls were painted with a medium to light blue colour. In keeping with the
general theme of this project, these too were painted darker then dry brushed
with lighter shades of gray and just a touch of light blue. The end result turned
out much better in my opinion.
The Pump Wagons
followed a similar treatment with wood items ‘washed’ with a deeper red-brown and
crew figures were painted in a similar style as described above. Metal fittings
were painted and highlighted in a similar manner as the rest of the collection.
August 21,
2018
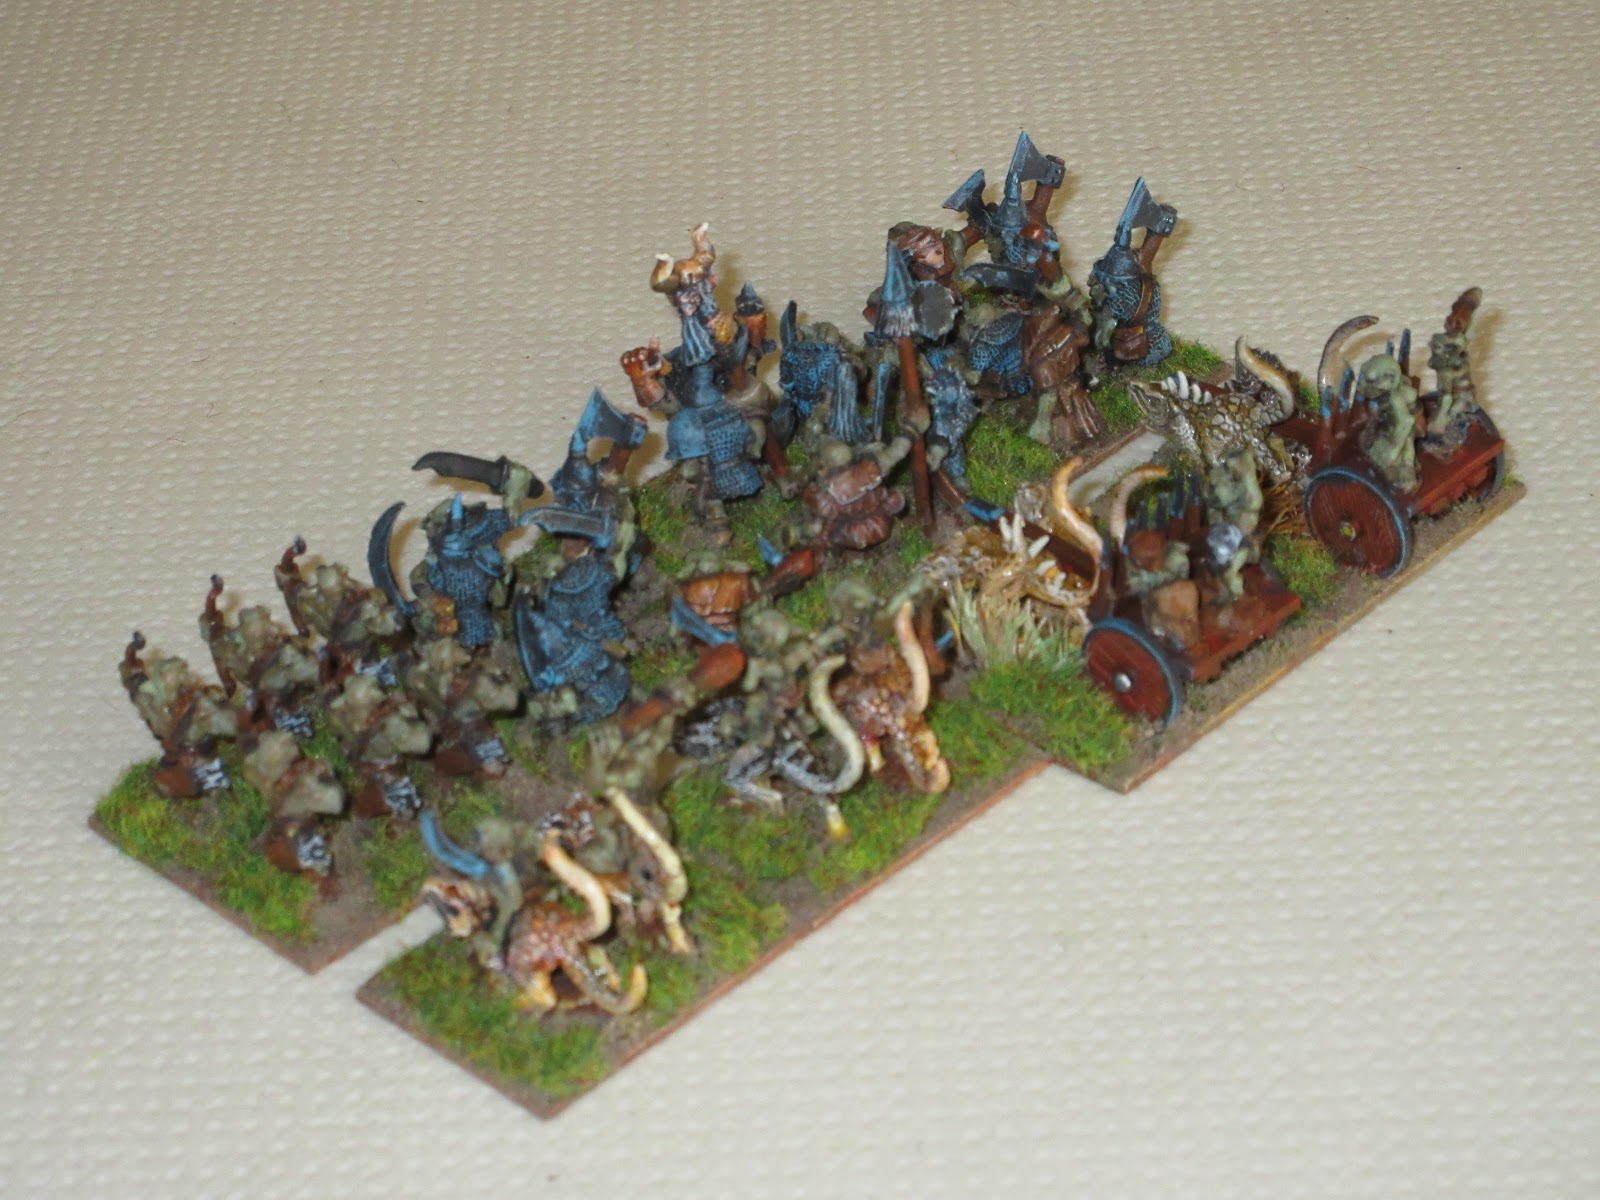
Commands 8 and 9 are modelled after the ancient Classical
Indian list which include elephants, chariots, cavalry and archers. Here, giant
boars with howdah replace the elephants and Orc warriors replace the Maiden
Guard of an earlier DBA list and both commands are stiffened with a good number
of archers and chariot.
Command number 10 was also completed over the weekend and
this contains a mix of mounted, Orc warriors and a few archers. This leaves the
artillery, Squiggs, horde and the last three chariot models to make an enlarged
command number 11.
Command 8 and 9
Command 10
August 28,
2018
The final command is finished and now joins the other
10 in their storage boxes. The Goblins are always fun to do (former Snotlings)
while the chariots offered the greater challenge with tight spots that needed
painting. The Squiggs were darkened and their teeth are not as pristine white
as before, yet still retain a fierce appearance. The artillery pieces were
painted a wood colour and a similar treatment was done to the palisade.
This took less than three weeks to complete with each
day no more than an hour or two required for painting, texturing bases and
flocking.
Command 11
before
Command 11
frontal
Command 11
rear
Project Overview
Mounted
6 x Savage Orc (3Kn)
8 x Orc riders (Cv)
16 x Goblin scouts (LH)
11 x Goblin Chariots (LCh)
= 41
Foot
24 x Orc warriors (3Bd or 3Wb)
30 x Arrer boyz (3Bw)
6 x Skirmishers, Lurkers (Ps)
52 x Goblin Swarm (5Hd)
4 x Spear Chukkas (Art)
= 106
Extras
4 x Giant Boars (El)
2 x Big Uns (Beh)
2 x Stone Trolls (Beh)
3 x Squiggs (SCh)
2 x Pump Wagons (WWg)
1 x Spider (Lurker)
= 14
This brings the grand total to 171 elements or more than thirteen commands.
NB. (Beh) Behemoth
30-09-2021
Goblin-Orc Parade Review
In the vanguard are the chariots (LCh) and skirmishing mounted goblins (LH), closely followed by the main body.
In the central column of the main body are Orc warriors (3Wb, 3Bd) with Orc bowmen (3Bw) marching to their front and rear. On the flanks of the central column can be seen the Goblin horde (5Hd) in standard march discipline accompanied by trolls (Beh).
Bringing up the rear of the army are the pump wagons, bolt shooters, Goblins mounted on large wild boar (El) and Squigg (SCh).
To the right of the column are two formations of heavy mounted Orcs; in the foreground are the “cavalry” (Cv) and to their rear behind the Angry Sun banner are the Big Boyz (3Kn).
On their way to an Elven banquet.
Subscribe to:
Posts (Atom)