Tuesday 22 August 2023

Roman Tour – Ancient British

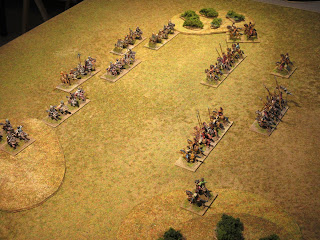
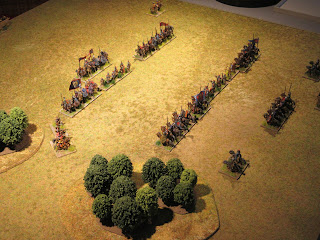
The DBA3 army list for the Ancient British ends at 75 AD with their final pacification. However, during the brief expeditions beyond Hadrian’s Wall during the latter half of the 2nd century, the Brigantes revolted curtailing further conquests. Fuelled by the excellent Empire series by Anthony Riches, I added the Ancient British of the late 2nd century to the collection of Imperial Rome’s enemies. These lack chariots, but they are not mandatory and without them, the Ancient British have performed better than expected. 

Two games were played against Rome’s finest and the results can be read below. These games complete the series; however, future battles are planned, some using the collision course format or DBA24.


Game one

Rome found the British arrayed in front of woods with its left anchored on a village. However, to reach the enemy Rome would need to realign its front by bringing its right wing forward.

The British caught Rome’s attention as they slowly approached the Roman line and hoped the infiltration of the wood on Rome’s left would go unnoticed. It did not, and Rome sent auxilia to secure the wood.

Both Roman wings floundered during the operation and sensing an opportunity, the barbarians struck.

The attack was ferocious, Rome losing two cohorts of legionnaires and artillery in the first rush. Casualties among the barbarian were light by comparison and the decision to retreat was made soon after the fall of a cohort of auxilia. Ancient British 4 - 1.


Game two

To meet Rome for this battle, the British shortened their line. In contrast, Rome’s line extended beyond the barbarian, but held its left flank back. As the barbarians rushed forward, the Roman counter attack caught the British by surprise.


At the first clash of arms, the British were able to reinforce their first line to confront the legionnaires. Casualties fell quickly on both sides as both centres and remaining flank came into contact. The pressure was greatest on Rome with the loss of its artillery and equites.

Regular formations on both sides become a shambles, but the advance of the cavalry was clearly to be seen by the barbarian. Led by their commander, the equites swung the battle in favour of Rome. Rome 4 – 3.


Observations

In game one, the British made good use of high pip scores to infiltrate the wood and reform their line in time to contact the legion. By turn four, the Ancient British held the advantage, 3 – 1, they were now coasting home to a victory.

Game two was a different story. Hard fought and quickly looking more a brawl than a battle, the score came level at 3 – 3 at the end of turn three. This time, Roman cavalry were in their element accounting for half the casualties inflicted on the barbarians. 

Early Imperial Roman

1 x General (Cv), 1 x equites (Cv), 4 x legionnaires (4Bd), 3 x auxilia infantry (4Ax), 1 x archers (Ps), 1 x light horse (LH), 1 x artillery (Art).

Ancient British

1 x General (3Wb), 8 x warriors (3Wb), 2 x light horse (LH), 1 x skirmishers (Ps).    

Romans in Britain.org/British Tribes

Selgovae  https://www.romanobritain.org/4-celt/clb_tribe_selgovae.php

Novantae https://www.romanobritain.org/4-celt/clb_tribe_novantae.php

Votadini https://www.romanobritain.org/4-celt/clb_tribe_votadini.php

Tuesday 15 August 2023

The Hun and the Gepid

The current discussion about horse archers at the Fanaticus Forum, prompted a re-reading of E.A. Thompson’s book “The Huns”. The chapters of the period before Attila describe the nomads using the cunei or wedge formation (Ammianus Marcellinus).  It is not clear if the passage references a tactical formation or the general appearance of the army when deployed.

Further, Hunnic incursions beyond the steppes were done by individual tribes rather than the massive horde described in the primary sources. This accounts for Huns fighting alongside Rome to oppose other Hunnic tribes. For the names of the various tribes, I would recommend Maenchen-Helfen, The World of the Huns: Studies in Their History and Culture.

Continuing our experience with cavalry armies, the Huns come into contact with the Gepid. The terrain is relatively open with a settlement (BUA) protected by scrub and masked by two hills. The Gepid return home to find the Huns occupying their settlement.

Game one

Half the noble Gepid flanked by spearmen approach the settlement head on. Skirmishers positioned on each flank are set to rush forward and secure the rough ground immediate to their front.

From their new position, Gepid skirmishers harassed the Huns, successfully fending off enemy counter attacks. To counter the Gepid attack, the Huns flanked the Gepid line but were met by lancers held in reserve.

Suffering badly, the Huns compelled to break off the conflict and leave. The action was brief (3 turns), earning the Gepid a win, 4 – 2.


Game two

The tables are turned and the wily Hun catch the Gepid at home. Deployment remained unchanged for either side.

Low pip scores for the Huns emboldened the Gepid to move their battle line forward while Hunnic attempts to outflank the Gepid advance were easily countered.

The battled became a slogging match with casualties becoming even 3 – 3 at the end of seven turns. Gepid spearmen easily fended off Hunnic attacks, however, the toll fell heaviest among the Gepid lancers. Slaughtering all the Gepid nobles, the battle became a disaster for the Gepid, 5+g – 3. 


Observation.

Hunnic deployment in small groups with sufficient spacing between works well; even low pip scores are utilised to shift groups or form columns. The Gepid are the first opponent with a sizeable number of foot (4 x 4Wb, 4 x Ps), the latter made good use of the rough ground in the first game. Despite having a combat factor of +2 against mounted is, the spearmen were able to repel Hun attacks.

Huns

1 x general (Cv), 11 x horse archers (LH).

Gepid

1 x general (3Kn), 3 x nobles (3Kn), 4 x spearmen (4Wb), 4 x skirmishers (Ps).

Friday 11 August 2023

Ancient British

The Ancient British are Blue Moon figures and two packs were purchased to build the infantry of two commands; half bare chested, half with tunics. From Armies and Enemies of Imperial Rome by P. Barker, red, blue and purple are dominate clothing colour and adding browns and green would bring variety. Colour combinations for chequered or stripe patterns were first tested on note paper.

Painting

To start, I set a 50/50 rule; that is half the clothing would be chequered or striped, half would carry woad markings and half shields would be decorative. Hopefully, this would reduce the number of painting sessions, save eye strain and avoid painting errors, yet still convey a picture of angry British.

Blue Moon figures have separate shields making the above painting system simple. Similar to visualising the chequered and stripes on clothing, sketches were produced for possible shield patterns. 


The two packs produced 21 elements, 18 x 3Wb, 2 x Ps and 1 x camp guards and four light horse were painted earlier, completing the two commands.  

Command one


Command two


Battle array


Thursday 10 August 2023

A Clash of Cavalry

The current discussion at Fanaticus Forum to improve the light horse in the rules prompted me to experiment with cavalry tactics. This paired the Huns and the Alani in a historical clash somewhere on the steppe, anno 375.

Game one

The clash of arms took place on a level field broken by two gentle hills and scrubby ground; leaving enough open ground to deploy. Both armies formed small groups and positioned them in two lines with solitary units placed to guard against threats to flank and rear. 

Cavalry armies do best when placing the enemy off balance, here, the Alani focused their attack on one flank, the remainder of their force holding their original position. This created gap offering the Hun a tempting target.

The ensuing attack resulted in casualties on both sides, nonetheless, the Huns held the advantage after two turns.

To turn the situation around, some risks were taken by the Alani and by turn three, they prevailed, earning a narrow 4 – 3 victory. 


Game two

The positions exchanged, the Alani duplicated their ‘winning’ deployment, while the Hun tightened its formations.

Repeating their tactic, the Alani assaulted the Hunnic left flank. Knowing that battles tended to be brief, any plan of a flanking maneuver dispensed with.

Seeing the threat to his left, the wily Hun withdrew the horse archers to regroup further back. Though committed to the attack, the Alani had to adjust his approach.

Forming a longer line of nobles and some horse archers, the Alani prepared to attack the Huns head on.

Taking advantage of the delay, the Huns reformed their own ranks to meet the threat. In the meantime (turn 3), the Hunnic light horse was active on the opposite flank.

Despite low pip scores, the Huns took advantage of the moment to launch an all-out attack on the main body of the Alani host.

The desperate attack did produce the unexpected, the Alani suffered greatly, including the loss of their general. A clear victory for the Hun, 5+g – 1.


Observations.

Both games needed little time to complete, the first, 20 minutes, the second 25 minutes. With cavalry armies, I found small groups work best and when in line formation. A second line is a must as these will hold reserve formations. Single elements placed in the second line can easily move forward to form a column for combat, therefore, they need not be formed during first deployment.

With adequate spacing between groups, 7 or 8 elements can easily cover a frontage of 12BW.

The spacing between groups can be covered by reserves or, as in game two, troops in the front line can withdraw and reform alongside the reserve.

Tuesday 8 August 2023

Roman Tour - Later Moorish

The Roman province of Africa was established in 146 BC and later, during the reign of Augustus, became a senatorial province (Africa Proconsularis). Rebellion by native tribes began as early as 5/6 AD, but a decade later, Tacfarinus was able to form an anti-Roman coalition among the Numidian and Maretanian tribes.

The province remained administered by a governor, however, command of the legion would be that of a legatus. During this period, the III Augusta would be permanently garrisoned in the province to become a large military settlement. Its veterans and later generations would defend the province against further Berber rebellions, the longest lasting from 138 to 161.


Game one

Threading through a narrow passage between rocky ground and difficult hills, Rome found the Moorish infantry positioned on the hills and to their right, the cavalry.

The hill position to front would become the first object for the auxiliary. The hills on the right of the column were quickly occupied by two cohorts of auxilia, but that on the left proved a harder task. The legion and artillery awaited the auxiliary outcome before moving against the Moorish cavalry. Interpreting the intent of the Romans, the rebel commander sent the bulk of the cavalry to outflank the Roman line.

Moorish resistance proved tenacious enough to disperse the auxilia, seeing the remaining cavalry departing to their front, the legatus sent legionnaires to finish clearing the hill of Moorish infantry. This would prove a costly error.

Clearing the hill position had cost both sides heavy casualties, but also left the artillery isolated. This did not go unnoticed. Moorish infantry lurking nearby, destroyed the artillery leaving the Roman centre exposed. Unable to recover the situation, the legatus called for a retreat. A Moorish victory 4 – 3.


Game two

Reinforced, Rome continued its campaign against the rebels and found them occupying a position in the hills and rocky ground to front. Rome deployed in their standard battle formation and prepared for an assault.

Forming two assault groups comprising of legionnaires and auxilia, one would assault the position with the second in support. Roman cavalry, positioned in a second and third line, would counter any attack by their cavalry.  

Roman auxilia cleared the rocky ground of enemy skirmishers leaving the Moorish infantry positioned on the hill to feel the weight of the approaching legion and auxilia. Despite their number, Moorish counter attacks were easily repelled. Equally, Moorish cavalry proved ineffective against Roman infantry.

Further resistance became futile and suffering severe casualties, the Moors departed the field. A clear victory for Rome, 4 – 0.


Observation

Though costly, the first engagement was a major win for the Moors. the first in a long line of defeats against Rome of other eras. What the army lacks in punch, they make up for in speed. Attempting to repeat their winning formula, a heavy dose of over confidence cost the Moors dearly losing the battle in game two.

Early Imperial Roman

1 x General (Cv), 1 x equites (Cv), 4 x legionnaires (4Bd), 3 x auxilia infantry (4Ax), 1 x archers (4Bw or Ps), 1 x light horse (LH), 1 x artillery (Art).

Later Moorish

1 x General (LH), 5 x horsemen (LH), 6 x javelinmen (3Ax or Ps).

Recommended reading

Legio III Augusta https://www.livius.org/articles/legion/legio-iii-augusta/

Tacfarinus https://www.livius.org/articles/person/tacfarinas/

Tuesday 1 August 2023

Collision Course - Novgorod vs. Muscovy 1471

Continuing our ‘collision course’ experience, we moved east to play the principality of Novgorod against the Duchy of Muscovy. Both are predominantly cavalry forces with infantry support offering both players tactical options. The encounter is loosely based on the Battle of Shelon of 1471 which will be featured later this year.   

Muscovy’s three columns deployed rapidly to line formation, requiring an hour to do so (4 turns). In that time, Novgorod scouts were still searching for its rear column.


Thirty minutes later (2 turns), the missing column appeared on the field, but Muscovy ready for battle, began its march forward.

Scrambling to form a battle line, Novgorod made ready for the expected clash.

Eager for battle, Novgorod attacked the Muscovy right with cavalry supported by militia infantry in centre. The Tartar LH, forming part of the reserve, engaged their counterpart near the wood.

Losses were sustained on both sides, yet Novgorod held the initiative to strike Muscovy’s opposite flank.

Holding its ground on the left, Muscovy shifted its effort back to its right flank to turn the battle. Novgorod resistance soon collapsed leaving the field to the Muscovites (5 – 3). 


Observations.

Blunders were done by both sides; Novgorod baggage impeded the cavalry located at the rear of the column and misreading the banners, Muscovy’s general found itself placed at the head of column one presenting Novgorod with an enticing target. Needless to say, the Muscovite general was survived a number of melees. 

IV/44 Post-Mongol Russian

1 x general with dvor (Cv), 6 x boyars (Cv), 2 x Tartar horse archers (LH), 1 x Cossack skirmishers (Ps), 1 x militia spearmen (Sp), 1 x militia crossbowmen (4Cb), 1 x mobile baggage.