Charles Martel subdued a revolt, led by Raganfrid, the late mayor of Chilperic II and upon its conclusion, Charles resumed his campaign in Bavaria. Passing through Swabia Charles gathers fresh troops to join in the campaign.
It was during this time news reached Charles of a Saracen raid in central eastern Frankia. Unable to send assistance, Charles hoped the indomitable Bishop Emilien of Nantes with local forces would be sufficient to beat back the Saracen.
Forces;
Saracen
raiders
The Saracens are led by General Ibn Suhayam Al-Kalbiare. Its exact composition is unknown however, the chroniclers describe the raid as being “rapid”. The Andalusian III/34a list serves well for the force operating from Provence but with one proviso; Berber and Arab elements are of equal number. In addition, demonstrating the less than amiable relationship between the two, neither can form groups with one another and remain segregated throughout the battle.
1 x General Ibn Suhayam Al-Kalbiare (Cv), 2 x Arab Jund (Cv), 1 x Andalusian archer (Ps), 2 x Andalusian spearmen (Sp), 1 x Berber light horse (LH), 2 x Berber spearmen (Sp), 3 x Berber javelinmen (Ps).
Frankish
defenders
The raid takes place through Burgundian lands, no longer an independent entity, therefore use the Carolingian III/28 list with the following adjustments;
1 x Bishop Emilien (3Kn), 1 x caballari (3Kn), 2 x lesser caballari (Cv), 4 x select levies, 2 x Lantwer lesser levies (solid Hd), 2 archers and javelinmen (Ps).
Terrain
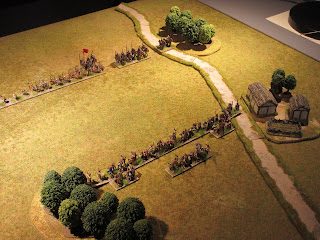
Battle takes place on the left bank of the L’ Arroux River near Autun, Burgundy. Two woods, a hamlet (BUA) with a road parallel to the River L’ Arroux are to be positioned by the defender.
Testing
the scenario.
Reviewing
the photos of both test games. the spot between the woods, would offer a greater
advantage for the defending Franks. As events transpired, the Franks achieved
an unhistorical result of winning both tests.
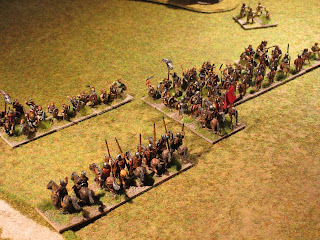
Both sides deployed in a conventional manner, placing their infantry spear in centre flanked by light troops and cavalry. The Franks gained a slight advantage in the initial clash and won the battle killing the Saracen leader.
In response, the Franks placed the lesser levy to face the Berber troops leaving the Frankish infantry to amass their number against the Arab wing.
Both sides attempted to encircle their opponent’s left flank; the Saracen launched their attack early and spend the remainder of the battle as spectators. Meanwhile, the Franks having a longer distance to cover did appear to see the battle’s end.
The collapse of the lesser levy on the right did cause concern as it exposed the centre right. Fortune smiled on the Bishop, when the arrival of the Frankish cavalry struck the Saracen rear.
Dangerously close to being pinned against his own troops, the Saracen commander called for a general retreat with the loss of the Jund cavalry.
Historical note.
Bishop Emilien did lose the battle of Autun leaving the city to be sacked by the Saracen. Years later, Charles would expel the Saracen from Provence, but would require the support of the Italian Lombard to achieve this.
Additional
tests
As
mentioned earlier, switching deployment positions might help to bring about a
Saracen victory.


