Friday 24 August 2018

939 AD, refighting the Battle of Trans-la- Fôret


Viking scouts had reported the approach of a Breton army. Deploying their troops in three groups, with the right flank resting on the crest of a nearby hill and the left flank rested on the fort. Any attempt by the Breton to turn the Viking left would be foiled by the presence of the fort offering them no further option that to attack the hill position.

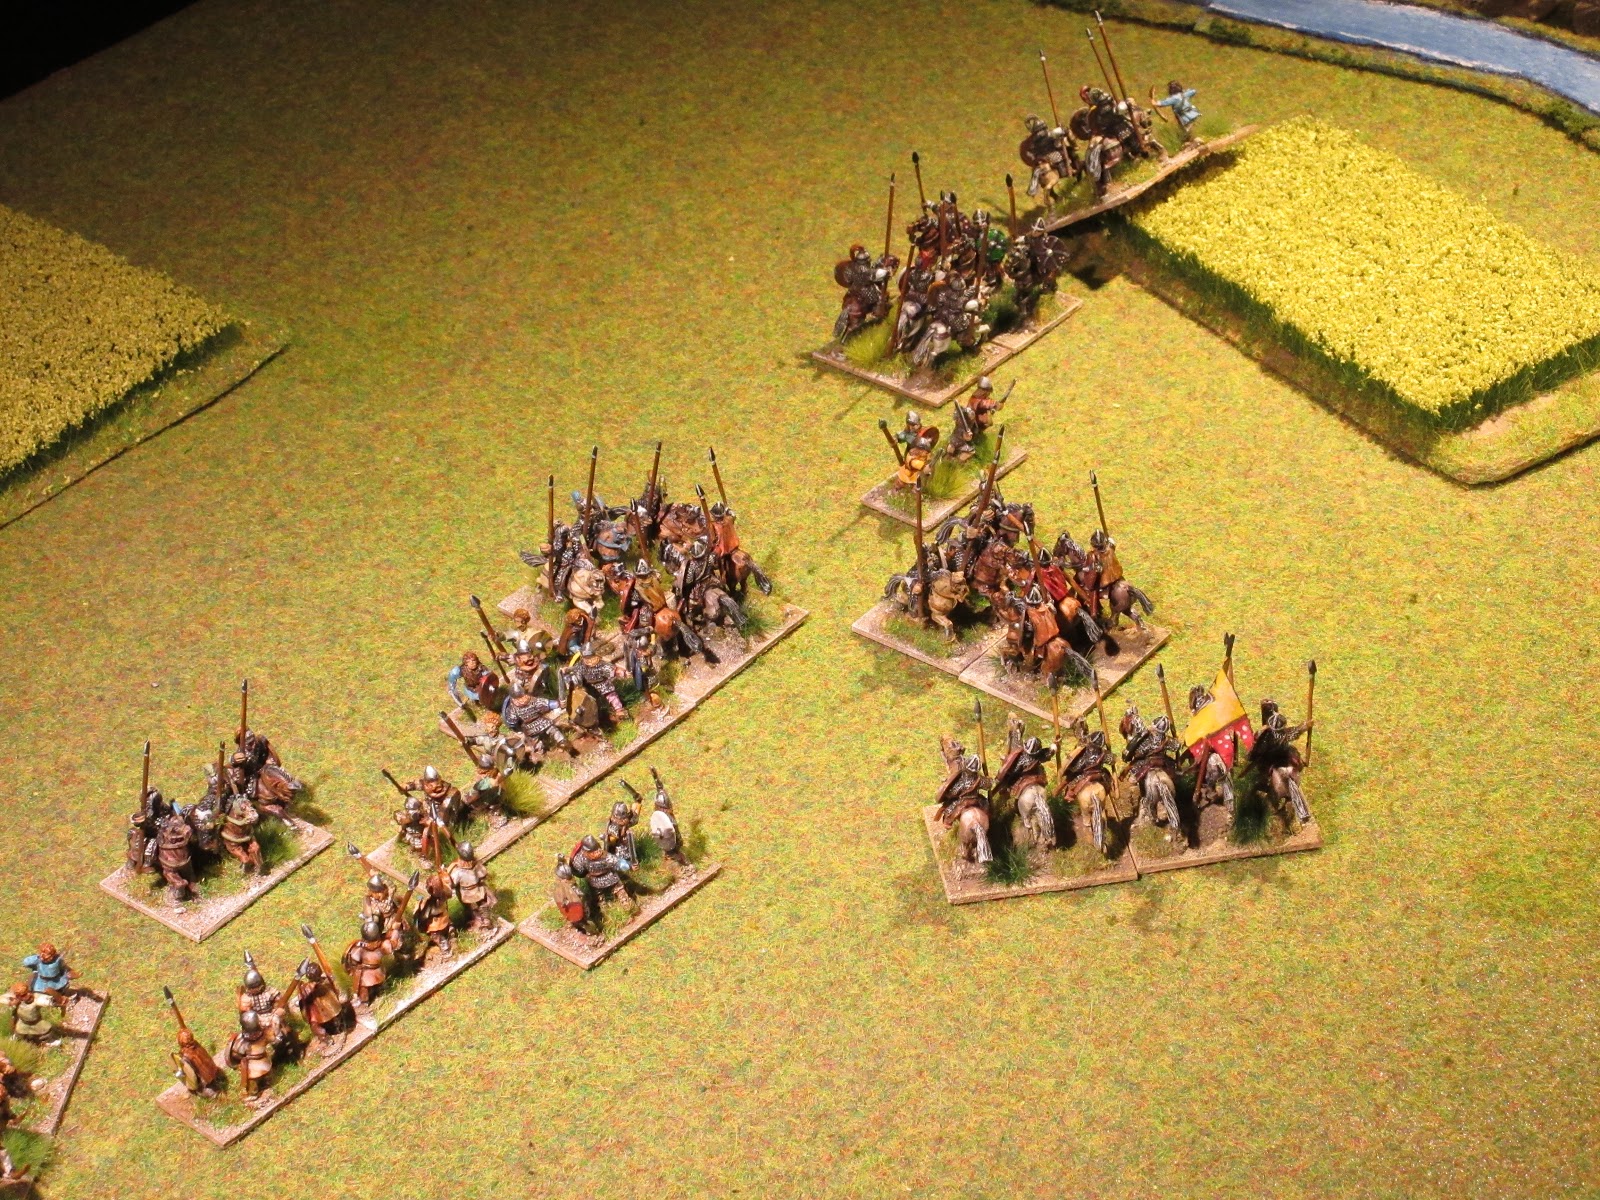
Alan II divided his army into three divisions; and posted the militia and skirmishers on the left, Breton cavalry in centre leaving all the Breton light horse to take a position to the far right of some dense wood.


The militia were instructed to demonstrate in front of the hill while the while the light horse would attempt to turn the Viking left flank. This left the Breton cavalry to deploy in front of the Viking centre and await the proper time to make their assault. Anticipating this, the three separate Viking lines wheeled right to form a contiguous line while a reserve detachment were rushed to support the left flank.


Seeing the Breton militia were not willing to make an assault, the Vikings on the hill moved further downhill hoping to provoke them into action. The timely arrival of the reserves frustrated Alan II but confident that the light horse would reach some success he brought forward the remainder of the cavalry to extend the centre line.


The wait was over and the Breton cavalry launched their attack on the Viking centre. This attack caught the Vikings off guard as their entire line recoiled back from the charge. The Vikings on the left anticipating an attack by Breton light horse were caught off guard by an assault by Breton cavalry coming from the centre.


Despite the casualties received in that first exchange (0 - 1) the Breton cavalry reformed to make a second charge. A second charge sent Viking line back on their heels but they did not break, however elsewhere,  the situation took a desperate turn as the Breton cavalry supported by light horse had broke the Viking left (2 – 1). Viking survivors retreated to form a new line.


The collapse of the Viking left freed many Breton cavalry and light horse to look for new targets. Seeing their commander was hard pressed, Breton light horse fell on the rear ranks of the Vikings locked in combat. This move sealed the fate of the Vikings and they fled the field leaving their dead behind (4 – 1).


Conclusion
This concludes the series of Dark Age scenarios set in the 9th and 10th century. I had selected some 30 battles and trimmed these down to a possible 10 that I could feasibly do. The battles selected could easily be fought with a standard size army of twelve elements with a possible inclusion of allies. Those battles that reached the final selection were those for which I had in my DBA collection and required no new figures. That said, the Welsh were the only exception to this as I found the battles of Conwy and Buttington interesting to do.

We enjoy playing historical battles so this series proved a good exercise in how quickly I could translate obscure text to create a playable DBA game. No changes to the rules were made with the exception of a change of deployment; Leuven and Buttington required the defender to set up in the middle of the board and Brenta placed the attacker closer to the enemy camp to simulate a level of surprise. These did require an amount of play test but we found the end result worked well.  

Tuesday 21 August 2018

939 AD, the Battle of Trans-la- Fôret

In the year 936, the political landscape of northern France was in a state of flux. Following the death of Rudolph of France and Louis IV ascending the throne of West Francia the Bretons seized an opportunity to divest themselves of Frankish hegemony and rose in revolt. Receiving some support from Athelstan of England, the Bretons were able to expand their rebellion throughout most of the peninsula and this brought them in direct confrontation with the Northmen colonists living within the region. Through the course of three long hard fought years, the campaign against the Northmen reached a conclusion at Trans-la-Fôret. On August 1, 939,  A Breton army lead by Alan II and supported by the counts  Hugh II of Maine and Judicael Berengar of Rennes, decisively defeated the Vikings bringing an end to their occupation of the region and the establishment of the Duchy of Brittany.

The Battlefield
Travelling south from Mont Saint-Michel Bay over the Coustenon River you can beach longships along a tributary within a kilometre from Trans-la-Fôret. Where the battle actually took place remains unknown, but the region is characterised with rolling hills covered by forests. Even Gregory of Tours as describes the region as sparsely populated in addition to it being heavily forested and hilly. The presence of wood enabled the Vikings to construct a fort near the river making La Guyoult the most likely candidate for a battle site.

Our battlefield should feature woods (2), a river, a gentle hill and a fort. We recommend using an 80cm x 80cm board with the maximum dimensions of the fort being 3BW x 3BW. If using a smaller board, then omit the river and use medium size wood (2BW x 3BW or 3BW x 4BW).

The Armies
The Vikings
The Viking are taken from Book III/40b which list eleven blade (4Bd) and one element of either berserker (3Wb) or archers (Ps or 4Bw).

The Bretons
In Book III/18 we find the Bretons of this period and it is quite possible to field an all mounted force. If selecting two horde (7Hd) options in place of mounted, the disguised Saxon option is not applicable.

The Setup
The Vikings are defending, determine which quadrant the ‘fort’ is to be placed and position this adjacent to the board edge. One element must garrison the ‘fort’ with the remainder of the Viking host positioned within their deployment area.


The Breton player deploys his army opposite the Viking fort. 

Recommended Reading.
La chronique de Nantes (570 environ-1049)  

Tuesday 14 August 2018

923 AD, refighting the Battle of Firenzuola

By the late afternoon of 28 July, Burgundian scouts had located the Italian army encamped not far from Firenzuola. Rudolph II placed his own camp near the Santerno River to await the arrival of the rest of his army and in the meantime he called for a war council to decide on a battle plan for the following day.

 First to decamp were the Lombards and Berengar I placed his archers on or near the hills while his knights were interspersed among the ranks of the militia spear and to the left, Berengar placed his loyal German faction.


In anticipation, Rudolph II deployed nearly all his knights on the right and infantry on the left as these were better equipped to deal with the archers located on the hills. On his right, he placed the knights of Spoleto and Ivrea opposite Berengar’s Germans. 


A cautious Berengar moved slowly forward to give time for his archers to form up on the forward slope to the right. The Bavarians however, advanced as one group, but eager for battle, the knights of Spoleto and Ivrea pulled ahead of the main battle line.


The Lombard were able to move 80 paces before the archers rained arrows on the Bavarian infantry. To Rudolph’s right, the allies demonstrated good sense by restraining their knights and allow their skirmishers to approach the enemy through the grain fields. 


As if by command, both sides halted their advance to await the outcome of the combat near the Santerno. Here, the Italian knights of Spoleto and Ivrea charged the militia spear successfully destroying half of their number while the Burgundian skirmishers repulsed the Lombard knights from the grain fields (1 – 0). 


Seeing Berengar move to contain the situation on his left flank, Rudolph resumed his march forward as the persistent barrage of arrows was having little effect.


Rudolph’s infantry and knights collided with the Lombards to push most of their line back, but one body of Lombard knights were able to break through sending some Bavarian knights recoiling. Rudolph II and guard moved quickly to aid these troops. Disaster struck as the knights of Spoleto succumbed to a Lombard counterattack bringing the score even (1 – 1). .  


Rudolph’s quick decision to aid his centre did restore the situation, however, elsewhere on the battlefield the number of casualties rose as the conflict took an intensive turn (2 – 2).     


The entire destruction of the Italian contingent from Spoleto and Ivrea left Rudolph’s right flank hanging in the air. Rudolph’s infantry were holding well against the bothersome archers and Lombard militia giving him time to his knights nearby and destroy a unit of Lombard knights (3 – 3). 


Seizing an opportune moment, Lombard knights moved through a gap between Rudolph’s infantry line. To counter this, Thuringian cavalry were sent by Rudolph to beat them back. This ended disastrously for the cavalry as the Lombard the knights crushed them. Elsewhere the Bavarian knights were rolling up the Lombard line bringing the score even (4 – 4). 


The battle reached a critical moment as both sides desperately sought to inflict a decisive blow. The Lombard knights wheeled around to strike the Bavarian infantry rear while Lombard militia battled in front. As fate would have it, the Bavarian infantry repulsed both Lombard militia and knights in a heroic combat. It was now the turn of the Lombards to feel the dance of death as Rudolph II broke their centre to claim victory (5 – 4). 


Design notes.
In this scenario, each side was given an ‘allied contingent’ to represent German supporters of Berengar I and Italian troops from Spoleto and Ivrea for Rudolph II. To avoid confusion, both sides kept their original elements and designated three elements to form an allied contingent rather that swapping elements from each other’s command. As the battle developed, the movement restriction for allied contingents did not handicap either side; cohesion was quickly lost after the first few turns.

The battle ended historically and was a nail-biter to the very end. Berengar did survive the battle and in this replay, his element and other knights pursued their opponents into the fields (rough ground) finally destroying them. This had the unfortunate result of costing too much time to exit the rough ground. They were in time however, to view their centre fleeing the battlefield.


Our boards are 80cm x 80 cm for all our games and if using a smaller board I would suggest omitting the Santerno River and placing the two difficult hills resting on the opposite board edge. This would allow both armies to deploy in ample room.    

Thursday 9 August 2018

923 AD, the Battle of Firenzuola


During the early part of the tenth century, Berengar I was not only the Holy Roman Emperor but also the King of Italy. As King of Italy, he faced a growing disaffection among his subjects causing many of the noble houses to support one of two factions. This divisive situation brought him at odds with the Italian supported kingdom of Spoleto and Ivrea, caused primarily through his poor handling of the Magyar incursions; preferring to bribe them than seeking a direct confrontation with the invaders. The incursions escalated forcing the church to seek another for the crown of Italy. The most likely candidate was Rudolph II of Burgundy, a choice that was also supported by the grandson of Berengar I, Berengar of Ivrea. During this critical period, the Magyar chose to again invade northern Italy leaving an indecisive Berengar I to watch the invaders pillage the countryside. 

The situation had reached a boiling point leaving Rudolph II to gather an army and confront Berengar I. On the 29th of July the armies made contact near Firenzuola 75km south of Bologna.

    
The Battlefield.
Firenzuola is situated in a valley between the Apennines Mountains connecting Florence with Bologna and coursing its way through the valley is the Santerno River, which may have served as protection for both armies. We can only speculate on the location of the battle site as no details or terrain features are mentioned in the accounts. Tuscany is renowned for its wine, so we can imagine the hillsides partially covered with vineyards.

Surveying terrain maps of the area we have an idea the terrain should be hilly with a minimal presence of farming area. The game board should contain a minimum of two difficult hills, a small BUA (hamlet) and river. The river should be placed as close to a board edge offering a protected flank for both armies and two difficult hills should be placed in the two quadrants opposite to the river. The placement of the hamlet is done by die roll and this should rest on the board edge leaving sufficient room for both armies to deploy. Players may wish to consider replacing the small BUA for two small sized fields (plough) and considering that the battle was fought on the 29th of July, these should be considered rough ground.


The Armies.
The army of Rudolph II is taken from the East Frankish list (III/53) and has an allied contingent representing Adalbert I of Ivrea (Italian Lombard III/21b).

The Army of Berengar I are taken from the Italian Lombard list (III/21b). It is debatable if Magyars were present at this battle as Berengar I did employ them in the campaign directly preceding Firenzuola. In their place, Berengar may have East Frankish allies (III/53) representing a German faction.


The Setup.
The Army of Berengar I are defending and therefore deploy first with the eastern side as their board edge, the River Santerno on their left and the difficult hills to their right.  

The Army of Rudolph II and allies are positioned second with the Santerno River appearing on their right and the hills to their left.   

Tuesday 7 August 2018

903 AD, refighting The Battle of Hama

On the 29th of November a Qaramitan covering force encountered the approach of Abbasid government troops moving from the east. Qaramitan leaders unanimously decided to postpone the march on Hama and deal with the government forces first.

In the early morning hours of the 30th, the Qaramitan formed three divisions, placing all their infantry in the central division and placed an even number of mounted troops to left and right divisions. The battle site for the most part was open with rough ground and dunes protecting the flanks.


Facing the Qaramitan, Muhammad ibn Sulayman positioned the bulk of his cavalry opposite the Qaramitan right and deployed his infantry to the centre and right flank. 


The Qaramitan battle line approach at the pace of the infantry in the centre division to which the Abbasid moved their central division forward supported by a line of archers to their right. Sulayman held the cavalry of the left flank back as a precautionary step. 


The Zanj struck the Qaramitan line sending their archers back on their heels leaving the Abbasid spearmen trotting close behind. To the right, the Abbasid archers wheeled their line showering the approaching Qaramitan mounted troops with arrows. 


Within a short time fighting erupted all along the line to include the centre and Abbasid right wing; only the Qaramitan left and their opposing cavalry remained uncommitted. 


Dailami mercenaries on the far right seized an opportunity to strike the exposed flank of the Qaramitan mounted, this was quickly supported by Jund troops. Despite this, the situation on the Abbasid right became desperate as all the archers were cut down prompting Muhammad ibn Sulayman to join the conflict on the far right. The loss of the archer corps was quickly offset by the Qaramitan losing their own archer corps to the Zanj (2 – 2). 


Both sides fell back to assess the situation as dust clouds obscured visibility. Both sides still retained an uncommitted division. 


The sound of horns and drums signalled each side to resume the conflict and the uncommitted troops now moved into battle. This included the Bedouin light horse who seized on an opportunity to attack the Qaramitan leader and Sulayman returned to the fight leaving the Zanj to still plunder the bodies of the fallen Qaramitan archers (poor pip score). 


The Bedouin light horse were dispersed giving the Qaramitan leader a brief respite (3 – 3). However, the Zanj stopped their plundering long enough to discover a richer prize lay within their grasp. Both units of Zanj surrounded the Qaramitan leader to cut him down sending the Qaramitan in panic and flee to the desert (4+g – 3). 


Design notes.
This scenario was tested a few times with both sides reaching victory including a decisive 6 – 3 win for the Qaramitan which was particularly interesting. We selected this battle as a final report as it did reach a historical result to include the elimination of Qaramitan leadership.


Both armies comprised a mix of infantry and cavalry which resulted in games requiring less time to reach a decision as compared to the infantry engagements between Vikings and Anglo-Saxons.  

Thursday 2 August 2018

903 AD, The Battle of Hama

The consolidation of Abbasid power during the last half of the eighth century had alienated many regions within the empire. The Caliphate would eventually cede authority over Umayyad holdings in North Africa and Spain and other regions such as Morocco and Egypt would remain independent of Abbasid rule.

Closer to home, the Abbasid would face greater challenges from rivals who were determine to usurp the position of Caliph and revolts such as the Zanj of 869 – 883 further disrupted the political scene. Sensing a further weakening of Abbasid authority the Qaramitan launched their revolt of 897. Beginning in Southern Iraq their rebellion quickly spread to the western edge of the Syrian Desert and from there they launched devastating raids against Abbasid and Tulunid provinces in the Middle East and Egypt. Damascus was also besieged for a time but its defenders successfully beat back repeated attempts to seize the city.


In July of 903, measures were taken to suppress Qaramitan activity in northern Syria and the Caliph assembled an army to confront the rebels. Led by Muhammad ibn-Sulayman, the army engaged the Qaramitan in a series of skirmishes eventually forcing them to a major battle. Dispersing a Qaramitan covering force a full scale battle ensued on the 30th of November resulting in a defeat for the Qaramitan and a loss of key leaders. Despite the defeat the flames of rebellion were not stamped out but would rekindle from their original starting point in southern Iraq. 


The Battlefield
Our primary source comes from al-Tabari who describes the battle as having been fought 24 miles from Hama. Viewing terrain maps of the region, there are numerable possibilities for a battle site, but there are two important details that help narrow our search; the recent destruction of Salamiyya and the proximity of the desert referenced in the flight of the Qaramitan from the battlefield. A route connecting Hamah (Hama) to Salamiyya must pass through a wide valley (5 km wide) which narrows as one continues further south. This does offer an ideal position for the Qaramitan to deploy and is close to the desert and Salamiyya. From a DBA game perspective, the terrain qualifies as ‘dry’ and from terrain maps we note a number of details; difficult hills, possible wadis, rocky ground and further south we find desert. Our battlefield therefore should have as a minimum; two rocky terrain features, one dune and one difficult hill. 


The Armies
The forces involved are described in detail by Al-Tabari; the Qaramitan had 4,900 horse and 3,000 foot.  To reconcile the Qaramitan (III/54b) army list with these numbers, some camel-mounted troops should dismount at the start of the game to reach the numbers of foot and mounted. This gives the Qaramitan the following; 2 x Cv (including general), 1 x LCm, 4 x Cm, 2 x Sp, 2 x 3Bw, 1 x Ps or 7 mounted and 5 foot elements which closely approximates the ratio needed for this scenario.


The Abbasid forces of Muhammad ibn Sulayman are taken from the III/37b sub-list which offer a fine mix of mounted and foot troops. Foot troops have Dailami auxiliaries which are particularly useful in rough ground as are the Zanj swordsmen. 

The Setup
The Qaramitan deploy in three groups (al-Tabari), a left wing, centre and right wing with all the infantry positioned in the centre and mounted are evenly divided between the two wings. The Qaramitan defend and therefore move first.


As the Abbasid decamp they approach the Qaramitan in three groups. Muhammad ibn Sulayman places two units of cavalry in ambush positions on both flanks. This most likely means a position behind the main battleline but out of sight from the enemy which was common practice (Kennedy). 


Recommended Reading.
The History of Al-Tabari, volume 38, Return of the Caliphate to Baghdad. (page 135)
The Armies of the Caliphs, Hugh Kennedy.