Tuesday 15 June 2021

Battle in Armenia (BBDBA)

 In 359, Shapur II launched his second campaign against Rome with the invasion of southern Armenia, but encountered stubborn resistance by the valiant defence of the fortress of Amida. Finally surrendering after a seventy-three-day siege, Constantius II made massive preparations to include support from the royal houses of Armenia. Crossing the frontier of Perse-Armenia, Constantius II encountered the Sassanid army encamped a day’s march distance and prepared to do battle. 
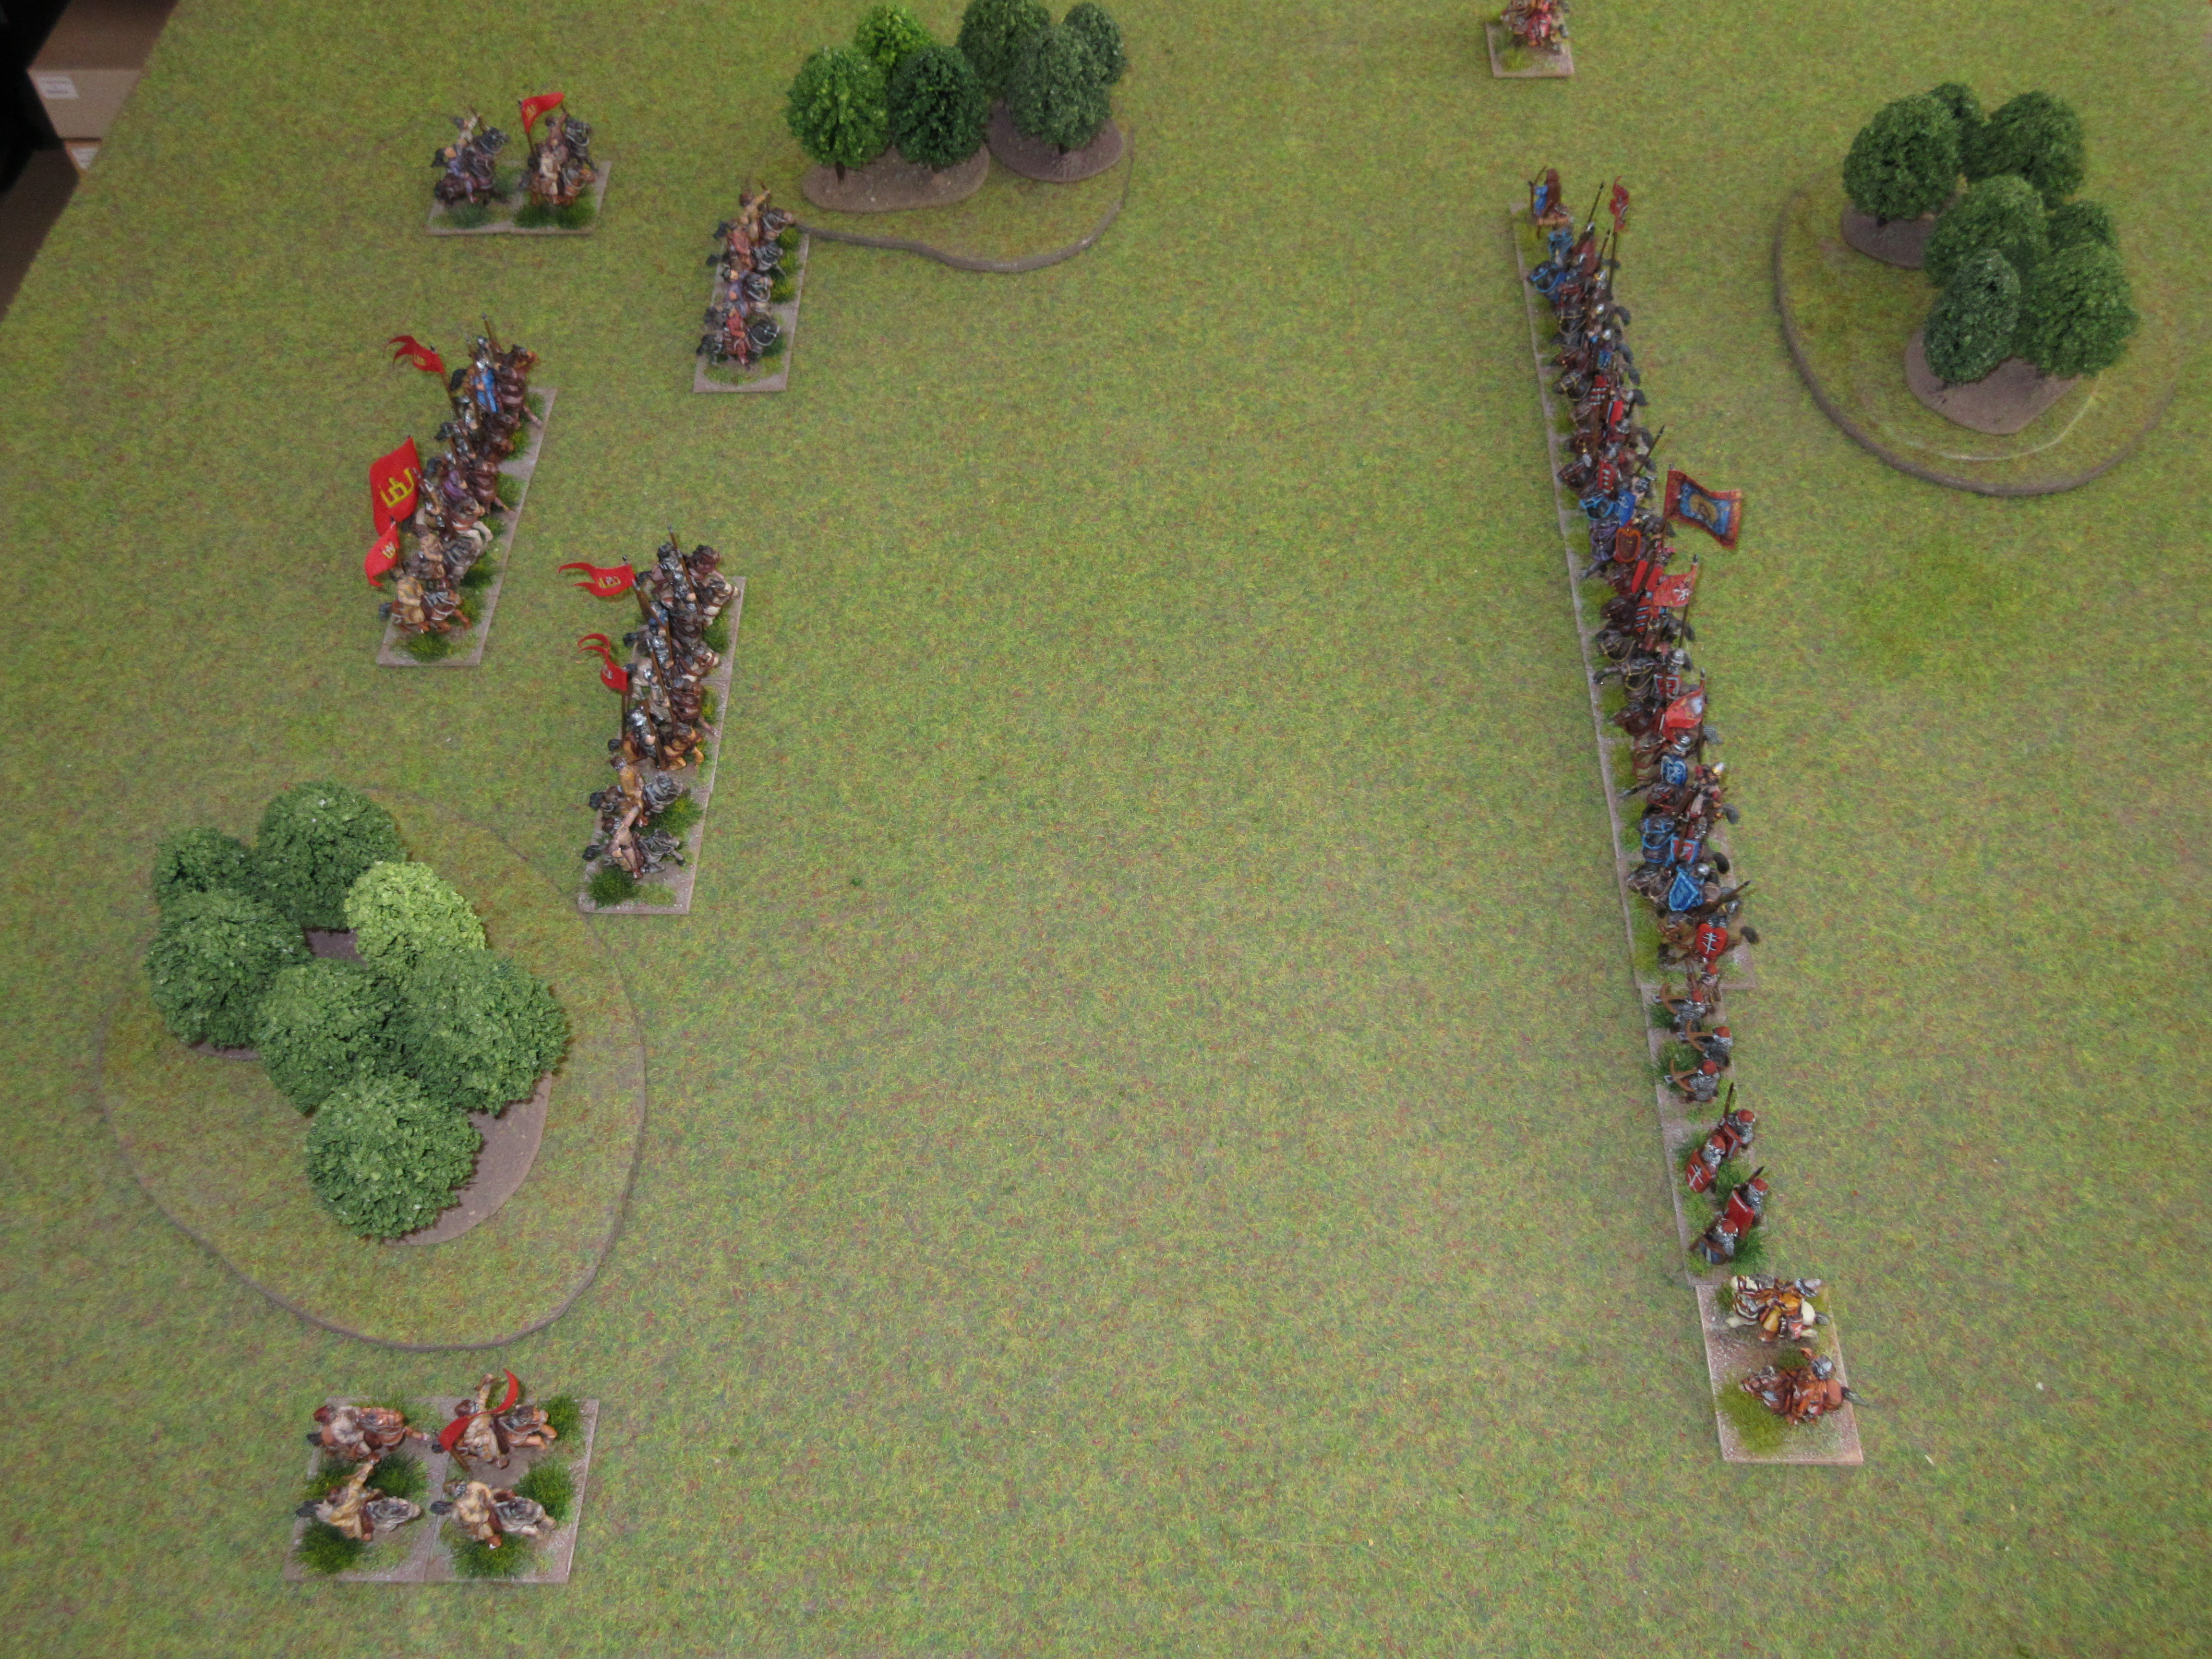
The open plain between both armies allowed for ample room to deploy with a range of hills serving as a backdrop for the ensuing battle. Along the length of the Sassanid battle line, the Asavaran banners could be seen in an array of colour which sharply contrasted with the Armenian loyalist lacking any, but recognisable by their armoured cavalry.

Rome deployed in two lines, the first, the shields of elite units of palatine legions and auxilia could be seen and behind them, fluttered the draco standards of the Roman cavalry.

The Sassanid plan was simple, eliminate the Armenian allies of Rome as this would ensure the loyalty of their own allies eager to continue their position to rule. To this end, the Sassanid right wing launched its attack while the central command advanced forward at a walk to support.

The Sassanid assault against the Armenian wing was vigorously led and prompted the repositioning of Roman equites to bolster their line. The Roman centre was also affected as it came under rapid volley fire by Asavaran cavalry forcing auxilia back.

The Sassanid effort continued unabated, finally splitting the Armenian line sending many units fleeing. The effort to break the Armenian wing however, had come at a high cost, as the Sassanid wing was spent (also demoralised) and could only hold their position. 

Meanwhile, Rome had not been idle and had similar ideas to deal with the Armenian usurpers on the Sassanid left. The Roman right wing bore down on enemy to clash with the mixed formations of Sassanid and their allies. The combined effort of clibanarii and palatine units proved so effective, the Sassanid of the left wing fled the field.


By mutual agreement, both forces in centre gradually drew apart; the Sassanid leaving the field to Rome with Rome too exhausted to pursue. Rome would record the battle as a victory, but their allies would have another tale to tell.


Comments

We do not game many big battle games due to their necessitation too much time to play. This big battle game took an hour and forty minutes to complete and in that time two double size games can be played. The exercise did stimulate some ideas to continue ‘campaigning’ in Armenia.

Rome: II/78b two commands eastern imperials. a third command of Armenian allies: II/28c

Sassan: II/69b three commands with 6 elements representing Armenian loyalists.  

Tuesday 8 June 2021

East European tests games

After completing the Post Mongol Russians (IV/44), I organised a four-nations test between the newly painted Eastern European armies; Teutonic, Polish, Lithuanian and Russian. Each nation would play in 24 matches, half as the invader, half as the defender. The standard 12 element size army was used and some variation with terrain was needed as three of the participating armies have ‘forest’ as home terrain; here, DBMM Book IV provided a few more options.

The series was done between painting sessions and took about three months to complete. The game board used was 80cm x 80cm, which left 4BW on either flank for a fully extended battleline, however, using a single battleline would meet with disaster. On the whole, the series provided an opportunity to explore interesting deployments and tactics which will be needed for two upcoming historical scenarios.

On a side note, halfway through the series, I became tired of dice flying off the table or disrupting the alignment of troops and the purchase of a dice cup solved this problem. Odd as it may seem, this changed one nation’s fortune for the better. Noted below are the performances of each army with some commentary.

Invader-Defender

Post Mongol Russian (7 wins, 17 losses)

Russia – Lithuania;       4-1, 4-2, 4-2, 4-0

Russia – Teutonic;        0-4, 5-2, 4-1, 2-4

Russia - Polish;            0-4, 0-4, 1-4, 1-4

The composition of the Russian army remained the same throughout the series, 9 mounted and 3 foot troops. Having too few infantry and light horse created difficulties, especially when playing the defender. History has documented how poorly the army of Novgorod performed during the 15th century and this will be covered in a future scenario, the Battle of Shelon.


Later Polish (15 wins, 9 losses)

Poland – Russia;            6-3, 4-0, 4-2, 4-2

Poland – Lithuania;       3-4, 5g-0, 3g-0, 5-3

Poland – Teutonic;        2-4, 3-4, 4-2, 4-0

The Later Polish were the most enjoyable to use. As invader or defender, the mounted contained a good balance of knights, cavalry and light horse and in many cases they ably out maneuver their opponents. War wagons and militia were used with the latter providing better value. The Teutonic Order proved a tenacious opponent with games lasting 5 or 6 turns.


Lithuania (16 wins, 8 losses)

Lithuania – Russia;       4-1, 5-4, 4-3, 6-1

Lithuania – Poland;       5-0, 5-3, 4-2, 4-3

Lithuania – Teutonic;    6-3, 5-1, 4-2, 5-0

Losing 7 of their first 8 games against Russia and Poland, I decided to make some changes. Deploying dismounted archers at the start of the game than during the game saved a migraine and investing in a dice cup, made a decided change. The latter was purchased after dice either disrupted the alignment of troops or fell off the table revealing your best die cast. The change was remarkable as Lithuania bounced back to win 14 straight matches. Experiments with deployment proved fruitful and these will be tucked away for our first face-to-face games. 


Teutonic Order (10 wins, 14 losses)

Teutonic – Russia;        6-2, 5-1, 4-2, 1-4

Teutonic – Lithuania;   0-5, 0-4, 5-4, 3-5

Teutonic – Poland;        2-5, 4-2, 1-4, 4-3

Despite their final score, the Teutonic Order are an excellent army to use but do require a long learning curve. The mix of troops, 7 mounted, 5 foot, does require some experimentation to reach a balance when fighting a highly mobile army, such as the Lithuanian. Various deployments were tried, such as evenly split and deployed on both flanks, positioned entirely on one flank, or positioned in the rear.   


Tuesday 1 June 2021

“Unreliable Allies”

 Allied contingents, where these are permitted in the DBA3 lists, can provide specialist troops otherwise not available to an army. Having a different command structure, these may not be moved as a group with elements of the main army and will likely create a pip drain. Historically, the employment of allies could become a double-edged sword; their assistance could gain victory in battle or hastened your defeat when they joined the enemy.

A recent historical scenario for the Battle of Montlhéry presented such a sword depriving King Louis XI of a decisive victory. The scenario did handle the comte du Maine’s defection, but the rule option still had room for improvement. Searching further brought me to an article in Slingshot written by Phil Barker titled – DBM4.0, Proposals “Unreliable Allies”, Slingshot 227, p. 24.

Phil outlined a number of factors that would force an ally to become unreliable, for example, participating in battle would encounter too high a risk and an avoidance to be on the losing side, were the most important. Equally, turning an unreliable ally to a reliable one required greater inducement which outweighed the risk or the enemy was losing, time to join in. And noteworthy, an unreliable ally would not move about the field.

The proposals were intended for DBM4.0, but priorities changed then as DBMM became Phil’s primary focus. The proposals are useful and will be used for future historical scenarios, these are:

 Unreliable allies

An allied contingent becomes “unreliable” if a player scores a 1 on his first PIP dice. They remain stationary for the battle unless “activated”.

 Activation occurs;

when enemy are 3BW from any element within the contingent or a player may elect to spend 5 pips as an inducement or enemy are the first to have a demoralised command.

 A demoralised command, normally associated with the big battle option, can easily be used with the 24-element option. See Montlhéry.