Tuesday 25 February 2020

Nikephorian Byzantine vs. Iqshidid Egyptian


During the last decade of Iqshidid rule (935 – 969 AD) financial constraints had reduced the number and quality of the army guarding the northern frontier of Syria (al-Sham). By contrast, the Byzantine army experienced a resurgence under the guidance of their future emperor, Nicephorus Phocas.
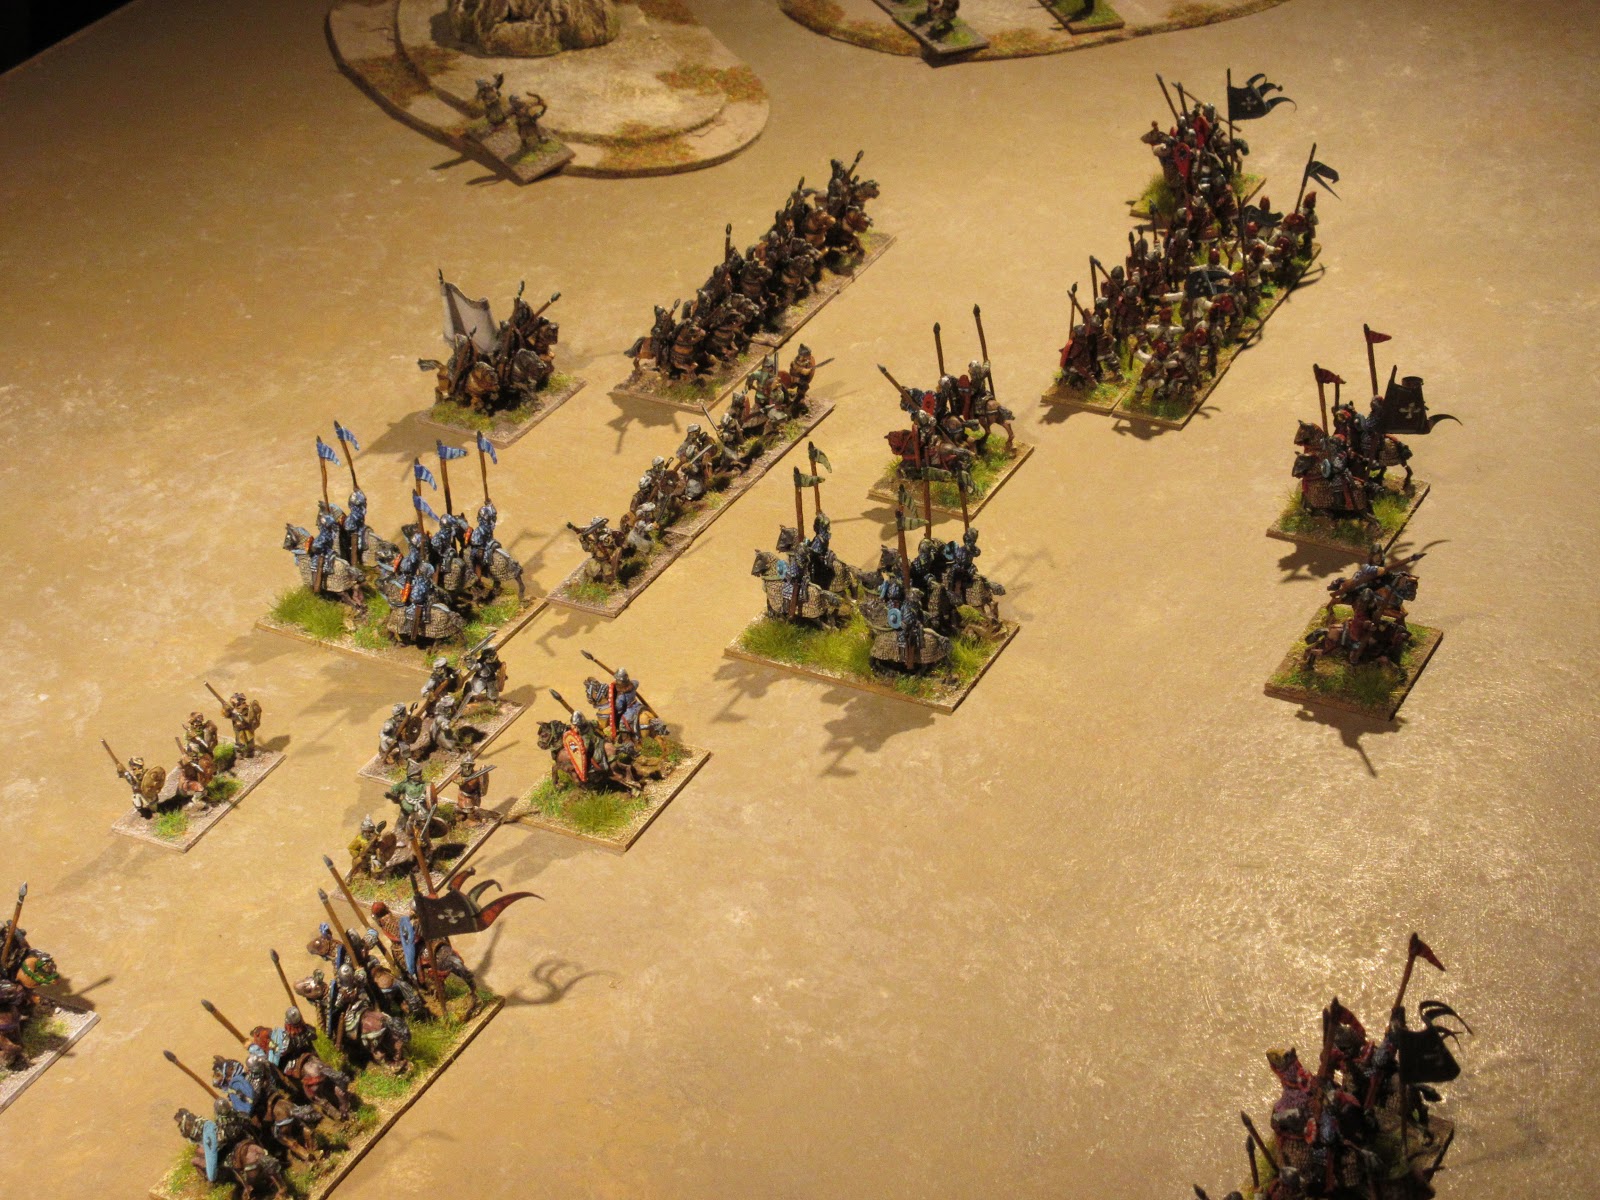
 These reforms included the implementation of new formations and weapons, a revision of tactics for both foot and mounted troops and rigorously honed by constant training and drills.  

Game one.

The Iqshidid Egyptians deployed their battle line with spear and sword armed infantry in centre with light troop holding the rocky ground on both flanks. Ghulam cavalry were positioned behind in support and on the far right, the Bedouin light horse. In contrast, the Byzantine positioned all their cavalry as its main battle with the Klibanophoroi taking a central position. Both kavaillaroi wings were supported by an equal number of skoutatoi.


The Egyptians opened battle by bringing forward their skirmish line on the right. The Byzantine replied by moving their own psiloi on the right and brought forward in echelon the kavaillaroi and Klibanophoroi. 


The Byzantine kavaillaroi charged first followed by the Klibanophoroi. The Egyptian line buckled but held. Both sides lost casualties, but the Byzantine were gaining ground. To quicken the pace, the skoutatoi supporting the right wing were moved forward.


The supporting skoutatoi was fortuitous as the loss of a few kavaillaroi now exposed the Ghulam cavalry to a withering fire. A constant shower of arrows sent enemy cavalry scrambling safety. 


Keeping the initiative, the Strategos reformed his kavaillaroi for the final phase and moved forward the skoutatoi on the left flank. The situation was now desperate for the Egyptians as Byzantine skoutatoi loosed their arrows with devastating effect on both infantry and remnant units of cavalry. finally sending the Egyptians in rout.


Score 8 – 4 Nikephorian Byzantine.


Game two
Pursuing the Egyptians further south, the Strategos found the enemy prepared for battle. This time the cavalry took a centre position with infantry forming on either flank. The Byzantine deployed in standard formation, but due to the constricting nature of the terrain kept units close together. To match the enemy line, the Rus and psiloi were positioned on the far left using the rocky ground for cover.


The charge of the Byzantine kavaillaroi and Klibanophoroi shattered the first line of Ghulam cavalry. Reforming the kavaillaroi allowed the skoutatoi time to take up their new position to support their next charge. Further to the right of the Byzantine line, other kavaillaroi pursued enemy light troops into the rocky ground eventually cutting most down.


Harassed by archery fire the Egyptian foot on the right made several attempts to close with the skoutatoi. Unfortunately, their effort was in vain as the deafening sound of a thousand hooves could be heard signalling the end.

Score 8 - 4 Nikephorian Byzantine.


The Nikephorian Byzantine continue this series with battles planned against the Dynastic Bedouin (Emirate of Aleppo) and the Fatamid Egyptian.

Thursday 6 February 2020

Consular Rome vs. Numidia


Following the death of King Micipsa in 118 BC, the succession to the throne was intended to be jointly held by Jugurtha and Micipsa’s  two sons Hiempsal and Adherbal. Not wishing to share the throne Jugurtha had Hiempsal killed and forced Adherbal to an open battle. Defeated, Adherbal fled to Rome for help to which Rome sent emissaries to mediate. A decision was reached resulting in the division of the kingdom into two equal parts.

In 112 BC, Jugurtha resumed his war with Adherbal finally besieging him in his capital of Cirta. Rome again sent emissaries but Jugurtha postponed the diplomatic talks until Cirta was captured. Jugurtha succeeded, however, seizure of the city had cost the lives of many of its residents including the Italians. Their deaths were unfortunate as it brought Jugurtha in direct conflict with Rome which they responded by sending an army under the command of Lucius Calpurnius Bestia. 

Game one
Jugurtha took up a defensive position with hills and wood protecting his flanks. Bestia deployed his troops in a traditional manner to confront the mobile Numidians; hastati and principes in the first line flanked by the allied troops with reserve troops behind each wing.


Seeing little activity from the Numidians, Bestia moved his right wing forward to pin the enemy’s close formation troops against the wood and ordered the left wing to seize the hill near the enemy's centre. From the position on the heights Roman infantry could pin Numidian reserves while the main assault took place. 


The lack of activity from the Numidian proved deceptive as their light cavalry attacked the supporting allied cavalry enabling a small number of Numidian horse to encircle the Roman right wing inflicting severe casualties.
Meanwhile, the battle for the hill became hotly contested with Rome gaining little ground; both sides suffered heavy casualties 


Allied cavalry recovered well enough to send the Numidian light horse in retreat and the timely support of reserve allied troops neutralised the threat to the Roman right wing. In centre, velites kept the Numidian elephants occupied while the triarii added their weight to the battle to tip the balance. Jugurtha called for a general retreat, giving Rome a costly victory (8 - 6).


Game two
Pursuing Jugurtha further south, Bestia found the Numidian army amongst similar terrain. Numidian light troops covered the slopes of the hills on their left and the woods to their right. Deployed as before, Bestia would send his allied infantry to clear the enemy light troops before committing the centre.


To Bestia’s surprise, the Numidian centre opened to allow the elephants to move forward to engage in battle.


The elephants successfully pushed the centre line back but Roman hastati and principes easily dispersed their opposition; both battle lines quickly became disordered as units became isolated. Dust clouds could be seen in the distance signifying the approach of Numidian cavalry. 


The situation became desperate as Roman casualties quickly mounted (6 – 2), not only did Numidian cavalry threaten both flanks but the elephants were causing serious damage in the centre.


The Numidian whirlwind slowly died (low pips) giving Rome a brief respite to redress their formations; reserve troops strengthened the centre giving both flanks time to fend off the Numidian cavalry. Having seized the initiative, Numidian casualties began to steadily mount. After a hotly contested battle lasting four hours (16 turns), the Numidian host left the field giving Rome a second Pyrrhic victory, 8 – 7.


Historical note.
Jugurtha later surrendered to Lucius Calpurnius Bestia and negotiated a favourable peace treaty. Bestia's rivals in the Roman senate were not pleased and named a new consul, Metellus, to continue the conflict. Equally unsuccessful, it would take the efforts of a newly elected Gaius Marius to set in motion the capture of Jugurtha, earning him a triumph in Rome.

Consular Army
2 x General (Cv), 2 x equites (Cv), 8 x hastati/principes (4Bd), 4 x triarii (Sp), 4 x allies (3/4Ax), 4 x velites (Ps).

Numidian Army
2 x general (Cv), 8 x horsemen (LH), 8 x javelinmen (Ps), 2 x elephant (El), 4 x Roman trained javelinmen (4Ax),