Tuesday 27 February 2018

Later Imperial Roman vs Patrician Rome

One of the finest examples of a conflict between the Late Imperial army and that of the Patrician era is Constantine III bid for the throne in 407 AD. Following the aftermath of the civil war and the barbarian crossing of the Rhine in 406 AD, Constantine III gathered his Britannic army and crossed the channel. He fought not only the migrating Germanic tribes also faced Roman forces sent against him from Italia.

In this match series, the Late Imperial Roman army of Constantine III are seen with their white banner and the Patrician forces (purple banner) are noticeable by the addition of both mounted and infantry foederati. 


Game 1
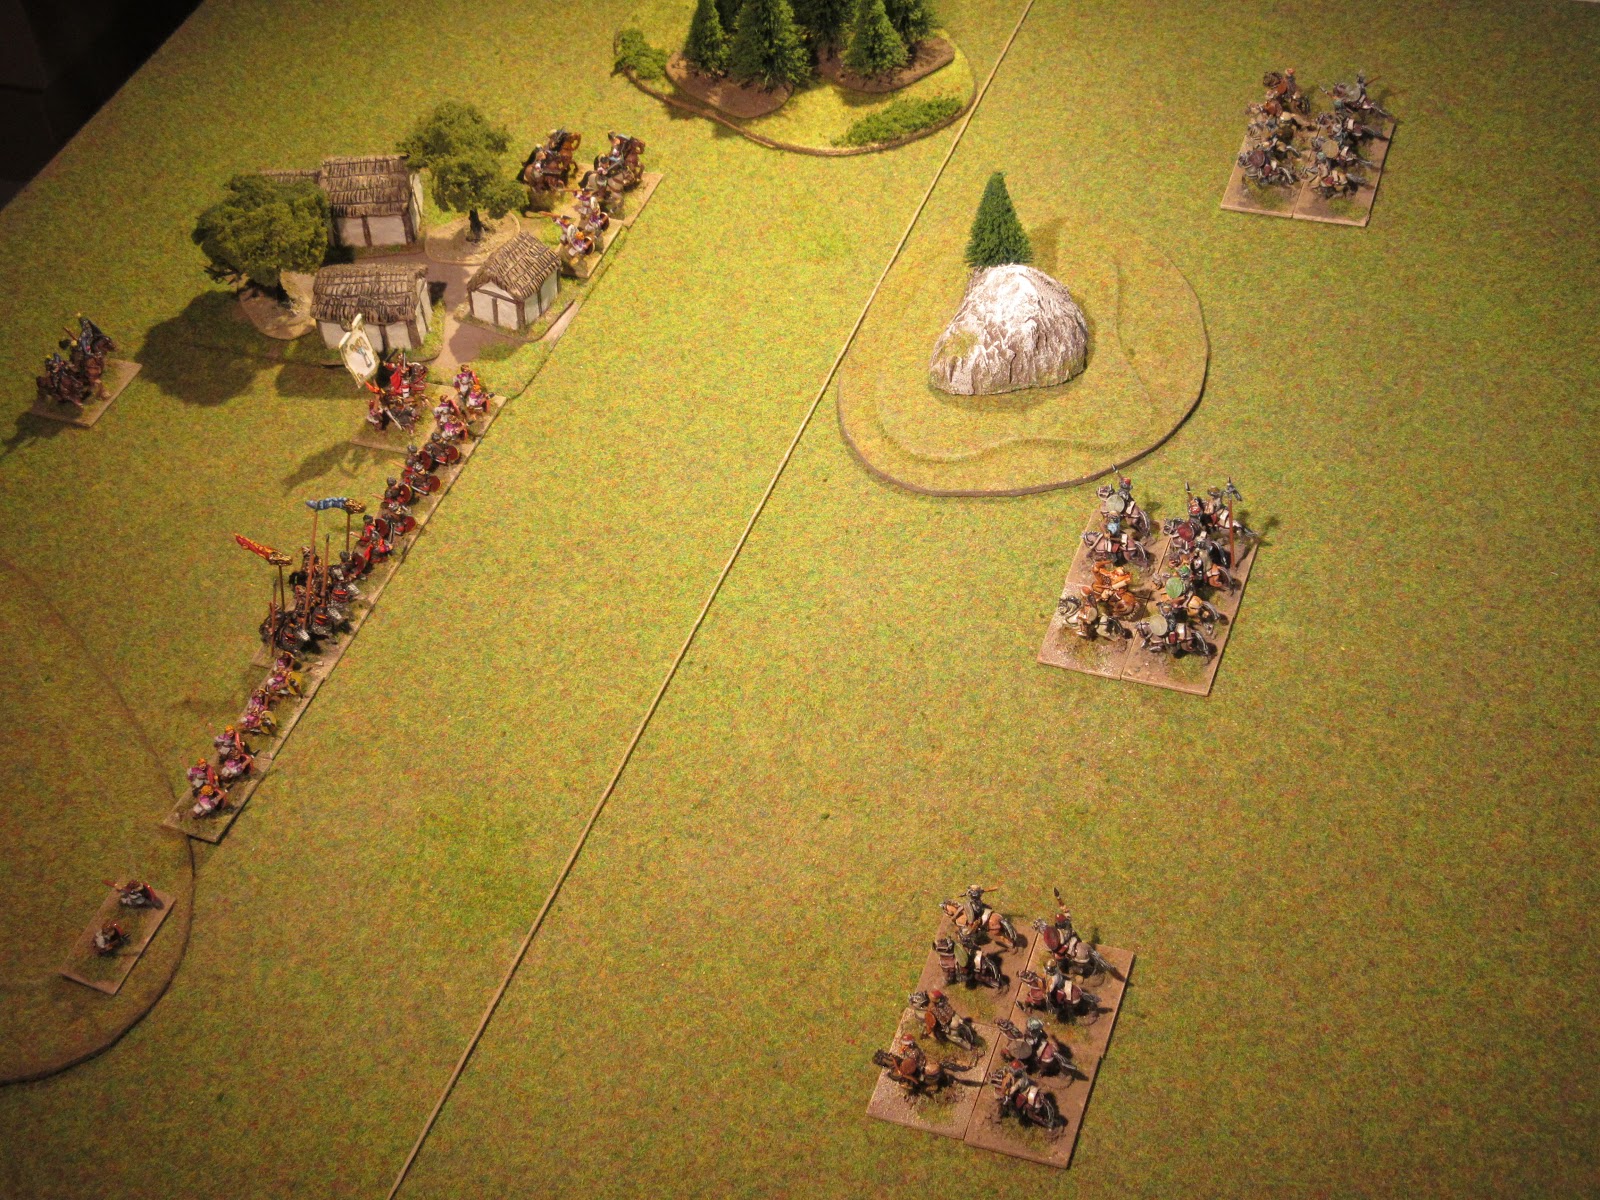
The battleground despite the wood and hamlet securing the left flank of each army was relatively open. The Patrician army (left of photo) have positioned their legion in the centre flanked by foederati troops and Hunnic allies are positioned further to their right. Constantine III positioned his legion opposite their counterpart with the  auxilia and cavalry extending the battle line further. Both armies held a small reserve force withing bow shot of their front line troops. 


Both centres advanced quickly forward as troops on either flank squared off to meet their opposition.


Following the clash of battle lines, the Gothic foederati on the left made brisk work by cutting down two units of auxilia but this setback was meet with equal ferocity with the Britannic legion and clibanarii destroying their opposition (2 – 2).


The battle now lost its cohesion as a breach in the line offered flanking opportunities. In this situation, the Britannic forces gained an advantage and crushed the Patrician army bringing the battle to a close. Score 5 – 2 for Late Imperial Roman.


Game 2
Now on the offensive, the army of Constantine III caught the Patrician forces on an open plain with one wood offering meagre cover. Here, the Britannic forces made good use of the surrounding difficult hills and hamlet to set up a defensive position while also secured their rear.


Seeing the Britannic forces were not willing to leave their position, the Patrician army moved forward with their right flank leading in echelon.


Both sides now seemed hesitant to engage and hesitantly moved forward (low pip scores for both). A feeble attack by the Patrician forces was easily countered by Constantine III. 


In a desperate move to regain the momentum, the Patrician general launched the Gothic foederati crushing a unit of auxilia for their effort. The Britannic legion held their ground and drove the Goths back on a supporting column of foederati infantry. Having no further room to recoil, the Goths were destroyed in place thus ending the battle. Score 4 – 1 for the Late Imperial Roman. 


Game 3
Maintaining the offensive, Constantine III was able to repeat his good fortune and catch the Patrician forces on an open plain. This time, the Patrician deployed its foederati troops as part of the main battle line with the Hunnic allies positioned on each flank. The Britannic force rested its right flank on the difficult hill and all its infantry filling the open space between hill and the village. Heavy cavalry formed a second line and all the light horse were positioned further behind as an extra reserve. 


The Patrician general seeing no threat on this left flank moved the Huns to a new position. Both battle lines now move quickly forward.


The armies met head on with both sides pushing and recoiling but neither side could make a breach in the other's line. 


In time, gaps that did appear were quickly filled by units held in reserve. Even Constantine III was seen in the thick of enemy troops.


Casualties were beginning to fall evenly on both sides but the Britannic line was steadily seen moving back.


The battle was becoming desperate as neither side would break leaving the small arena between hill and village littered with dead. (3 – 3).


The Gothic Feoderati had broken through the Britannic line but they were held to a standstill by the Illyriani LH. On the right flank, the Britannic forces were able to recovery the initiative and strike a decisive blow. This brought an end to a hard fought battle. Score 4 – 3 for the Late Imperial Roman. 


II/82a  Patrician Roman 408 – 493 AD Terrain type: Arable, Aggression 0
1 x general (Cv or 3Kn), 1 x equites (Cv), 2 equites (Cv or 3Kn or LH) or foederati (3Kn), 1 x legionnaire (4Bd), 2 x auxilia (4Ax), 3 x auxilia (4Ax) or foederati (4Wb), 2 x archers (Ps).

Wednesday 21 February 2018

Historical Match up – Later Imperial Rome vs. the Sassanid


Strange as it may seem, but this is the first time these two armies have met as the Sassanid have fought the Middle Imperial Roman and Early Byzantine in earlier battles but passed over the 4th century Roman Empire. In this series Rome is the invader and the Sassanid has marshalled their forces to include an elephant and levy.
Terrain selection for both sides is arable but will have an arid look to it.

Game 1
Rome selected a relatively open plain with a gentle hill and from its slight rise, the magister militum arrayed his infantry along its base and positioned the cavalry to the right flank. Facing the legion was the Persian levy and elephant and in centre was their commander flanked by Asavaran cavalry and horse archers.


Rome initiates movement and quickly moves to intercept enemy light horse threatening the right flank, while the clibanarii supported by the legion and auxiliaries advance toward the Sassanid centre.


The ensuing clash brings heavy casualties to both sides, two auxilia are destroyed as are the Sassanid horse archers bringing the score even. Elsewhere in the centre, the clibanarii hold the Asavaran cavalry and the elephant having moved beyond its support is struck in front and flank but manages to hold its ground.


Having destroyed the elephant, the legion closes the distance on the isolated unit of cataphract and destroys it sending the Sassanid in retreat. Score 4 – 2 for Eastern Rome.


Game 2
Rome continued their campaign and found the Sassanid deployed in open ground with scrub to their right. The village located between the two armies would become a focal point in this contest.


The Sassanid advanced slowly allowing all its troops to maintain their alignment. The task of capturing the village was left to the levy and the elephant corps and the remainder of the army would concentrate on the Roman centre.


Ever eager to cross lances with Roman cavalry, a few units of Asavaran cavalry charged ahead. Elsewhere, the Sassanid closed the distance to the awaiting Roman line.


The Sassanid, in successive waves of cavalry attacks brought down a unit of clibanarii and half the legion.


With the loss of the legion the magister militum had no other alternative than to join the battle. His left flank kept the levy and elephant corps at bay while on the right, events took a grim turn with the further loss of the clibanarii. Up to this point Sassanid losses had been minor, 3 – 1.


Units on the Roman left were successful luring the elephant corps away from battle and some even managed to destroy the levy supporting the elephants. The Roman centre held its ground, but the cavalry on the right were overwhelmed by the tenacity of the Asavaran and horse archers. The magister militum called for a general retreat, score 4 – 3 (+2Hd) for the Sassanid.


Game 3
For the final battle Rome were caught on open ground with scrub located nearby. Placing the auxilia on the right to make use of the scrub the legion was positioned in centre with the heavy cavalry and clibanarii in support on its left. A third line held a unit of light horse as a reserve.

The Sassanid deployed in open ground between a village and a low hill. Positioned on the hill were the levy flanked by the elephant corps with all the Asavaran deployed in two lines.


The Sassanid initiated the battle by moving its centre forward. Rome countered by positioning archers in the scrub and left wheeling the entire second line to link up with the bowmen.


The Sassanid centre held its position giving time for the flank units to march up; the levy made a bee line toward the archers and the horse archers on the far right advanced quickly to threaten the Roman left. Rome made good use of the time to strengthen its left flank and tidy up the centre.


With both Roman flanks now threatened, the Sassanid launched their full might against the Roman centre.


The elephant corps managed a breakthrough by destroying the legion to its front, but it found itself alone as the Asavaran on the right recoiled and those on the left were destroyed. That positioned was quickly filled by the Asavaran of the reserve line. Not wanting the elephant to run rampant along the Roman line, the magister militum attacked it.


The turns following can be described as a titanic struggle. Despite the loss of its cavalry, Rome slowly gained the upper hand to bring the score to 3 – 2. The final blow came when the Sassanid general fell under the lances of the clibanarii ending the game. Score 5g – 2 for Eastern Rome.


Sunday 18 February 2018

The Nubian, the Hyksos and Old Kingdom Egyptian

The Nubian

The Nubian army list covers the period of 3000 BC to 1480 BC which corresponds with the Old Kingdom Egyptian. From my scant research, the lands to the south known as Nubia are actually divided like Egypt in a lower and upper region. This is significant as it will influence my choice of painting schemes. 

Map: The Early Kingdoms.


Bordering Egypt we find the nomadic tribes of Wawat, Irtjet and Setju inhabiting the scrub land to the west and east of the Nile. These people are akin to the Egyptians but having slightly darker skin. Travelling further south to the Dongola reach one encounters the darker skinned inhabitants normally associated with modern day Sudan. 

The Miniatures
These are Black Hat Miniatures and the five packs ordered were enough to build a Nubian collection. This comprises of 1 x general (3Bw), 2 x clubmen (3Wb), 6 x archers (3Bw) and 3 x skirmishers (Ps) plus a camp guard. The extra archers will join the Old Kingdom Egyptians as Medjay mercenaries.


Opting for the tribes of lower Nubia, I by painting their kilts first followed with their skin colour. The skin colour is a mix of flesh, mid-brown and a hint of red. This is later highlighted with a lighter shade to detail the muscle, hands and face. A wash, a mix of Ogryn Flesh (washes) and Rhinox Hide (base) was applied over the figure. This step was a departure from my standard ‘out of the bottle’ technique, but the result turned out well.


The Hyksos 

The Hyksos army have two sub-lists dating 1645 BC – 1591 BC and 1590 BC – 1337 BC. The difference between the two is the increase number of chariots replacing units of retainers and Bedouin auxiliaries.

Where the Hyksos came from is still a matter of debate as some modern authors regard the ‘rulers from foreign lands’ as coming from fertile crescent while others view them as migratory Amorite. Most authors will agree that their presence was a steady successive wave of migration to the eastern delta and not an invasion. Their governance of the Nile region is marked as the Fifteenth Dynasty and during this time, Upper Egypt remained an independent kingdom establishing the Abydos Dynasty.

Illustration: Hyksos tribute


Painting the miniatures
These are Black Hat Miniatures from their Biblical range and like the Old Kingdom Egyptians are very well detailed. I have seen depictions of Hyksos in multicoloured kilts and tunics presenting tribute to a pharaoh/king, I view this as  an activity done by administrative functionaries and not military types. Since the armouries and factories of the eastern nomes were taken over, I decided to paint the majority of infantry in standard white kilts with the exception of the Bedouin auxiliaries, preferring their homespun cloth.  

The horses and chariot of general’s element are somewhat restrained, that is no plumage or decorations signifying a leader’s equipment. The archer figure (general) is modestly dressed with a cloak and this I embellished a bit.


Old Kingdom Egyptian

This is a second command of Old Kingdom Egyptian and was built so the internal conflicts between Upper and Lower Egypt could be fought. Also, pairing the two would permit larger battles against the Later Amorite and their Bedouin allies.

The miniatures
The miniatures are Black Hat figures with extra figures filling out the options listed for other armies. The Hyksos for example may have an Egyptian levy (7Hd) and skirmishers (Ps) and extra Nubian will supply the Medjay (3Bw) as an option for the Egyptian force.


Future plans
This completes the project for the moment as the Sumerians to be produced by Eureka may become available in May or early June. In the meantime, there are plenty of armies to use for a few campaigns. 

Tuesday 13 February 2018

Later Imperial Roman vs the Hun

356 AD benchmarks the Hunnic presence in book II of the DBA Army lists. Beginning with the eastern portion of the empire it is toward the last quarter of the 4th century that western field armies come into contact with them. The Hunnic list given below predates the rule of Attila leaving the majority of Huns classed as light horse with a small quantity of nobles classed as heavy cavalry.  

Rome is initially defending their provinces and therefore make use of arable terrain; BUA (hamlet) is compulsory with difficult hills and forest used as optional terrain features. 


Game 1
Huns are attacking and have caught Rome on an open plain with the scant protection but for a small hamlet. The Huns deployed their cavalry in two major groups, both set to work on the open left flank of Rome.


To the surprise of the Huns, Rome quickly moved forward to keep the Huns bottled in the limited area offered by the difficult hills. The Huns respond by sending their furthest column forward to threaten the Roman cavalry.


The Huns of the central group were ably contained between the hills by the legion and auxiliaries and this means the Roman equites would have to take the brunt of the Hunnic attack approaching the left flank.


Hunnic arrows were finding their targets and in quick succession the clibanarii and half the legion were broken.


Roman units were quickly sent to fill their places, but the Huns were quick to take advantage of the gaps and isolated units. Score 4 – 1 for the Hun.


Game 2
Caught for the second time in an exposed position, the Roman force deployed closer to camp. As before, the Huns deployed in two groups with the majority of their cavalry positioned on the extreme right.


Taking advantage of the time needed for the flanking column to reach battle, the army moved its infantry to seize the heights and form a new battle line.


The legion and auxilia were not averse to taking the action to the Hun and those infantry on the left were able to repel the Hunnic cavalry. Meanwhile, Roman cavalry quickly dispatched two units to the ‘afterlife’.


Caught off balance, the Huns were steadily losing ground such that their chieftain made a desperate attempt to turn the battle around. Unfortunately, this was not to be as a further two units were destroyed ending the battle. Score 4 – 0 for the LIR.


Game 3
Rome was now on the offensive and took advantage of the terrain offered to secure their flanks on the difficult hill and hamlet. The majority of the equites were positioned on the left flank to foil any attempt by the Huns to turn that part of the battle line. 


As expected, the Huns did probe the Roman left, but the equites deployed for that event quickly moved to counter the enemy threat.


Confident that Roman light horse and auxilia could contain the Hunnic threat on the left, a unit of Roman heavy cavalry returned to the centre in time to see the Huns assail the centre and right flank.


Well aimed bow and javelin by the Huns destroyed two auxilia sending shivers down Roman spines. The gap created left the Roman general temporarily isolated.


A second gap appeared on the Roman flank and seeing his light horse fleeing on the left forced the Roman commander to call a general retreat. Score 4 – 0 for the Hun.


II/80d Hunnic 356 – 570 AD Terrain type: Steppe, Aggression 3
1 x general (Cv), 11 horse archers (LH).

Saturday 10 February 2018

Later Imperial Roman vs. Alaric

The Goths have made an earlier appearance, but not the army of Alaric which has a number of options which you will find below. The two armies confront one another within the empire with both having full options of terrain and allied contingents. 


Game 1
Rome is the attacker in the first confrontation. The Goths found themselves in less than ideal terrain, but Alaric was eager to attack the Eastern Romans. Alaric with other mounted nobles formed the right wing with the rest of the warriors on foot formed the left. 

Facing the Goths, Rome's battle line extended beyond that of the Goths which invited an opportunity to encircle both flanks.


The infantry on both sides were eager to cross swords but stopped forty paces to regroup their dense columns. The Gothic cavalry on their left moved forward at a walk as their charge would come soon enough.


Underestimating the determination of the auxilia all three Gothic columns were repulsed but only the legion followed up their pursuit.


Renewing their effort, the Gothic infantry created a breach in the Roman line. A heartbeat later, the legion collapsed enlarging the breach sending a note of alarm to the magister militum watching nearby.


Following up the success of their infantry, the Gothic cavalry lowered their lances and charged forward sending most of the Roman cavalry recoiling from the shock. Despite the destruction of Gothic skirmishers, this was small compensation as another unit of auxilia were destroyed sending the battle quickly out of control for Rome. 

Alaric was in the thick of the fight eliminating half of the clibanarii and their loss sent the magister militum to call for a general retreat ending the battle. Score 4 – 2 for Alaric.


Game 2
Rome was now the defender and found itself on open ground with one lone hill serving as flank protection. Across the field, the Gothic infantry were seen gathering at the outskirts of a village and their dreaded cavalry took a position between the wood and the infantry.


Rome’s battle line moved forward maintaining a strict alignment. Across the field, the Goths moved steadily forward keeping cadence with their swords striking their shields.


With the exception of a few mounted units held back as a reserve, all units were committed to battle. Within minutes the lines were moving to and fro with the Gothic left giving the most ground. The situation on the Gothic right broke through the line held by the legion and were pushing back the remainder of the Roman left.


As the breach in the Roman line widen, the situation became desperate for the magister militum as he was quickly surrounded by Gothic freed slaves and warriors and killed. His demise would surely mean the destruction of the Roman army (3g – 1).


Now leaderless, Roman resistance fell to the tribunes of the cavalry regiments to avenge the loss of their leader by falling on the flank of an infantry column and elsewhere the clibanarii and equites surrounded a unit of Gothic cavalry. The quick counter attack did have its effect cutting down Gothic infantry (3g – 2).


Surrounded, the Gothic nobles repulsed their adversaries back. These same nobles counter attacked the clibanarii while the Alaric attacked the equites in the rear and their loss drove the heart out of the army and sending it fleeing from the field. Score 4g – 2 for Alaric.


Game 3
The final battle found the Roman army deployed in front of a line of woods and formed in their standard formation;  cavalry in the centre and auxilia evenly distributed on either flank. Across the field, Alaric formed the cavalry in the defile and positioned skirmishers on either side, while the infantry would scale the hill to descend on the Roman right.


Rome took the initiative and moved forward in two wings; the right wing would deal with the infantry descending the hill while the left wing would try to contain the Gothic cavalry in the defile. Auxilia and skirmishers would seize the hill on the Gothic right to help facilitate this move.


In the eagerness to confront the Gothic cavalry, Roman mounted surged forward ahead of their infantry support.


The Gothic cavalry were more than ready for battle as they easily repulsed the Roman cavalry driving them back toward the Roman commander’s position.


The Roman infantry on the right contained the Gothic threat and even the legion was steadily driving their adversaries back toward the hill. To bring order to the maelstrom caused by the cavalry action in centre, the magister militum committed his guard to the fight.


Both commanders were in the thick of the fight, but Alaric was able to issue orders for uncommitted units to assist the cavalry action. Half the clibanarii fell as did other Roman units in quick succession bringing the battle to a close. Score 5 – 1 for Alaric.


II/65c Alaric 408 – 419 AD Terrain type: Arable, Aggression 3
1 x general (3Kn), 2 x noble cavalry (3Kn), 1 x cavalry (3Kn or LH), 4 x warriors (4Wb), 2 x freed slaves (4Wb or 7Hd), 2 x archers (Ps).