Thursday 24 October 2019

Early Egyptians vs. Nubian (3000 BC)

This week’s post brings a return to the standard game and a historical matchup between two armies of the Biblical period. The early Egyptians have seen action, but not the Nubians. To be honest, bow heavy armies do not rank high on my and that is the reason for their late appearance. These were added to the biblical collection as they were frequently at odds with the Egyptians. Army list for the armies can be found below.

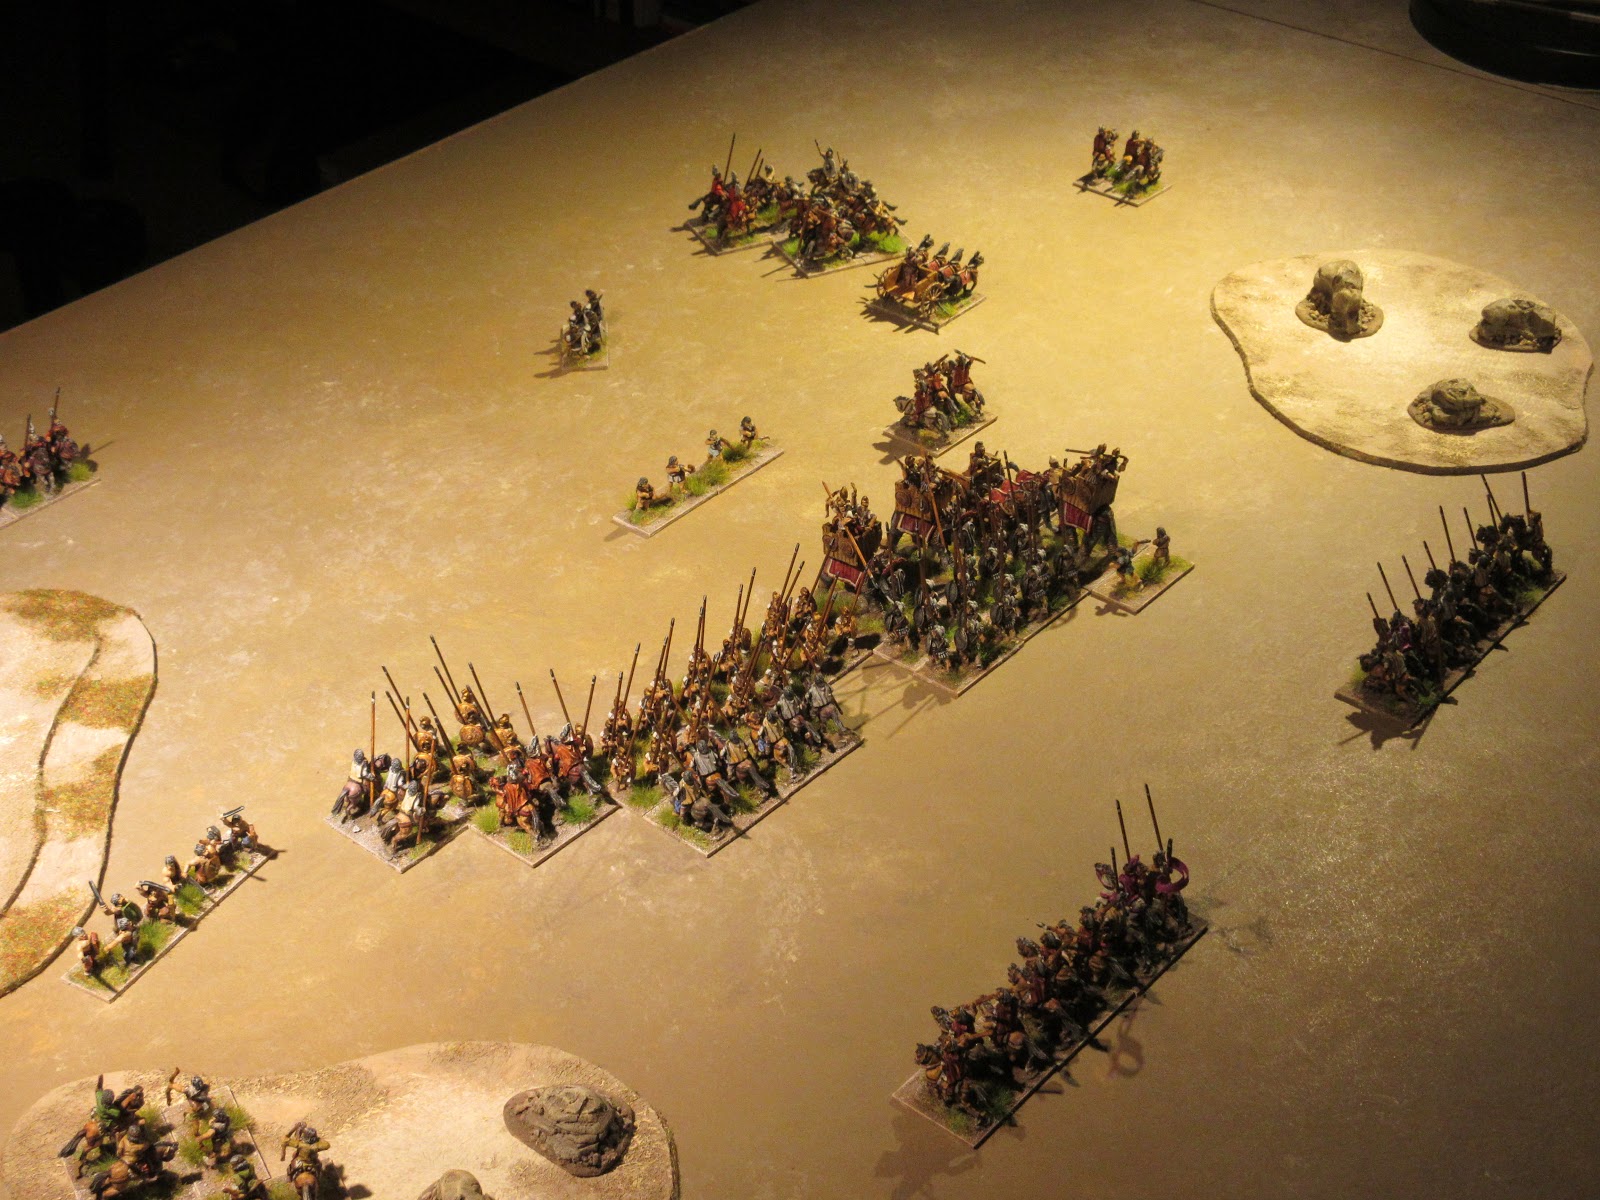
Egypt invaded the steppe region of Nubia characterised by gentle hills and rocky ground. 


Game one.
Both side reinforced their right wing with an objective to turn the other’s left flank; the Egyptians used their  menfat for this task while the Nubian grouped their warriors supported by skirmishers for a similar objective. As the battle progressed, the Nubian attack on the right was effective but Egypt in response quickly evened the score. The Egyptian attack however, now threatened the Nubian line of archers prompting their general to embolden his next move. Ignoring the impending threat on their left, the line of archers moved forward to launch a fire storm of arrows quickly thinning the Egyptian ranks (3 – 1). The Nubians countered the menfat assault bringing the axemen down in the ensuing melee. Score 4 – 1 for Nubia.


Game two.
Both sides changed their battle line by extenting their formation while foregoing the placement of a reserve. As the battle progressed, mixed signals among the Egyptians hampered their advance (low pip scores) which the Nubian quickly took advantage of to envelope the enemy left. Casualties fell quickly on both sides giving Nubia a slight advantage (2 – 1). However, the gods displayed their favour on the Egyptians as their arrows struck true sending a wave of panic among the Nubian ranks forcing them to leave the field. Score 4 – 2 for Egypt.


Game three.
With a few minor changes both sides deployed in similar fashion to their previous battle.


Troops on both flanks quickly enganged while the centre of each army advanced slowly forward. The Egyptian menfat on the right, destroyed a unit of archers, but their success was frustrated by the fierce resistance of a second unit of bowmen. The Nubian assault on the Egyptian left met with similar resistance, but Nubian archery created a wave of panic among the Egyptian ranks scoring three casualties.  


In desperation, Pharaoh attacked the Nubian line of archers destroying a unit of bow and success elsewhere brought the score even, 3 – 3. On the battlefield, four separate combats could be seen locked in combat, but the final stroke came when Nubian warriors destroyed another unit of Egyptian bowmen to end the battle. Score 4 – 3 for Nubia.


Comments
My initial reservation about bow heavy armies has changed some. Although the Egyptians could field four bow the Nubian could easily double that number. To better support the Nubian warband I exchanged two bowmen for skirmishers (Ps). The two extra skirmishers worked well in turning the Egyptian flank in all three battles.


Early Egypt
1 x general (4Bd), 4 x archers (4Bw), 2 x menfat (3Bd), 1 x javelinmen (Ps), 1 x Medjay (Ps), 2 x conscripts (7Hd), 1 x Libyan javelinmen (Ps).

Nubian
1 x general (3Bw), 2 x warriors (3Wb), 6 x archers (3Bw), 2 x archers (Ps), 1 x javelinmen (Ps).

Tuesday 15 October 2019

The Umayyad vs. the Abbasid

During the year 747 AD, Murwan II had to contend with rebellion within the kingdom. In the east, rebel forces led by Abu Muslim would meet the Umayyad in a series of battles the following year. That revolt would later be takien up by Abu al-Abbas as-Saffah sealing the fate of the Umayyad in the final battle near the Great Zab. 

For these games, both armies of 24 elements are very similar in composition with a near equal proportion of cavalry to infantry. Both sides have trained cavalry, infantry and archers giving both sides an equal chance of victory. 

Game one.
As defenders, the Umayyad deployed its infantry in centre with cavalry supporting the flank and rear. The Abbasid, deployed in a similar fashion, but had to contend with constricting terrain, The Abbasid had planned an evelopemnt with their right wing refusing their left. While the flanking move had its desired effect the cost to both sides negated any advantage won. The shattered remians on both sides reformed on their respective center. There, the conflict escalated to a blood bath with casualties becoming even each turn. Renewing their effort, the Umayyad however launced successive waves crumbling the Abbasid resistance to end the battle. Final score 9 - 5 for the Umayyad. 


Game two.
Undeterred, the Abbasid gathered new forces to meet the Umayyad near Merv. Both sides formed their infantry in two wings with ample room for the employment of cavalry in the centre. These were positioned in a second line well outside of bow range. 


On the Abbasid left, spearmen clashed with their counterpart while Zanj swordsmen destroyed enemy archers. The Abbasid joy was cut short as they lost a unit of their own on the opposite wing. 


As the Abbasid were gaining ground on the left, their right was to suffer a similar loss against the Umayyad. As the struggle intensiified the Abbasid were able to turn events on their right to their advantage. Sensing the approach of tipping point in the battle, the Umayyad, commander launched a cavalry assault against the Abbasid centre. 


Abbasid archers found their range and were scattering Umayyad cavalry in the centre and right flank. This opened an opportunity for Abbasid infantry to leave their secure position to attack exposed flanks. The subsequent casualties were the final blow for the Umayyad forcing them to flee the filed. Score 8 - 1 for the Abbasid. 


The Umayyad
1 x general (Cv), 3 x Jund cavalry (Cv), 3 x spearmen (Sp), 2 x archers (3Bw), 1 x archer (Ps), 2 x Bedouin and Ghazis light horse (LH).

The Abbasid
1 x general (Cv), 3 x lancers (Cv), 3 x spearmen (Sp), 2 x archers (4Bw), 1 x Zanj (3Bd), 1 x archers (Ps), 1 x Bedouin light horse (LH).

The Umayyad were defending in game one, terrain features selected were from the list "Dry". This was 2 x rocky ground, an oasis and BUA (hamlet). 

Monday 14 October 2019

Enlarging the Standard Command.

The comments have been surprisingly favourable for the enlarged single command. Below are a list changes to the standard game.

The Game Board

The game board need only be increased by 50% when using this option. As an example, our standard game board is 80cm x 80cm is now increased to 120cm x 80cm for this option.

Terrain Pieces.

The number of terrain features for use with the BBDBA option are increased, but all our tests found no reason to increase this for DBA24, for two reasons; larger pieces could now be used and discarding pieces due to lack of space became a rare occurrence.

Twice the Number

DBA24 simply duplicates the number of elements forming a single command. For some armies this will mean other options can now be used to bring the total number of elements to 24. The Han Chinese as an example may field a mix of infantry and cavalry or alternatively an all-mounted command.


Two Generals

Twice the number of elements will also produce two generals. One is designated a CinC with the second serving as a subordinate general. Although the loss of the subordinate general counts as one element lost, his function is to extend the command distance a further 8BW. If the CinC is lost during battle, the subordinate assumes command of the army on the subsequent turn.  

Allied Contingents

If employed, this too will double in size with a possible increase in the diversity of troop type.

Demoralisation (01-05-2021)

Players familiar with DBA are aware that demoralisation of a command is a feature found only in the big battle option. Demoralisation is reached when it suffers a certain level of losses precipitating the flight its elements to an army’s base edge. The rule is particularly useful if playing medieval period scenarios that divide an army’s force into three ‘divisions’; van guard, main division and rear guard. 

To determine the ‘demoralisation’ for each ‘division’, calculate this as a third of the division’s original elements, excluding horde and camp followers. Reaching demoralisation, flight would take place on the player’s next turn. Expending pips, a player can hold elements or groups in place with the process repeating each turn. Victory is reached when 8 elements are lost or (new) if two of the three divisions (vanguard, main battle or rear guard) are demoralised. (see page 13, paragraph 7). 

Additional Time Required to play?

Beginning DBA24 may require some adjustment as movement will seem slower than one is used to. The standard 12-element game, a decision can be reached on the 4th or 5th turn, but an extra two turns were all that was needed to declare a victor. Some games were resolved in 40 minutes needing seven turns while the longest required thirteen turns or 70 minutes to reach a decision.

Observations

The single die cast to shift 24 elements required some rethinking as troops needed three or four turns to move assault troops and supporting elements into striking distance. What has worked successfully is following the ancient text books regarding deployment, regrouping fragmented formations and the use of reserves.

Click on the Index to Storm Within the Empire, scroll to the bottom to find Enlarging the Single Command to 24 elements which lists many examples of battles.


Tuesday 8 October 2019

Middle Imperial Rome vs. the Marcomanni


I have found that using the larger command size (12 to 24 elements) does require a refinement of one’s game style. With one die cast, you will quickly find insufficient ‘pips’ to move all your troops even if grouped well. This can often be the result of terrain becoming an inconvenience to formations or as the defender you can find yourself wrong footed. Developing a methodical approach in the opening moves worked best for the attacker as not only attacking units were moved but sufficient supporting troops were brought forward to sustain an attack. This did build game tension as focusing on a threatened sector would mean another sector would remain idle. This did equate to taking a risk.

To continue the experiment I selected a historical confrontation between Rome and the Marcomanni. View this as a ‘back to basics’ meeting between balanced forces.  


Game one
Rome deployed in a deeper formation with auxilia positioned in the first line followed by the legions in the second. A third line held all the cavalry and command forming the army’s reserve. The Marcomanni positioned all its cavalry on the right with warband forming its centre and left wing. Advancing in line, the Marcomanni slowly moved forward while Rome took measures to extend its by moving the auxilia to extend the army’s line leaving the legionnaires visible. The initial clash came as Marcomanni warriors met the auxilia who were quickly supported by units from the second line. Seeing the initial rush falter, Rome counter charged catching the Marcomanni on the right and centre off balance. The Marcomanni line quickly crumbled with the battle ending with a 3 – 8 victory for Rome. Half the army was employed while the remainder remained spectators.

(7 turns in 49”)


Game two
Rome deployed with a few minor changes in three lines. The Marcomanni revised their deployment by forming less deep and amassing its cavalry on the left.  


To counter the extended Marcomanni line Rome moved its cavalry reserve to strengthen the right and on the army’s left, auxilia were seen trotting off to harass the enemy line.  


Marcomanni approached slowly sending skirmishers to deal with the auxilia on the right. When the warbands struck, Rome held their ground or repulsed the Marcomanni buckling their line.


Seeing the success of the auxilia, the Praetorian and legio Parthica impetuously charged forward. In the ensuing melee casualties fell quickly on both sides with the Marcomanni holding a slight advantage (3 - 2).


Unlike the previous battle, the Rome’s second line were quickly drawn into the conflict brewing up with the number of casualties increasing on both sides. The pendulum no swung in favour for Rome (4 – 5).


Gaps now appeared (turn six) bringing the conflict to a critical point as both sides attacked exposed flanks bringing the score to an even 7 - 7. The Marcomanni sensed victory (pip score of 6) proceeded to flense the Roman line, destroying legionnaires and equites, to end the battle with a score, 7 – 9. 

(7 turns in 48”)


Middle Imperial Rome
1 x General (Cv), 2 x equites (Cv), 1 x equites (LH), 4 x legionnaires (4Bd), 4 x auxilia (4Ax).

Early German (Marcomanni)
1 x General (Cv), 2 x cavalry (Cv), 9 x warriors (4Wb), 1 x skirmisher (Ps).


Tuesday 1 October 2019

The Seleucid vs. Graeco-Bactrian

In 238 BC, Diodotus governor of Bactria, used the Parthian rebellion to assert his independence. Seleucus II planned expedition would seek to recover the region, first dealing with the Parthian before moving against the Bactrian province.

This historical conflict continues the usage of one command enlarged to 24 elements. The composition of both forces is listed below with the Graeco-Bactrian fielding both options listed to reach their total of 24 elements.


Seleucus invades the territory of Bactria which is characterised by steppe terrain features; two gentle hills, and rocky or scrub ground.


Game one
The Bactrian with superior numbers of mounted troops easily stretched their battle line beyond that of the Seleucid army. At the start, the Bactrian quickly enveloped the Seleucid left, but in the ensuing combat came off the worst for their effort. Incurring heavy casualties (3 – 0) the Bactrian commander probed for weaknesses between the phalanx and left wing. This proved successful with the destruction of units to include the elephant and chariot corps bringing the score even (5 – 5).

Alarmed at the breach in the line, Seleucus led half the phalanx to stave off the impending Bactrian threat. Caught in the cavalry maelstrom, the Seleucid general became wounded generating a panic among his troops. Sensing the indecisive activity among the Seleucid, the Bactrians seized the break in combat to reform their troops for the decisive blow.  This came giving Bactria a victory over Seleucus, 5 – 9 + CinC.


(13 turns, under one hour)


Game two
Seleucus now formed two wings with the right wing positioned forward. This comprised of the phalanx, elephant corps and supporting infantry. The supporting wing on the left contained the chariots and Xystophoroi. To counter this, the Bactrian placed their phalanx in centre with Iranian lancers positioned in support to the right of the phalanx all the Greek cavalry. Extending both flanks were all the Bactrian light horse.

As the Bactrian phalanx marched steadily forward, Bactrian light horse attacked the Seleucid right forcing their commander to send troops to recover the situation. Unfortunately, the situation became critical as parts of the Seleucid phalanx had to face new threats on their flank. In the melee that followed, casualties fell heavily on both sides with the Bactrian having a slight advantage (5 – 7). The final stroke came when Bactrian reserves charged the Galatian mercenaries cutting them down to a man. Victory Bactria 5 – 9.


(9 turns in 45”)


Game three
Following two setbacks, the Seleucid deployed in a compact formation with Xystophoroi cavalry forming a reserve. The Bactrians too deployed in a compact formation, but this was due to the constrictive nature of ground rather than a need to match the Seleucid tattle line. This placed their phalanx opposite the Seleucid chariot and elephant corps. 


For a period, weather conditions hampered proper signalling (poor pip scores) on both sides and after an hour (four turns) both armies shuffled forward to meet in the centre.


Iranian lancers charged Seleucid phalanx and held their advance long enough for supporting troops could turn its flank. At the same time, Bactrian light horse now threatened the Seleucid left raising alarm bells for their commander. To contain the threat, Seleucus moved the Xystophoroi held in reserve and chariots to contain the Bactrian threat. This became critical as Seleucus became wounded and was carried off the field leaving overall command of the army to his second in command (1 – 3 +SCh + CinC).  


Assessing the situation, the second in command moved forward to reform troops. In this moment, the Bactrian redoubled their efforts to take out the chariots and an elephant to widen the gap between their centre and left wing. 


Avenging their general, the Seleucid phalanx charged the Iranian lancers. Galatian mercenaries joined the battle by attacking the Greek cavalry to their front. The renewed effort tipped the balance leaving a stunned Bactrian general no option but to leave the field. Score Seleucid 7 -9

(10 turns 1:20”)


Double the number listed below will bring the total to 24 elements for each command.

The Seleucid
1 x General (3Kn), 1 x Xystophoroi (3Kn), 4 x phalangites (4Pk), 1 x Thracians (4Ax), 1 x scythed chariot (SCh), 1 x elephant (El), 1 x Galatian (4Wb), 2 x archers (Ps).

Graeco-Bactrian
1 x General (3Kn), 2 x Arachosian and Saka cavalry (LH), 2 x Iranian lancers (3Kn), 1 x elephant (El), 4 x phalangites (4Pk), 1 x military settlers (3/4Ax), 1 x Cretan archers (Ps).  
and
1 x General (3Kn), 3 x Arachosian and Saka cavalry (LH), 4 x Iranian lancers (3Kn), 4 x Bactrian (Cv/LH),


Note:
The loss of the CinC counts as two elements when calculating scores. In both these tests, the loss of the CinC meant overall command moved to the sub-ordinate. Command distance is measured from the subordinate general (8BW) which in both cases left a number of troops outside coverage. Those troops beyond command distance still require the additional pip cost to move.