Wednesday 28 June 2017

Experimenting with army size – an assessment.

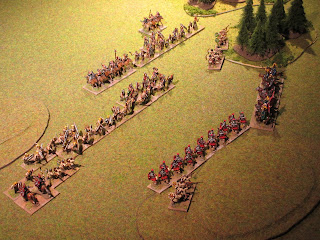
After completing test game one I was surprised as to how well the Romans controlled the battle. Despite losing three elements and therefore one short of losing the engagement the Romans still retained the initiative. This was done by inflicting enough casualties on the first sub-tribe to send them into demoralisation; thus  building a momentum up as this freed units to join battle against the next sub-tribe.

Once demoralised, a sub-tribe may not initiate any tactical moves but can still inflict damage especially if an opponent decides to engage them; archers can still be effective against mounted. This follows the same rule as per the big battle game.    

One die for 18 elements
During the historical matches between the Consular army and the Spanish I played a number of games using 18 elements a side. The use of one die for pip score did not hinder the game as both sides needed more time to develop their plans resulting in games lasting between eight and twelve turns.

The loss of the General
No generals were lost during these tests nor in the past games using such large numbers per command;  this contrast with the frequent loss of the general in the standard 12 element game. Despite the loss of commander I have been fortunate enough to win battles without them.  

However, under these conditions (18 elements), losing the general would become an even greater challenge. Firstly, any pip score would need to be parcelled out among the remaining sub-tribes for their tactical moves and let us not forget the demoralised command would require pips to hold their ground.less its departure would leave a gaping hole in the battleline.


Other period applications
The demoralisation rule and it application to the smaller game has proved useful. For historical scenarios requiring allies to corporate together, this can be an effective tool to re-fight the Roman civil wars. Armies of the medieval period were not always homogeneous but a loose alliance of royal houses brought together for a temporary cause. This application of the demoralisation rule might also prove a useful way to demonstrate 'treachery' as the recalcitrant sub-group leaves the field. 

There is still much to experiment with and I will report future results here.

Cheers, 

Tuesday 27 June 2017

Experimenting with army size

Duplicating historical battles, players may find the standard 12 element per army falls short of the image we have of large barbarian forces fighting a small but disciplined Roman army. As part of my ongoing development with campaign rules I decided to address this and experimented with a large barbarian army of 18 elements to fight a standard Roman army of 12.

Test 1
Romans have deployed in a standard battle formation with two vexillations of legions flanked by auxilia. A reserve of cavalry forms up as a second line. Just behind the Roman left is a gentle hill and on the right are two woods.
The Germans have formed their three groups (sub-tribes) with their chieftain (C-in-C) taking a central position.


The Roman legions have dropped back to the base of the hill opening up a corridor for the reserve cavalry to move through. The barbarians, undaunted move forward.


In a surprise move, the auxilia supported by the Promoti launch an attack on the German right which helps fragment their assault. The legions supported by the general and his guard now attack the main barbarian columns while the reserve cavalry launch their own attack.


Both German wings have been shattered and are now trying to hold their ground (demoralised) while the centre still pushes on to hopefully carry the day.


The German centre finally cracks leaving the Romans holding the field. Score 9 – 3 a victory for Rome.


Test 2
Rome rests the left flank on wood, but the presence of a marsh and a second wood prohibits any deployment in depth. The Germans form up in a similar formation as before and will attempt to contact the Roman line in one massive rush.


Rome recalls the auxilia on the left to redeploy on the second wood and the legions brace themselves for the barbarian assault (poor pip score).


The legions prove successful at pushing back the German wave, but elsewhere the casualties begin to mount.


At this point, the Germans catch their second wind to break the Roman centre. Two of the German sub-tribes have lost their momentum (demoralised) but still hold their ground. With the legions destroyed, the commander calls a general retreat. Score 5 – 4, a German victory.


Test 3
The barbarians have secured ideal terrain for a defensive position, but that idea is not their intent. Rome has a gentle hill on which the legion and auxilia form up. This time, the cavalry will take a pro-active role and form on the left flank to support the second legion leaving the commander to form the only reserve for the army.


As the Germans rush forward, the legion and auxilia move to the forward slope giving the archers an opportunity to harass the barbarian cavalry. The second legion is feeling the ‘heat’ as the barbarians draw nearer.


The entire Roman left moves back luring the barbarian horde further forward. This opens a gap which is filled by the commander and his guard.


The barbarian left wing is shattered but they do hold their ground. Their fate is unknown to the remainder of the horde as they press forward.


The battle reaches a critical point as Roman casualties mount. The Germans are now surprised as Roman assistance comes sweeping down the hill and the Promoti (LH) have moved to support in time the Roman left flank. This last move retrieves the situation bringing all three sub-tribes to exhaustion and they leave the field to the Romans. At a heavy cost Rome claim a victory with a score of 7 – 3.  


Next post will have an assessment and its further application for other periods. 

Saturday 24 June 2017

The Abbasid

Although the Abbasid lists cover the period from 747 AD to 945 AD, we do find references to Abbasid enclaves surviving a century or two later. At the apex of its conquests the Abbasid empire exceeded that of Rome, however, governing such a large realm was not its strongest suite as frequent civil wars and rebellions fragmented the empire creating new dynasties.

During this period, the Abbasid resumed its war with the Byzantine not only on land but also at sea. Of peculiar interest is the fact that the Abbasid became allied with the Tang Chinese sending troops to help bring down the An-Shi Rebellion in 756 AD. Reading its list of enemies these cover nearly every part of the empire which offers a multitude of campaign and scenario possibilities. 

The miniatures
Like the Christian Nubian of my last post these are also Old Glory miniatures and are a mix of Arab Conquest, Andalusian and Crusade types. The infantry packs are half sword, half spearmen which neatly produce the necessary number of blade and spear elements. Many of the weapons were ‘freed’ from their contact with head or torso and bending the arms produced an active looking group.

Painting
Using a matt white undercoat I could use thin coats of paint for clothing and shield colour. This helped speed the process of painting the army as the figures did not require any highlighting. I decided not to paint these as the elite types dressed in black, but did use a darker palette of brown and green and mixing red or orange to produce a greater range of colour. Turbans are either white or black and these contrast nicely with  as their topcoats or tunics to increase the variety of colour.

Shields are for the most part painted leather colour and while still ‘wet’ I dappled the outer edge and ‘boss’ to add variation. From my research, the ‘tiraz’ is associated with the conquest period, so they were not painted on the upper arms of the figure.

Banners
All flags are black which is standard for the Abbasid and depending on which troops are carrying them they may vary in shape. Six elements have them. which quickly identifies the army as Abbasid. There are no inscriptions on them as these seems to be a later development. 

III/37b Abbasid Arab 835 AD – 945 AD, terrain type: Arable, Aggression: 1
1 x General (Cv), 2 x Ghulam (Cv), 1 x lancers (Cv), 1 x Faraghina horse archers (LH), 2 x spearmen (Sp), 2 archers (4Bw or Ps), 2 x Zanj (Bd), 1 x Mutatawwiá (3Wb) or Dailami (4Ax) or stone thrower (Art).


The Abbasid in battle array.


Sunday 18 June 2017

Tulunid Egyptian

The Tulunid dynasty did not enjoy a long period of rule over Islamic Egypt but did maintain one of the most formidable armies of the time. Its forces were well trained Sudanese, Greek and Turkish troops, however, the cost to maintain such an army placed an economic strain on the emirate and proved its undoing.

The composition of its army is balanced with a good number of mounted troops supported by a quantity of solid blade and bow. To fill out the numbers you have skirmishers or Ghazis (warband) as an option. Like the Aghlabid, the Tulunid also maintained a naval presence in the eastern Mediterranean and can have as 'home terrain', littoral.

The miniatures
The figures are from the Old Glory Arab Conquest series with Essex supplying the Abid Archers. The Ghulams are former Sassanid cavalry which serve well as bow and lance armed cavalry. Most had simple conversions, such as the clipping off of a plume or the reshaping of the helmet by adding a cloth band from Milliput, to make them Tulunid Egyptian.

Painting
This was the most challenging part, what colour to use for their clothing and shields? I wanted them distinct from the other Middle Eastern collections and began first with the ‘regular’ troops, the abid swordsmen. I chose red, orange and umber topcoats and black turbans. The Ghazis (optional) have white clothing and turbans with only the shields adding any colour to the group. Skirmishers have tunics in a mix of colour with a few having white turbans and light colour shields.

Banners
The banners for all four armies were painted at the same time to ensure consistency of shape and size. Ground colour is black for the Abbasid, green for the Muslim North African, and white with cross for the Christian Nubian and for the Tulunid I chose a cream colour. With the exception of a gold disc (Abbasid) and black cross (Nubian) the other banners have no designs or text. From my reading these become common after the 11th/12th century.

The Tulunid Egyptian in battle array


III/49 Tulunid Egyptian 868 – 969 AD, terrain type: littoral, Aggression: 1
1 x General (Cv), 3 x ghulams (Cv), 1 x Berber light horse (LH), 2 x abid (4Bd), 2 x abid (4Bw or 4Bd) or thughur (Sp), 2 x javelinmen (Ps) or ghazis (3Wb), 1 x archer (Ps).  


Map of Tulunid domains: By Ro4444 - Own work, CC BY-SA 3.0, 

Friday 16 June 2017

Rome vs. Carthage – second day of battle

That evening, in the Carthaginian camp, the generals and key officers made plans to resume battle the following morning. The novel tactic of shifting the Numidians from one flank to the other would no longer catch the Romans on the wrong foot, so it was decided to form all the cavalry to the right wing. This would noticeably shorten the main battleline and to compensate for this light infantry were interspersed between the auxiliaries and spearmen. This was a risky deployment, but everyone had to do their part. 

As was the custom for consuls taking the field, overall command alternated between the two and for next day the commander of the left flank now made plans. The dense deployment of the previous day would be replaced by a longer line bringing the hastati and principes to face the Carthaginian spearmen. To achieve this, the triarii would take a central position in the main battleline. To take care of an enemy approach on the open side (left flank), a reserve of cavalry and velites would form a second line; these would have the task of neutralising the enemy cavalry operating on that side.

The tension was further heightened when a thunderstorm broke during the night bringing with it a downpour of rain; this would make the fields in the area rough going. This was viewed as a good omen by the soothsayer ensuring the Roman command of victory in the morning.

Battle 
Marching out of their camp, Rome deployed its legions to the plan. On the left flank, a second line positioned itself to hold off any cavalry attempting to encircle the Roman battleline.


The Carthaginian infantry deployed in the same formation as the day before, Spanish auxiliaries and Gallic warriors in the centre with Poeni and Libyan spearmen anchoring both flanks. On the far right flank all the cavalry formed up eager to come to grips with Roman cavalry.  


Rome moved first and during the approach both legions were plagued by mixed or missed signals (low pip scores) and as a consequence the approach took on an oblique order. This actually worked in their favour as the Carthaginian cavalry swept quickly around the left flank.


As the Roman infantry were slowing closing on the Carthaginian battleline, the Poeni spearmen were seen retiring; this smelled of treachery. Due to the slow approach on the left, the reserve line with the assistance of Allied auxiliaries was able to blunt the cavalry threat.


By now, the entire legion on the right was fully engaged and meeting stiff resistance from the Spanish and Gallic troops. Further to the far right, the Allied auxiliaries were making no headway against the Poeni shield wall.


Having made their approach in a staggered formation the hastati and principes were now able to join the battle. These sent the Spanish and Gallic troops recoiling, but the effect brought no casualties; this would seem to be developing into a long hard battle. On the far left, the Carthaginian cavalry were held back with the additional help of a unit of hastati.


Signal horns were heard and repeated along the Carthaginian line announcing a general assault and both groups of spearmen moved into combat. On hearing the signal, the cavalry renewed their attack.


Repeated assaults by the cavalry had cost them dearly bringing their losses just short of demoralisation. It was then decided to have the cavalry fall back and regroup. At this moment cheering could be heard coming from the infantry battle and through the dust could be seen a line of white shields marching forward – the Poeni spearmen. Through the combined effort of the spearmen with the Spanish and Gallic troops, the Roman left wing was shattered leaving the right wing to carry on with the battle.


The Roman right was now in a desperate situation as they had suffered significant casualties while the Carthaginian battle line remained unbroken. In a desperate attempt to turn the battle around, the Roman commander and Allied cavalry charged forward.


A sense of doom gripped the Roman troops as the left wing could only look on as the Numidian light horse skirted their line to approach the rear of the Roman troops on the right. Unfortunately for the Numidians, they were denied their moment of glory as the Spanish and Gallic troops broke the remaining legion sending them fleeing in the direction of their camp.

The Carthaginian commander, sitting on his camp stool (CP) accepted the accolades from his companions for the decisive victory over Rome.


Epilogue
The Carthaginian cavalry had fallen short of their objective, but history of course would present a different story. In effect, the threat did draw off needed Roman troops including the C-in-C that could have proven valuable elsewhere. The C-in-C’s command had suffered three casualties bring his command one short of becoming demoralised; all these came from the cavalry and its supporting light infantry.


The second command, which took the brunt of the Roman assault were able to break one legion and assist breaking a second and all this while suffering no casualties. If the thunderstorm was interpreted as a good omen, then it was obviously meant for the opposition. Needless to say, that soothsayer has made his last divination.     

Sunday 11 June 2017

Historical Match up - Rome vs. Carthage

At the DBA Fanaticus Forum the subject of auxiliaries and their effectiveness under the current version is being discussed. I have not encountered much of a problem with auxiliaries and yes, they can die quickly but in many cases they have done exemplary service in more games than I can remember. I decided to select Carthage and Rome as both sides field auxiliaries.

A previous historical matchup between Carthage and Rome, Rome lost all three games. These were fought with the standard 12 elements a side but for this experiment I decided double that number for each side. .

Battle

Rome split her forces evenly to simulate the alternate command role among the consuls. The allied legion was represented by the two 4Ax, one Sp and a cavalry element and are easily identifiable by their white shields. 


The two Carthaginian commands also totalled 12 elements each, but one held the majority of infantry while the other all the cavalry. No elephants were heard or seen trumpeting on the battlefield.


Carthage used their successful Cannae deployment with Numidian light horse on the left flank and Gallic heavy cavalry on the right. Rome was aware of the superior number of enemy cavalry and deployed in a denser formation.


After two turns, Rome’s formation exposes a central reserve of triarii and cavalry on the flanks as the main battle line moving steadily forward. Seeing Rome committed to the assault, the Numidians moved from the left flank to the Carthaginian right. This would bring them in a position to encircle the Roman line from the open plain and together with the Gallic cavalry they would eliminate the Roman horse. 


The struggle on the Carthaginian left unfolded in a similar manner as it did at Cannae, the Spanish and Gallic troops holding or recoiling back slowly drawing the Roman troops closer to the awaiting spearmen. Casualties in this sector were quickly mounting with both commands at an 3 – 3. However, disaster struck the Carthaginian right as their general was carried off the field resulting in an even score, 2 – 2g.


Despite the loss of their general on the right flank, the Carthaginians struck back with the spearmen attacking the Roman line frontally and Numidians from the rear. Brilliantly executed this delivered another Roman casualty, but the Muses were having their day as the score ended even at 3 – 3g.


On the Carthaginian left, both sides reached a tipping point as each suffered a casualty bringing both to a state of demoralisation on the same bound. On the following turn (six), only the Roman velites bolted leaving the two lines facing each other 40 paces apart, numb, exhausted and awaiting further orders. 


On the Roman left, their commander charged the Gallic cavalry while sending the triarii to surprise some Numidian horse; the Numidians fled, but one of the Gallic cavalry fell. Just as Chorus Left was about to sing praises for Rome, Chorus Right burst out laughing as a Roman auxilia fell to Carthaginian spear ending that bound, 4 – 4g.


A very bizarre ending with both sets of opposing commands becoming demoralised on the same bound. History would describe this as an inconclusive battle with most cases, the conflict resuming the next day.   

Saturday 10 June 2017

Early Muslim North Africa

The Aghlabid dynasty ruled Ifriqiya (Northern Africa) on behalf of the Abbasid Caliph. Aside from paying a yearly tribute, the Aghlabid did have autonomous rule undertaking the conquest of Sicily and other islands of the Mediterranean Sea and countries from Spain to Greece. This brought them quickly into conflict with two formidable powers of the time; the Holy Roman Empire and the Byzantines.

The composition of troops reflects a relatively fast striking force comprising a large percentage of mounted troops supported by spear and bow types. Like the Vikings, the Early Muslim North African can make use of seaborne assaults. 

The miniatures
Of the eight packs ordered, the Early Muslim North African are the third army to be built. Old Glory Arab infantry packs have an equal number of spear and sword which is useful for producing the 4Bd and Sp elements necessary for most of these Middle Eastern armies.  Likewise, the skirmisher pack have an equal number of bow and javelin armed figures. To generate variety of poses many of the weapons were ‘freed’ from their placement against the head or torso of many figures; bending the arms further produced an active looking group.

Painting
To differ these from the Abbasid, I painted all the figures with white turbans but gave them a mix of white, red brown and ochre colour topcoats. Shields were painted a variety of leather tones and lightened or darkened to show wear and tear. By way of an experiment, I painted grey those parts that would later become white turbans or topcoats. After black lining the figures, these would only require small wedges or lines of white giving a sense of depth (folds) to the clothing.

Command stand
‘Armies of the Dark Ages 600 - 1066’ by Ian Heath mention Arab flag colour being black for the Abbasid, red for the Khawarij, and green for the Spanish Umayyad, Alids and Fatimid. Green, white and black were also recorded for the conquest period. No mention of the Aghlabid but it would seem logical that green standards were also present.  

The Early Muslim North African in battle array.


III/33 Early Muslim North Africa, terrain type: Littoral, Aggression: 1
1 x General (Cv), 1 x Arab lancers (Cv), 3 x javelin light horse (LH), 3 x spearmen (Sp), 1 x archer (3/4Bw), 3 x Berber javelinmen (Ps).

Wednesday 7 June 2017

The Christian Nubian

Under the Black Banner project.

The three Christian kingdoms of Alodia, Nobatia, and Makuria are located in the region currently known as Dongola in the Sudan.  They faced a number of regular incursions by, the Umayyad, the Abbasid, the Tulunid, and the Fatimid armies. Nobatia and Makuria eventually made the change from Christianity to Islam around the 13th/14th century and the small Nubian state of Alwa changed at the end of this period.


Its army closely resembles the Nobades with its reliance on the bow and spear for the infantry. The cavalry and light horse are supported by a large force of camel mounted warriors capable of charging enemy. Since the project focuses on the Abbasid, the Christian Nubian makes a nice adversary for them. Further, the Umayyad will be added to the project and the Nobades which are currently in the collection will keep the Christian Nubian busy with minor campaigns along the Nile. 

The miniatures
All miniatures are from the Old Glory Arab Conquest, Andalusian and Crusade lists and from the initial order of eight packs I build four armies. The biggest challenge, as all figures similarly clothed, was to create a colour theme that would best represent each so as to make them distinct from one another. The Christian Nubian are dark skinned and a light colour was selected with white dominant followed by beige and saffron. The mass of light coloured clothing would contrast well against the many dark skinned and half naked Nobades.

Painting
I undercoat all my figures with a matt white which is helpful when painting with thin coats of paint. Tunics were given a mid-grey, beige or saffron wash and this was followed by painting the folds in the clothing a dark grey. To finish the clothing, I used thinned white to highlight the raised parts of the clothing, turban and breeches regardless of the ground colour.

Shields are painted in light tones and dry brushed giving the overall effect a uniform appearance. 

Banners
I found depictions of early medieval banners with a cross motif and decided to simplify the design for the commander's banner. I had planned to add more and smaller flags to help identify the blade (2 x 4Bd) from the single auxilia (4Ax), but these plans were placed on hold as the number of armies to paint were a higher priority. 
I still may add them at a later date. 

III/12 Christian Nubian,
1 x General (Cv), 2 x Camel warriors (Cm), 2 x light horse (LH), 2 x warriors (4Bd) 1 x warriors (4Ax), 3 x archers (4BW), 1 x archer (3Bw), 1 x archers (Ps).

Christian Nubian in battle array.


Sunday 4 June 2017

Under the Black Banner

To build new DBA armies, I decided to move up the timeline of military history to the latter half of the 7th century for my next project. This was an unknown realm of history other than the Arab conquests had reached the frontier of India in the east to the shores of the Atlantic in the west. During my initial research I was confronted with an enormous amount of choices, so to make this project an enjoyable one I needed to focus and narrow my selection to one ‘kingdom’. The selection fell on the Abbasid Caliphate.  

Looking at the Abbasid army list, there are two time periods showing little difference between the composition of army, but do offer significant differences among its list of enemies. These includ the Abyssinian, Christian Nubian, Tibetan, Tang and the Thematic Byzantine plus a host of Muslim dynasties that emerged during the collapse of the caliphate.

Compared to the Severan project (3rd century Rome), which accumulated 49 armies at last count, this one will be small by comparison and should reach a completion by the fall season. To order and paint the armies, I plan to do this in two steps. Step one would take care of the Muslim armies as these would have similar dress and weapons would be the easiest to paint and inexpensive to purchase. Step two would add a few of the non-Muslim enemies listed above and these would require some planning as Old Glory (Timecast UK) do not offer Tibetan, Tang or Abyssinians.  

Aside from the large number of Muslim armies (Umayyad, Abbasid, Dynastic Bedouin, Muslim North African, and Tulunid) the biggest challenge will be to make each army distinct despite their similarity of dress.

I have already bookmarked and filed sufficient information for a number of campaigns and these will of course appear here but not necessarily in chronological order. That would depend on the speed of delivery and painting of the armies.

Map: The Caliphate in 750 AD.


Source: Historical Atlas of Islam by Malise Ruthven, Azim Nanji.

Next posting, the Christian Nubian.