Tuesday 26 November 2019

Sassanid vs. Early Byzantine

On the heels of a few standard size games the next few will return to the enlarged command; double size command, but using one die for pip score.

Game one
The Byzantine deployed its infantry in centre with cavalry on either flank, while skirmishers secured 
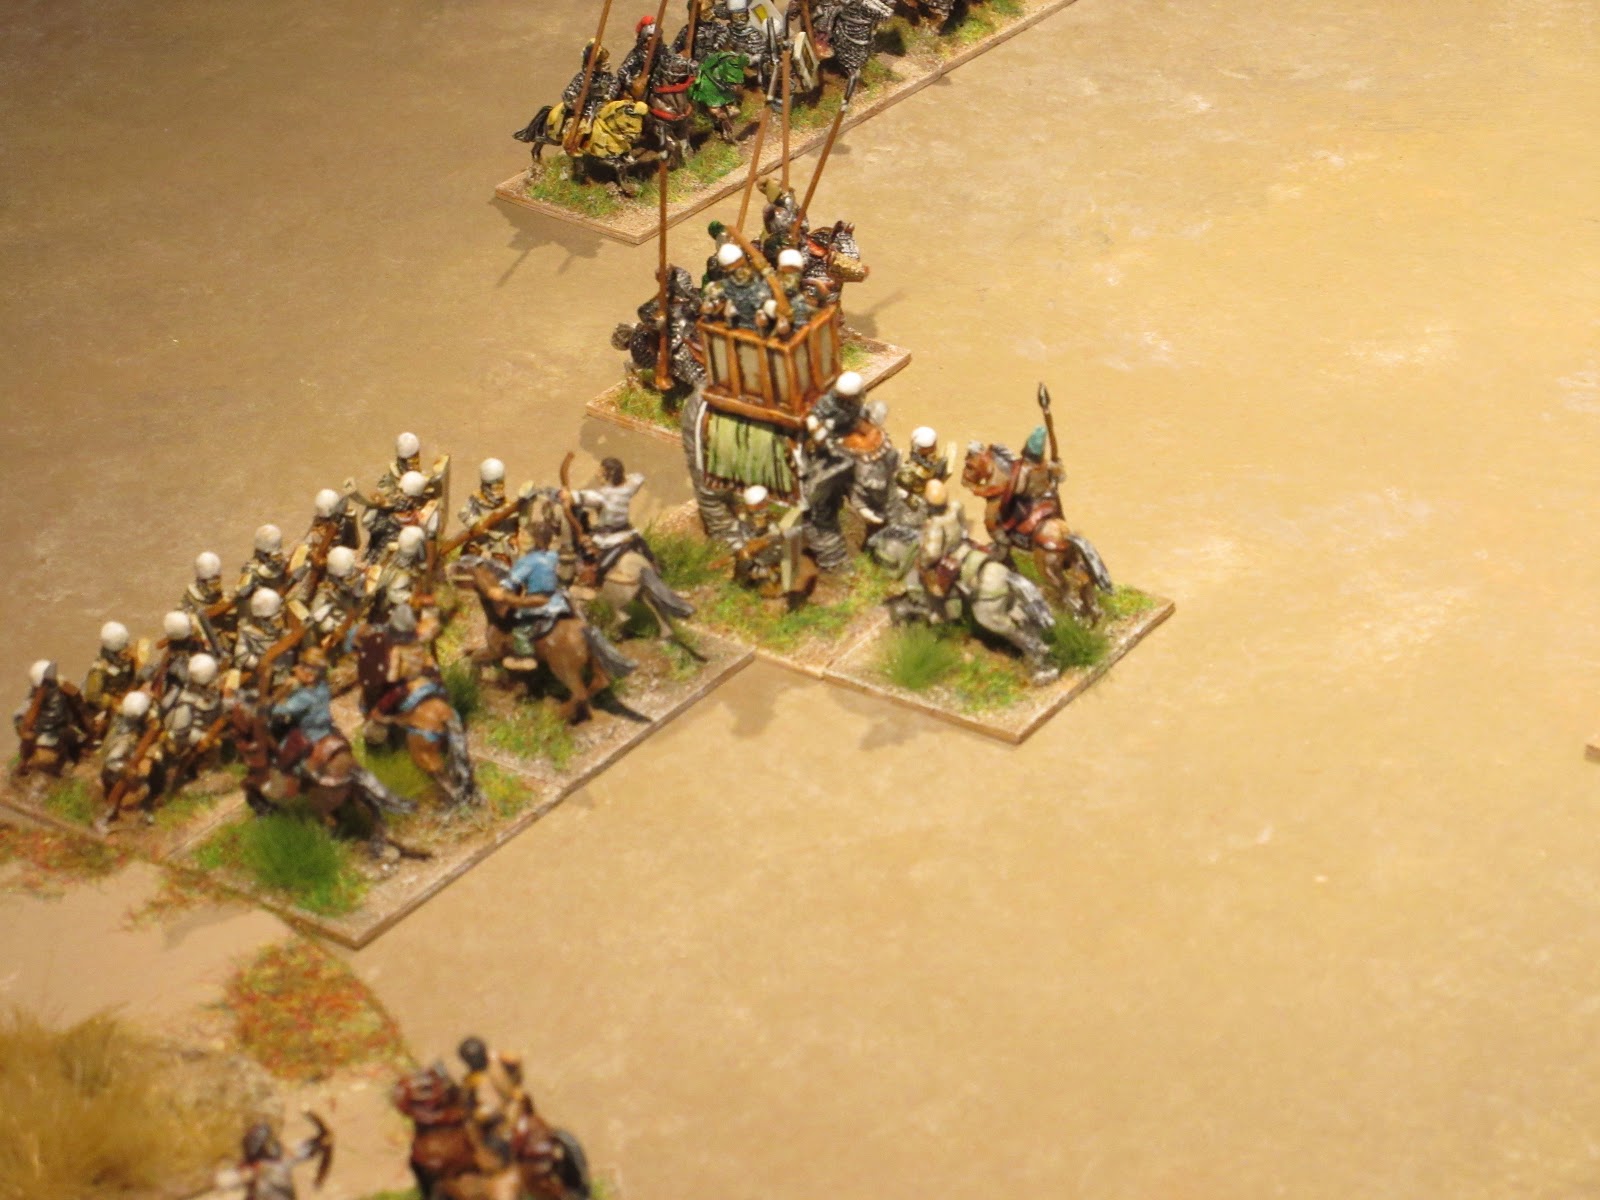
the rough ground protecting both flanks. The Sassanid positioned its main cavalry force in centre with the levy and elephants posted to both flanks. More cavalry formed a second line supporting each wing and centre. Adjusting their line of approach, the Sassanid right wing struck first gaining an initial advantage which the Byzantine could not overcome resulting in the loss of the entire left flank. Despite valiant attempts elsewhere Byzantine resistance crumbled to give Sassan an 8 - 5+2xHd victory. 


Game two
Facing the Sassanid on similar ground, the Byzantine revised their deployment positioning the infantry on both flanks with a strong cavalry centre. The Sassanid deployment remained unchanged but due to the restrictive nature of the ground, the divisions were grouped closer together. The wind played havoc for the Byzantine (low pip scores) as signals were routinely misunderstood. Initiating their attack with their right wing, the Byzantine lost their momentum on which the Sassanid seized the advantage. Caught in mid-stride, the Byzantine were dealt a severe blow (6 – 1). For the next hour, the Byzantine tenaciously held their ground to swing the casualty count to even the score  at  7 – 7. Personally leading the reserve cavalry, the Sassanid general tipped the scales to snatch victory iver tge Byzantines, score 9 – 7 for the Sassanid.


Game three
With their right wing resting on a deserted village, the Byzantine deployed in their standard formation with adequate spacing between divisions. Similary, the Sassanid right made use of the cover provided by the difficult hills. All the asavaran and Immortals formed two lines in centre with all the horse archers taking a position on the left. 


Holding their right in position, the Byzantine psiloi advanced to seize the first of two hills with the heavy infantry following close behind. Byzantine cavalry shifted their position to better support this operation. The Sassanid were not idle and moved their own left wing leaving the asavaran cavalry to strike the Byzantine first.


Taking heavy casualties (2 – 0), the Byzantine recovered by sending the heavy infantry to support. In the village, the psiloi frustrated the Sassanid elephants.  through the village on a merry chase. After a period of inconclusive fighting both sides committed their immediate reserve formations. In that time, the elephant threat was eutralised bring the score nearly even (5 - 6).


The conflict reached a highwater mark as the Strategos shifted his attention to the left flank and moved his cavalry reserves to charge the Sassanid supporting units led by their commander.


On the Byzantine left, working in unison, the psiloi distracted the levy while the heavy infantry attacked the elephant corps and second body of levies. This opened an avenue for the Byzantine cavalry to move through and strike the asavaran.


Eliminating the levy, the psiloi now skirmished with the asavaran reserves while awaiting the arrival of the heavy infantry to join the.m. The amount of pressure brought on by the Byzantines was too much for the Sassanid to counter giving the Sassanid commander no choice but to signal a retreat. Score 9 – 6 for Byzantine.


Some thoughts,
The Byzanitine were plagued with low pip scores in games one and two, which made game two a miracle for the Byzantine; bringing the score from a 6 – 1 deficit to an even 7 – 7. 

Game three required a different strategy and after reviewing "Belisarius" by Ian Hughes, I decided to develop a “Dara” gambit. This worked, as the loss to two Byzantine cavalry on the right flank lured the Sassanid to feed further their initial success. Once the Sassanid effort reached its high watermark, the battle shifted to the other flank catching the Sassanid off balance to end the battle with a score of 9 - 7.


Double the following battle order to reach 24 elements.

Byzantine
1 x general (Cv), 5 x cavalry (Cv), 1 x Heruli (3Kn), 1 x light horse (LH), 2 x scutati (4Bd), 2 x psiloi (Ps).

Sassanid
1 x general (Cv), 1 x cataphract (4Kn), 5 x asavaran (Cv), 2 x horse archers (LH), 1 x elephant (El), 2 x levy (7Hd). 

Saturday 23 November 2019

The March To Battle


The Art of Warfare In Western Europe During the Middle Ages by  J.F. Verbruggen, gives a detailed analysis of the various components of medieval warfare, such as the mounted arm, foot soldiers, command and more. In chapter IV, Ggeneral Tactics, the march to battle caught my attention and interested me enough to experiment with it on the game board. 

In DBA3, following the placement of terrain pieces the defender deploys his troops followed by the attacking player. These are positioned no closer than 480 paces from his opponent’s line. There are however, a number of historical examples that demonstrate how contact between advance parties escalated to a full scale battle. 

With the following tests I would like to explore the development of battle away from the procedure as described above. Commanders must contend with a fluid situation and make a quick assessement to seize key terrain or deploy for battle. Pip scores will heavily influence the positioning of troops, but that is the objective with the following tests. Hopefully, the following examples may interest others to experiment with their own collections.

Below is an engagement between the infantry heavy armies of Neustria, blue banner and Austrasia, red banner, in Northern France. 


Test game
Spearheaded by advance parties of cavalry and skirmishers, these spy one another across an open plain. Maintaining a steady pace of 2BW per turn, the remainder of the army slowly move their columns and deploy on the battlefield.


Evaluating the situation, the Austrasian commander directs his warriors (4Wb) to form on the left with the spearmen (Sp) forming behind in support. The Austrasian cavalry screen this operation to its completion.

Opposite, the Nuestrian commander and cavalry have seized the gentle hill and deploy their own spearmen to face the Austrasian warband positioned between hill and woods. The Nuestrian warband, trailing at the rear of the column, deploy on the reverse slope hidden from view by the enemy.


Two hours have passed (8 turns) since the initial sighting and with orders passed to the troops the Austrasia begin the battle advancing their warband toward the Neustrian shieldwall. The spearmen move forward in support. 


In the ensuing clash on the left, the warband are repulsed by the Neustrian spearmen. Advancing toward the hill, the Austrasian spearmen with the help of the Austrasian cavalry  intend to sweep the enemy off its crest. 


Renewing their effort against the Neustrian spearmen, the warband breach the shieldwall and though a minor victory, this was overshadowed by the quick destruction of Austrasian units on the slopes of the hill. From their concealed position, the Neustrian warband broke the Austrasian spearmen adding to the increasing casualty toll created by the Neustrian cavalry giving Neustria a clear victory, 5 – 3 (game length: 12 turns in 45 minutes). 


A suubsequent action is planned, this being an all cavalry encounter. This should take place next week. Following the two reports I will post a review adding a few suggestions for readers experiment with their own 'March to Battle' games.     

Tuesday 19 November 2019

Sogdia vs. the Huns


While searching for information on the conflict between these two one question did come to mind, when did Sogdia become independent from the Hunnic group known as the Chionites (Xiaona)? These are not listed as enemies of the Central Asian City States, despite history informing us of the defeat of the Chionites by the Sassanid, yet they do not disappear from record, but are reconstituted in other parts of the region lasting until the 8th century AD.

In our recreation of history, the first battle is typical of the Hunnic incursions into the Central Asian region. The subsequent battles simulate a reconstituted Chionite (II/80c) against the Sogdian confederation. Both will use the maximum number of cavalry allowable Terrain for all three games is steppe, placing the confrontation near the fertile region north of the Jaxartes River.

Game one
Sogdia, the aggressor has pinned a marauding Hunnic band with their backs to a tributary of the Jaxartes River. Further, the undulating plain and scrub offer little obstacle for the Sogdians as they formed an extended line for battle. The Huns, feeling the constraint offered by the ground launch a desperate attack with their horse archers on their left while occupying the attention of the Sogdian elsewhere. The shaman’s offering before battle worked its wonder as the Sogdian right flank collapsed under the spirited attack by Hunnic horse archers sending the Sogdians in flight. Score, the Huns 4 – 1.


Game two
The Chionites find the Sogdian army resting its left protected by the river and cavalry positioned centre. Archers formed up on both flanks. The Chionite warlord deployed his archers in centre ordering them to advance while horse archers kept pace on either flank. The tempo gave the Chionite left wing ample time to clear the scrub of Sogdian archers and responding to that threat to the Sogdian commander sent cavalry to their aid. The situation escalated as both sides fed more troops to the stricken flank. The outcome was to the detriment of the Sogdians as their entire right wing collapsed sending the rest to retreat. Score Chionites 5 – 2.


Game three
The Sogdian are caught on an open plain and therefore formed their archers in centre with cavalry evenly deployed on both flanks.


A lone hill on the Sogdian left became the scene of a hotly contested battle between Sogdian cavalry and Chionite horse archers. Dispensing with distance shooting, the Sogdian archers joined the fight on the hill.  

The swiftness of the assault on the hill caught the Chionite warlord off guard and coupled with subsequent losses elsewhere could not send assistance to the battle on the hill. The Chionites left the field to the Sogdian. Score Sogdia 4 – 2.


III/8 Sogdian coalition  
1 x general (3Kn), 2 x chakars (3Kn), 3 x diliqun (Cv), 1 x horse archer (LH), 4 x archers (3Bw), 1 x archers (Ps).
Türgesh allies
1 x Cv, 2 x LH

II/80d Hunnic (Xiaona)
1 x general (Cv), 11 x horse archers (LH).
II/80c
1 x general (Cv), 8 x horse archers (LH), 1 x lancers (3Kn), 2 x archers (3Bw).

Tuesday 12 November 2019

Sassanid vs. the Alan

During the entire existance of the Sassanid Empire, the Alan tribes have made regular incursions into Persian territory. such that all three Sassanid lists (220 -651) may be used. The first list replicates the campaigns of Ardashir  and presumably to a number of these were independent operations conducted by his son, Shapur I.

I am not aware of any Sassanian campaing operating north of the Caucuses therefore all terrain used in these games are found among the arable list. 

Game one
Shapur deployed his cavalry in three divisions with both his wings positioned forward of the centre. Comprising all the elite cavalry, the Alan centre advanced slowly forward. Seizing the moment, the Sassanid struck first on both wings with casualties falling evenly on both sides. Adding the Alani elite into the conflict, these were repulsed while on the wings the asavaran were able to cause more damage breaking the Alani resolve to continue the fight. The Alani fled the field leaving twice their number behind. Score 4 – 2 for Sassan.


Game two
Much later, the Alani crossed the Caucuses and met a mixed force of Sassanid cavalry, infantry and elephants. The terrain offered no obstacle to either side and the battle progressed with the Sassanid moving their infantry ahead of the cavalry formation. The prospect of skirmishing with the infantry was too enticing an opportunity to miss. Unfortunately, the Alani horse archers were too optimistic about their plan, leaving the asavaran cavalry an opportunity to charge the Alani heavy. This attack held the Alani centre at bay while both Alani flanks broke giving the Sassanians a decisive victory. Score 4 – 0 for Sassan.


Game three
Time had passed since the last nomadic incursion and Sassanian military reforms had made a few changes to the military force in charge of defending the norther frontier. To meet the Alani the Sassanid added Dailami mercenaries and regrouped the cataphract as a personal bodyguard of the governor.


The Sassanid levy led the advance with he asavaran cavalry keeping pace. The Alani, likewise moved cautiously forward with its left flank ahead of the battle line.


Both centres struck and casualties mounted quickly on both sides (2 - 2). The rout of the elephant corps animated the Sassanid to redouble their effort. This resulted in bringing down a unit of Alani elite and horse archers to seal the victory. Score 4 – 2 for Sassan.


Sassanid
Game one: 1 x general (3Kn), 2 x nobles (3Kn), 6 x asavaran (Cv), 3 x nomad horse archers (LH).
Game two: 1 x general (Cv), 1 x cataphract (4Kn), 4 x asavaran (Cv), 1 x elephant (El), 1 x archer (Ps), 2 x horse archer (LH), 2 x levies (7Hd).
Game three: 1 x general (4Kn), 5 x asavaran (Cv), 1 x elephant (El), 1 x Dailami (4Ax), 2 x horse archer (LH), 2 x levies (7Hd).

Alan
1 x general (3Kn), 3 x nobles (Kn), 7 x horse archers (LH), 1 x camp follower archers (Ps).

Sunday 10 November 2019

Enemies of the Central Asian City States


Sogdia is a name that is frequently recorded in history from the 6th century BC to the 11th century AD It is not until the later part, 6th through the 11th century AD that the region becomes independent that we find a complete DBA army list  Situated along the route known as the Silk Road, their last five centuries have brought them in conflict with innumerable enemies, such as listed below.

Juan-Juan 308 – 666AD
Northern Dynasty 517 - 589AD
Hunnic 374 – 558AD
Central Asian City States 500 – 1000AD
Other Turkish 555 – 1350AD
Tibetan 560 – 1065AD
Sui 581 – 611AD. Tang 518 – 755AD
Arab Conquest 639 – 660AD, Khawarai 658 – 873AD
Umayyad 661 -750AD
Late Tang 755 – 979AD
Samanid 900 - 999AD

Following my last battle report between the Umayyad and Sogdia, I looked within the collection at what else could follow next. Referencing the above list, I moved to the Huns for which I do have more than enough figures. However, researcing information brought me to some historical anomalies.

The Hephthalites (or Ephthalites), sometimes called the White Huns, were a people who dominated Central Asia during the 5th to 8th centuries. Based in Bactria from 450 to 560, they expanded outward, east to the Tarim Basin, west to Sogdia, and south through Afghanistan to northern India. As allies of the Sassanid, they helped in the destruction of the Kidarites in the early 5th century. A century later, the Hephthalites would become victim of a similar political ploy ending their domination of the region at the Battle of Bukhara in 557AD.

There is some disagreement among historians as some suggest the Hephthalite are gradually assimilated into the Iranian culture much like the Kushans of an earlier period. Others suggest in the Chionites lands of Lower Tukhaistan, Badghis, and Herat, the principalities of the Hephthalite were able to reconstitute themselves well into the 8th century, albeit, not in their former glory, but very well present.

While not enough to substantiate revising the current enemies list for the Central Asian City States, this does offer an opportunity to experiment with two different Hunnic armies to engage Sogdia. Those battle reports will be posted in the coming week. 


Recommended Reading

The Arab Conquests in Central Asia, H.A.R. Gibb, 1923 
The Making of Turan, The Fall and Transformation of the Iranian East in Late Antiquity, R. Payne, Journal of Late Antiquity, 2016. 

Map, History Files 2.0

Tuesday 5 November 2019

The Umayyad vs. Sogdiana


From 650 AD, Umayyad contact beyond the ‘land of the beyond the river’ (Oxus) were primarily executed by raiding parties. To improve their control, the systematic pacification of Transoxiana was solved by the relocation of warriors and their families to key locations across the river Oxus. In 676, Sa’id-ibn Uthman, military governor of Khurasan, led an expedition into Sogdia defeating a coalition of city states and Turks. After securing their allegiance, Uthman marched further east and captured Samarkand.

The composition of forces for the confrontation are listed below. The region between the Oxus and Jaxartes is described as the ‘Hungry Steppe’ until one reaches the fertile region near the Jaxartes River.

Game one
The Umayyad met the Sogdian in battle formation, archers holding the high ground on the left, cavalry in centre followed by light troops on the right. Umayyad formed up placing spearmen in the centre and archers evenly deployed on either flank. Jund cavalry were positioned to support the infantry line. Displaying contempt for the desert dwellers, the Sogdian launched a cavalry charge at the Umayyad shieldwall supported by the archers on both flanks. In three quarters of an hour the shieldwall was shattered and supporting troops on either flank were broken from the rain of arrows. The Umayyad were sent fleeing the field, score, Sogdia 4 – 1.


Game two
The Sogdian army caught the Umayyad on a featureless plain. Deployed in a similar formation, the Sogdian positioned all their cavalry in centre placing all their archers on the left flank. Confident of a repeat victory, the Sogdian cavalry charge the Umayyad infantry who offered stubborn resistance. After an hour, the conflict was still in doubt as casualties were falling evenly on both sides. Redoubling their effort, the Sogdian broke the centre and following the death of the Umayyad commander the army fled the field. Score Sogdia 7(gen) – 4.


Game three
Under new command, the Umayyad were deployed in a similar formation as the Sogdian forces. The Umayyad spearmen opened the battle by advancing against the Sogdian right.


Under a hail of arrows, the line of spearmen engaged the archers and at that moment, the Jund cavalry launched their attack on the Sogdian centre.


The cavalry fight swung back and forth with Sogdian archers picking off isolated Umayyad cavalry. The Umayyad spearmen had destroyed the Sogdian infantry holding the left and were now moving to join the cavalry action in centre. Their well-timed presence turned the battle by eliminating the Sogdian commander. Still defiant, the Sogdian moved off the field to make preparations for their next conflict. Score Umayyad 5(gen) - 4


A side note
Although listed below, the Türgesh allies would be deployed in case of a Sogdian defeat. As events developed, they were not needed.
  

Umayyad
1 x general (Cv), 3 x Jund cavalry (Cv), 3 x spearmen (Sp), 3 x archers (3Bw), 1 x Bedouin (LH), 1 x Dailami (4Ax). 

Sogdian coalition   
1 x general (3Kn), 2 x chakars (3Kn), 3 x diliqun (Cv), 1 x horse archer (LH), 4 x archers (3Bw), 1 x archers (Ps).
Türgesh allies
1 x Cv, 2 x LH