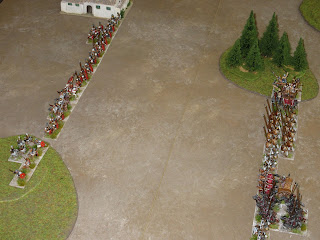
Rome and the Seleucid met at Magnesia in 190 BC and
though defeated Antiochus III still held power over a vast empire. For many
gamers, the Seleucid army is not an easy one to use as it is pip costly especially when using elephants and scythed chariots, but then wheat is a Seleucid army without them?
In their favour, the changes to 3.0 have made the phalanx easier to
handle and cataphract (4Kn) no longer pursue as do their 3Kn cousins.
This completes the test series for Rome and next week a new series will begin featuring the army of Antiochus III (Seleucid).
This completes the test series for Rome and next week a new series will begin featuring the army of Antiochus III (Seleucid).
II/33
Polybian Rome
1 x general (Cv, 1 x cavalry (Cv), 2 x triarii (Sp), 4
x hastati/principes (4Bd), 2 x velites (Ps), 2 x allied auxiliaries (4Ax).
II/19c Seleucid
1 x general (4Kn), 1 x cataphract (4Kn), 1 x elephant
(El), 1 x scythed chariot (SCh), 4 x phalanx (4Pk), 2 x thureophoroi (4Ax), 1 x
Cretan archer (Ps), 1 x slinger (Ps).
Test game
one.
Seleucid defending placed the terrain, a BUA, two
gentle hills and a wood and deployed in an extended line with the phalanx on
the left and cataphract on the right. Rome squared off and matched the Seleucid
line and interspersed the triarii between the hastati and principes, allied
units were placed on the extreme end of the line and all cavalry formed up as a
reserve.
The Seleucid moved as two separate wings in echelon,
the maneuver would have the phalanx pin the Roman line while the cataphract and
scythed chariot would deal the final blow.
That moment came quickly as the phalanx did their job and
surged forward while Roman determination sent the cataphract recoiling back. Despite
the minor embarrassment, the Seleucid were ahead 2 – 0.
For some unexplained reason, the Seleucid could do no
wrong; the phalanx ground their way forward killing Romans, the Scythed Chariot
through the Roman centre and the cataphract finished the job they started out
to do, 7 – 0 for Seleucid.
Test game
two.
Rome, now the defender, took advantage of the hill
placement and BUA to deploy its force between them which positioned their line further
back.
Positioned further back, Rome improved her deployment
forcing the Seleucid line to wheel right and break her alignment.
This had the desired effect of exposing the flanks of the
phalanx to be dealt with by the heavy troops while the lighter troops kept the
Seleucid cataphract occupied. 1 – 4 for
Rome.
Test game
three.
The Seleucid as defender placed the terrain so as to
provide maximum space for the army. The final game saw the first use of an “allied
contingent”, the Pergamene (2 x 3Kn, 1 x Ps) and these can be seen at the far
right of the Roman line.
Despite being plagued with a series of “1” for pip
scores, the Seleucid managed to bring her line forward.
Pergamene have rolled up the Seleucid left flank but
the cataphract have made a dangerous breakthrough to threaten the Roman command
and the score is even at 3 – 3.
Repeating their decisive maneuver at Magnesia, the
Pergamene fell on the exposed centre while the hastati turned the phalanx from
the opposite side and now every element was engaged along the battle-line. It
was close and the final score was 3 – 4 for Rome.
The closes the series of test games for the
mid-Republic and the next series will feature the Seleucid against their historical
opponents.
Cheers,


Can't beat DBA for quick and decisive Ancients games. Great post.
ReplyDeleteThey are quick.
ReplyDeleteGame time averages 45 to 50 minutes including terrain set up.
They are quick.
ReplyDeleteGame time averages 45 to 50 minutes including terrain set up.