
Rhodri the Great died in 878 and the rule of northern
Wales passed to his surviving sons; Anarawd ruled Gwynedd, Cadell controlled
Ceredigion and Merfyn received Powys. During the period of rule of Rhodri much time
was spent repelling incursions by Vikings and the neighbouring Saxon kingdom of
Mercia; his sons now face similar prospects.
In 881, Aethelred, asserted Mercian hegemony by
forcing the southern Welsh kingdoms of Glywsing and Gwent to submit to Saxon
overlordship. This programme of ‘subjugation’ was met with resistance from the kingdom
of Gwynedd forcing Aethelred to respond with force.
Following the harvest season Aethelred gathered a
sizeable force of Mercian fyrd and crossed the frontier. The army continued
their march along the Conwy River until scouts reported the presence of the
Welsh army near the town of Conwy.
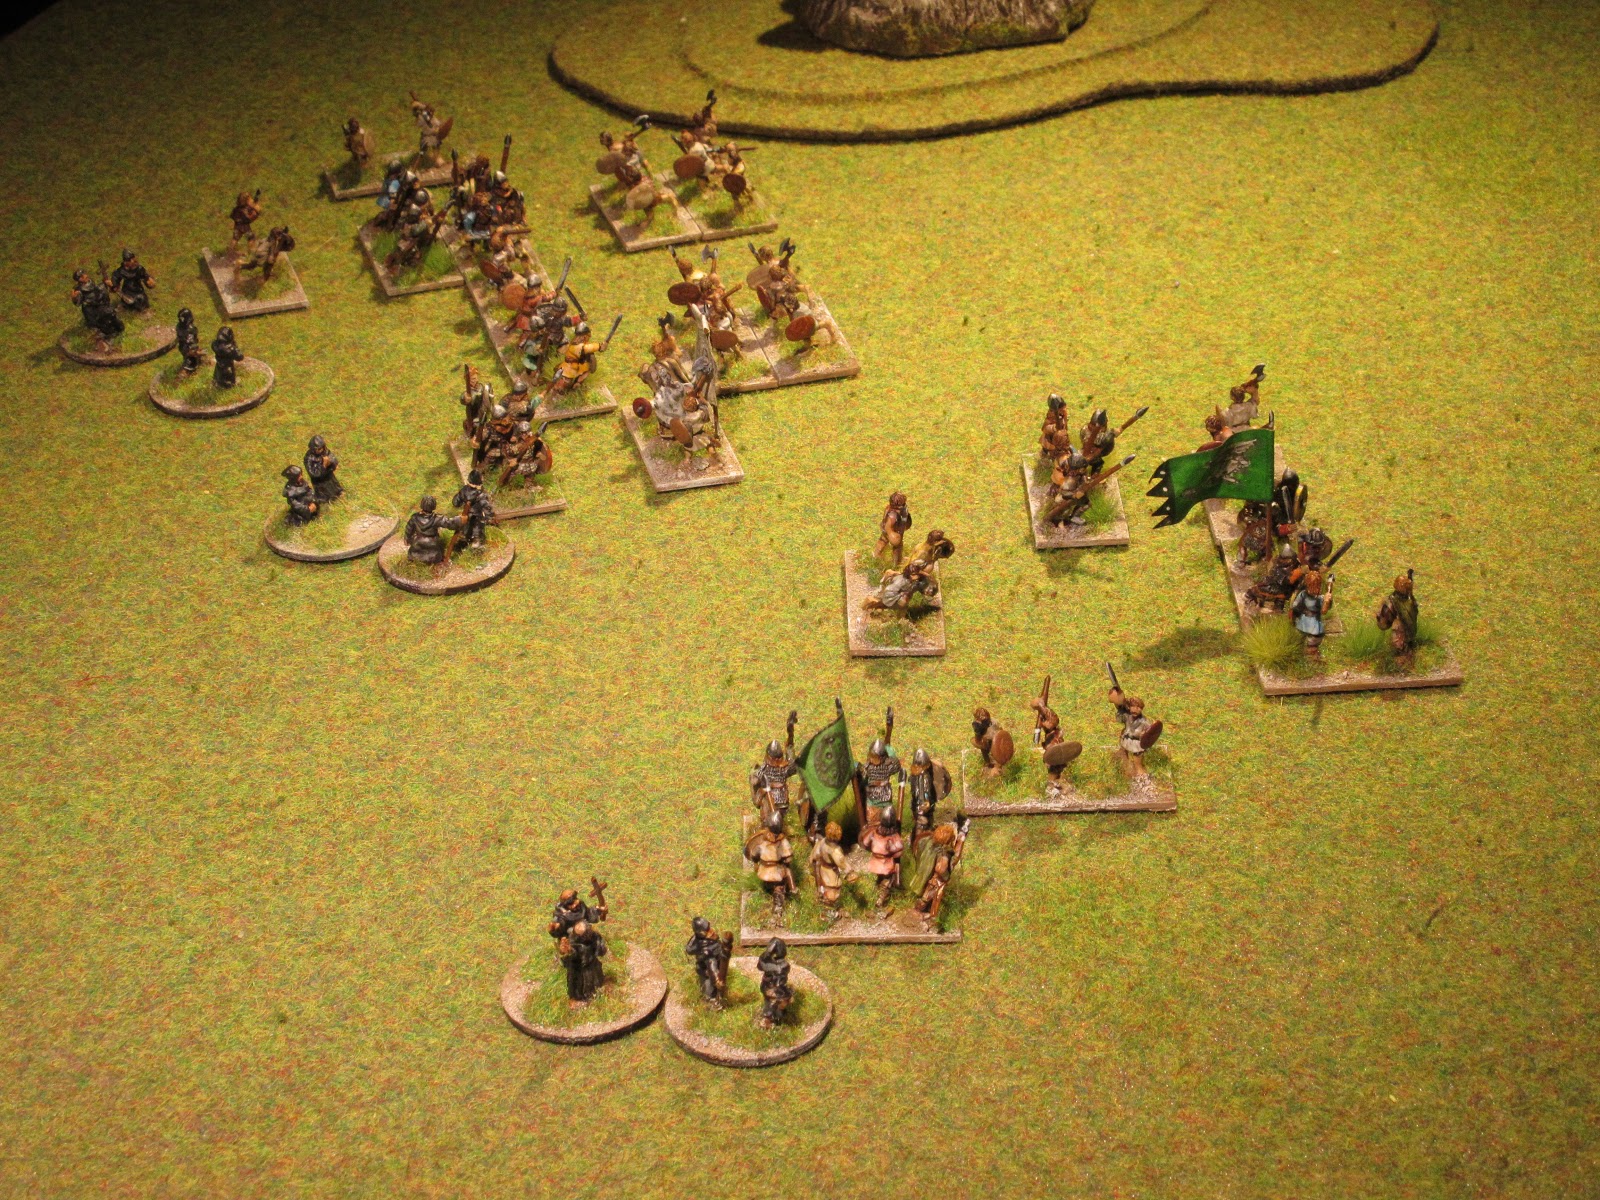
The site of battle was a wide valley offering ample
room to deploy. Aethelred formed his infantry in an extended line and
reinforced its flanks extra spearmen. The small unit of scouts (Ps) was posted
to the right flank.
Departing the narrow valley to confront the Saxons,
the Welsh formed several deep columns giving the impression of having a smaller
number of troops.

What the Welsh lacked in numbers, they compensated
with their speed and quickly covered the open ground between the two
armies. Welsh skirmishers could be seen scrambling over the slopes of the nearby hill
and to counter the threat the Mercian battle line left wheeled forcing the Welsh to
adjust their approach.

The Welsh did adjust the battle line by forming
two groups. Anarawd led group on the right while the left wing contained
troops from Ceredigion and Powys led by his brothers, Cadell and Merfyn.

Cadell and Merfyn were the first to be struck by the Mercians led by Aethelred. Outnumbered two to one, the Welsh fought desperately against
a frontal and flank attack by Mercian skirmishers.

Fortune smiled on the Welsh allowing them to beat back
the first assault but a second attack did cause casualties to both sides (1 – 1).

The battle on the Mercian right degenerated into
small desperate combats, even Aethelred and his Huscarls were surrounded briefly but the Welsh were beaten back. On the Welsh right, Anarawd swarmed over his opposition
breaking a shield wall and destroyed a unit Huscarls (4Bd). The gap between both wings grew wider at this point bringing alarm to both commanders. Clusters
of black robed priests were seen praying for divine intervention (3 – 1).

Aethelred’s Huscarls had done their job well repelling their opposition such that
they now looked for easier game. and these were found on the Mercian right.
Noting the thinning of enemy opposing Aethelred looked to his rear to see both
his flanks covered by swarms of Welsh. Calling for a general retreat, Aethelred
departed the field (4 – 1).
Design
notes:
After a number of test games resulting in decisive victories
for the Welsh, we concluded that this was one battle that would be difficult to
adjust for play balance. The Welsh had much in their favour; geography, troop
types that performed well in that terrain and a burning desire to defeat the
Mercian army and avenge Rhodri. Yet, if one could claim some minor consolation
from a defeat, perhaps the extent of losses inflicted on the Welsh before
calling a general retreat. A 4 – 3 victory for the Welsh would seem less
impressive than 5 – 0, which was the actual result of the first test game.
Their determination to defeat the Mercian army was evident as the
chroniclers record all three brothers were present at the battle.
Looking at the basic combat factors, the Mercian have
a number of advantages; spearmen can increase their factor by + 1 using flank support, secondly, they do not pursue so their line can remain unbroken and lastly even
scores in combat will mean ‘fast’ troop types recoil. A likely deployment
will have at least eleven elements placed in a single line easily out flanking the Welsh on either side. The lone psiloi
hovering on the flank or positioned as a reserve in centre and this was the
case as we selected the second battlefield for this refight.
In contrast, the Welsh gain a +1 for a second rank in
support and destroy their opponent with a combat result of ‘better than’ is
achieved. The threat of being out flanked was always present, so the Welsh must
use their speed to their advantage.
Luck does play a role, but both sides experienced an equal share of poor and excellent pip
scores, even during combat.
Great report. I'm going back into DBA after a few years break - pre 3.0. What are the figures on the round bases for?
ReplyDeleteMichael,
ReplyDeleteThank you for the kind word.
The priests on round bases are placed to add an ambiance plus annoy my opponent.
In the next battle, the ‘black robed ones’ will appear after each destroyed enemy element.
That should work as an incentive.
Cheers,